Labeling Guide
How to label your items so they come back signed exactly the way you want.
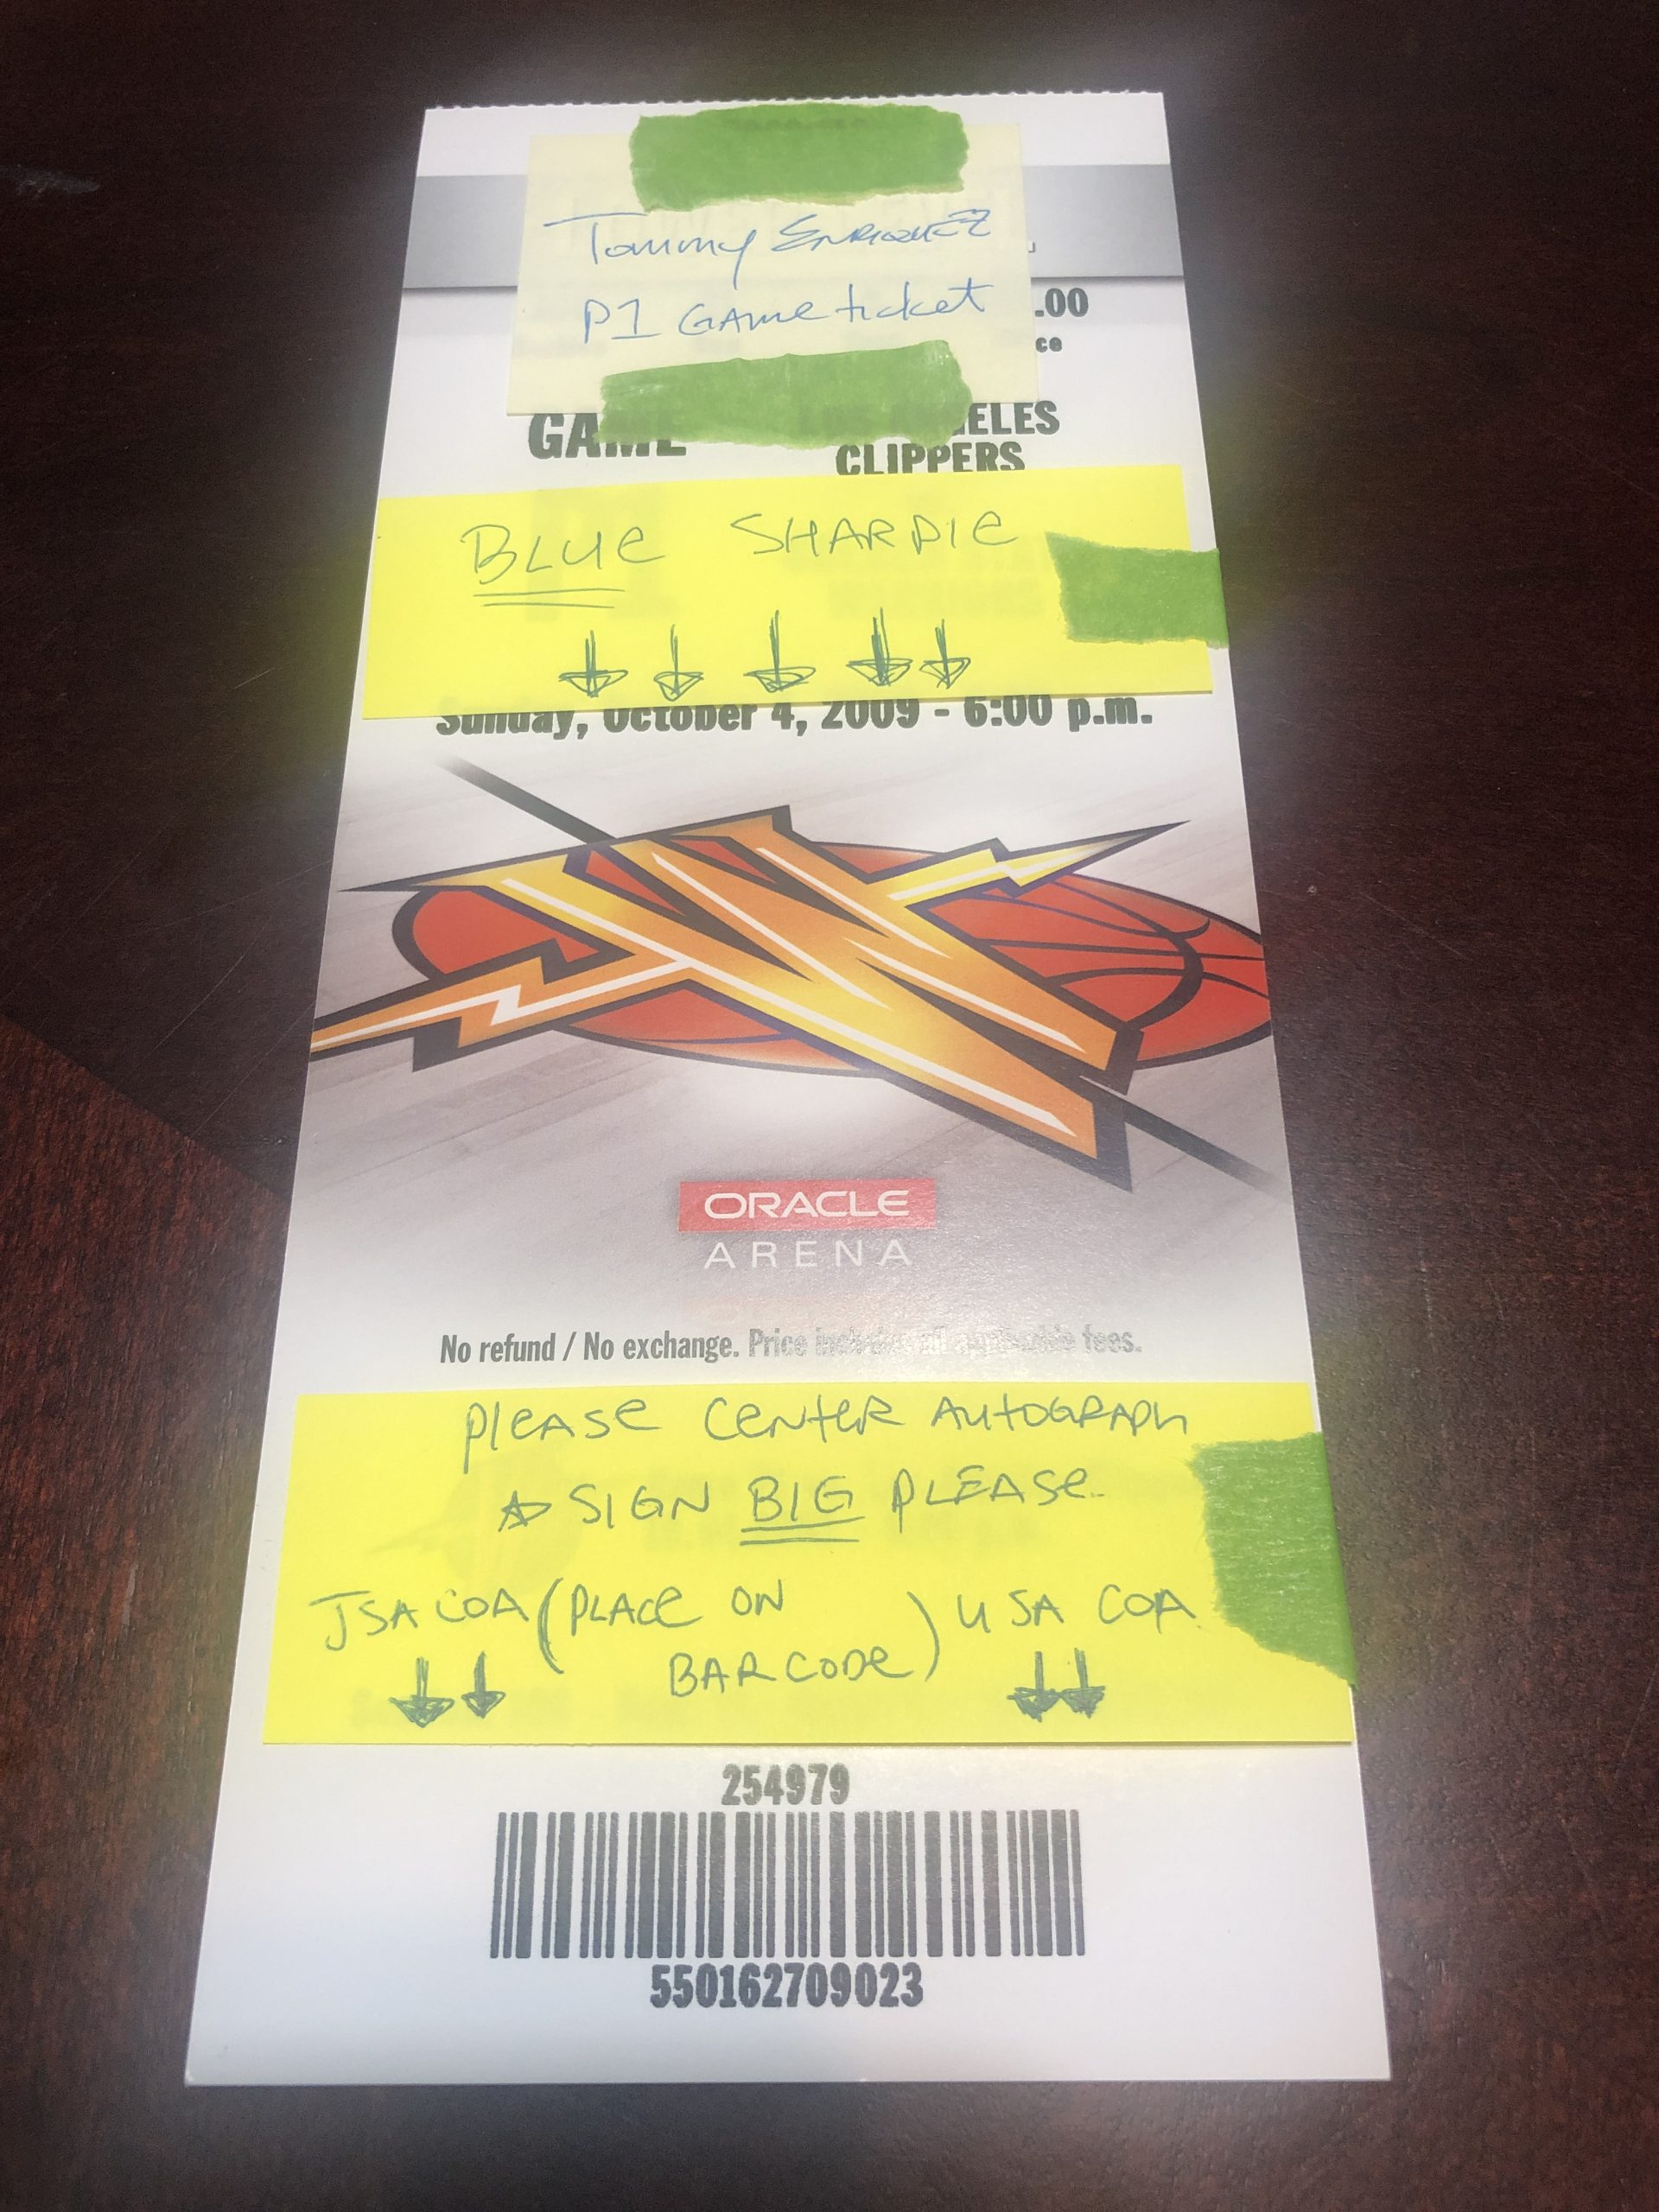
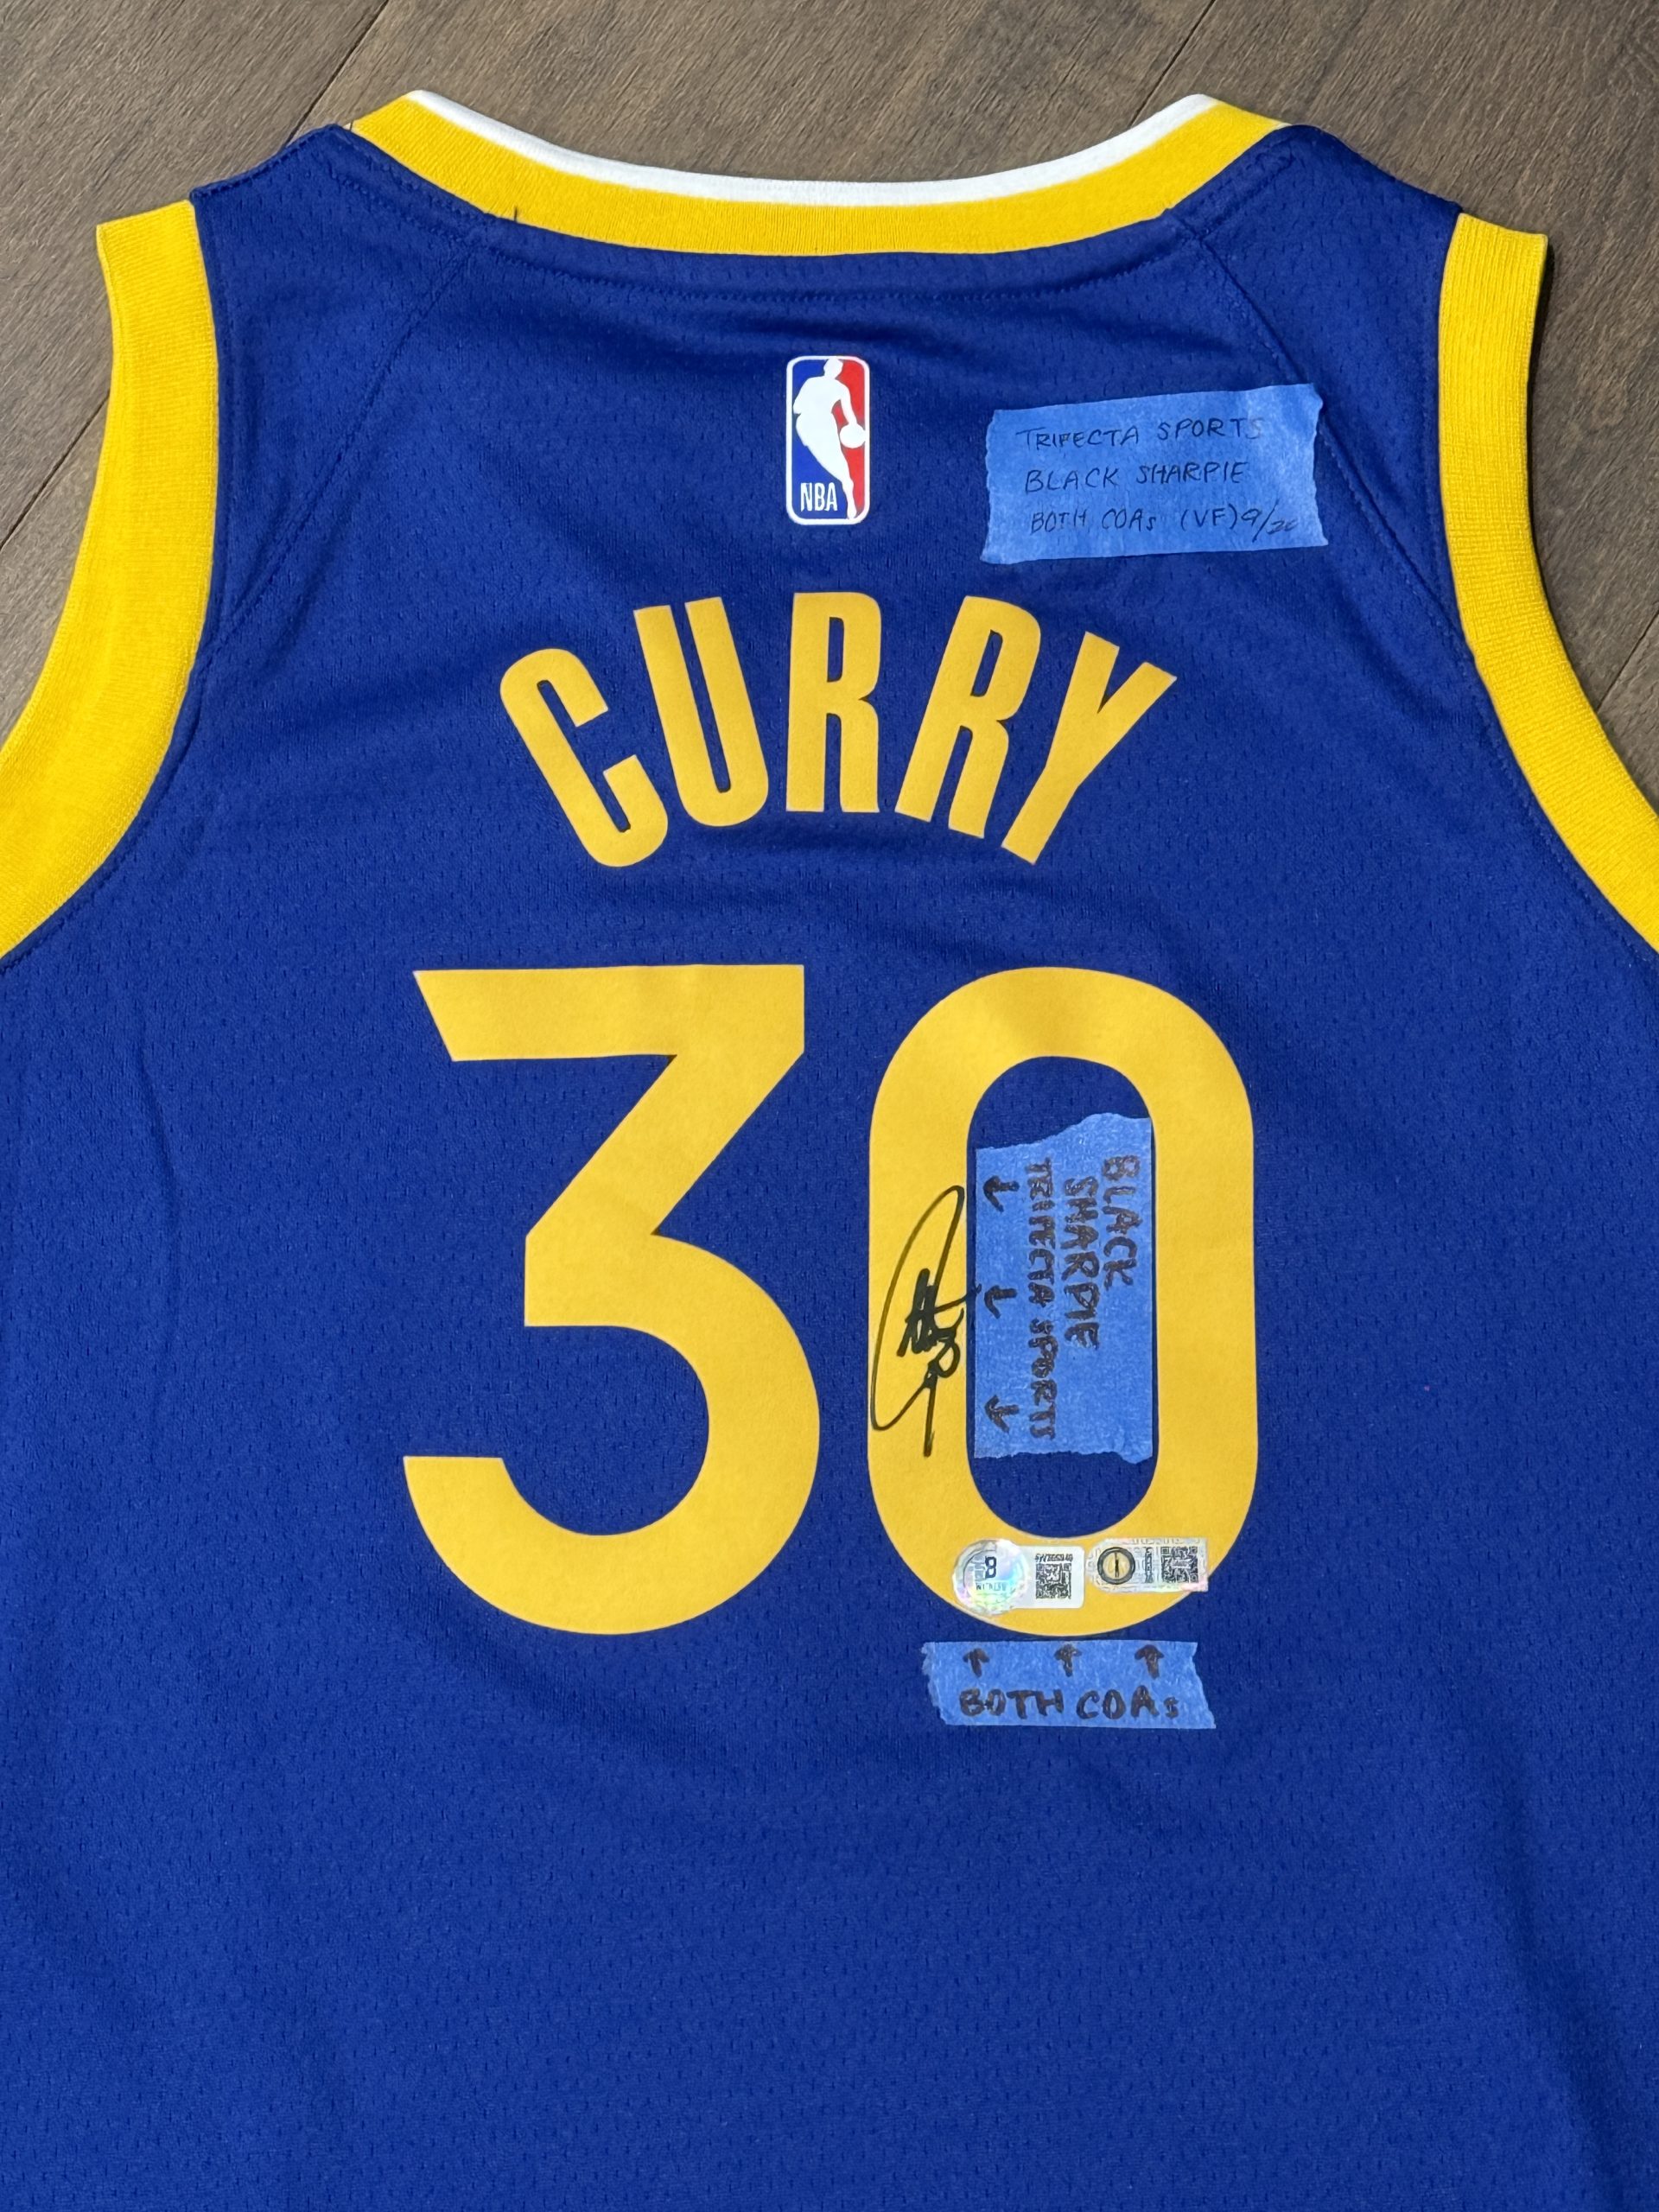
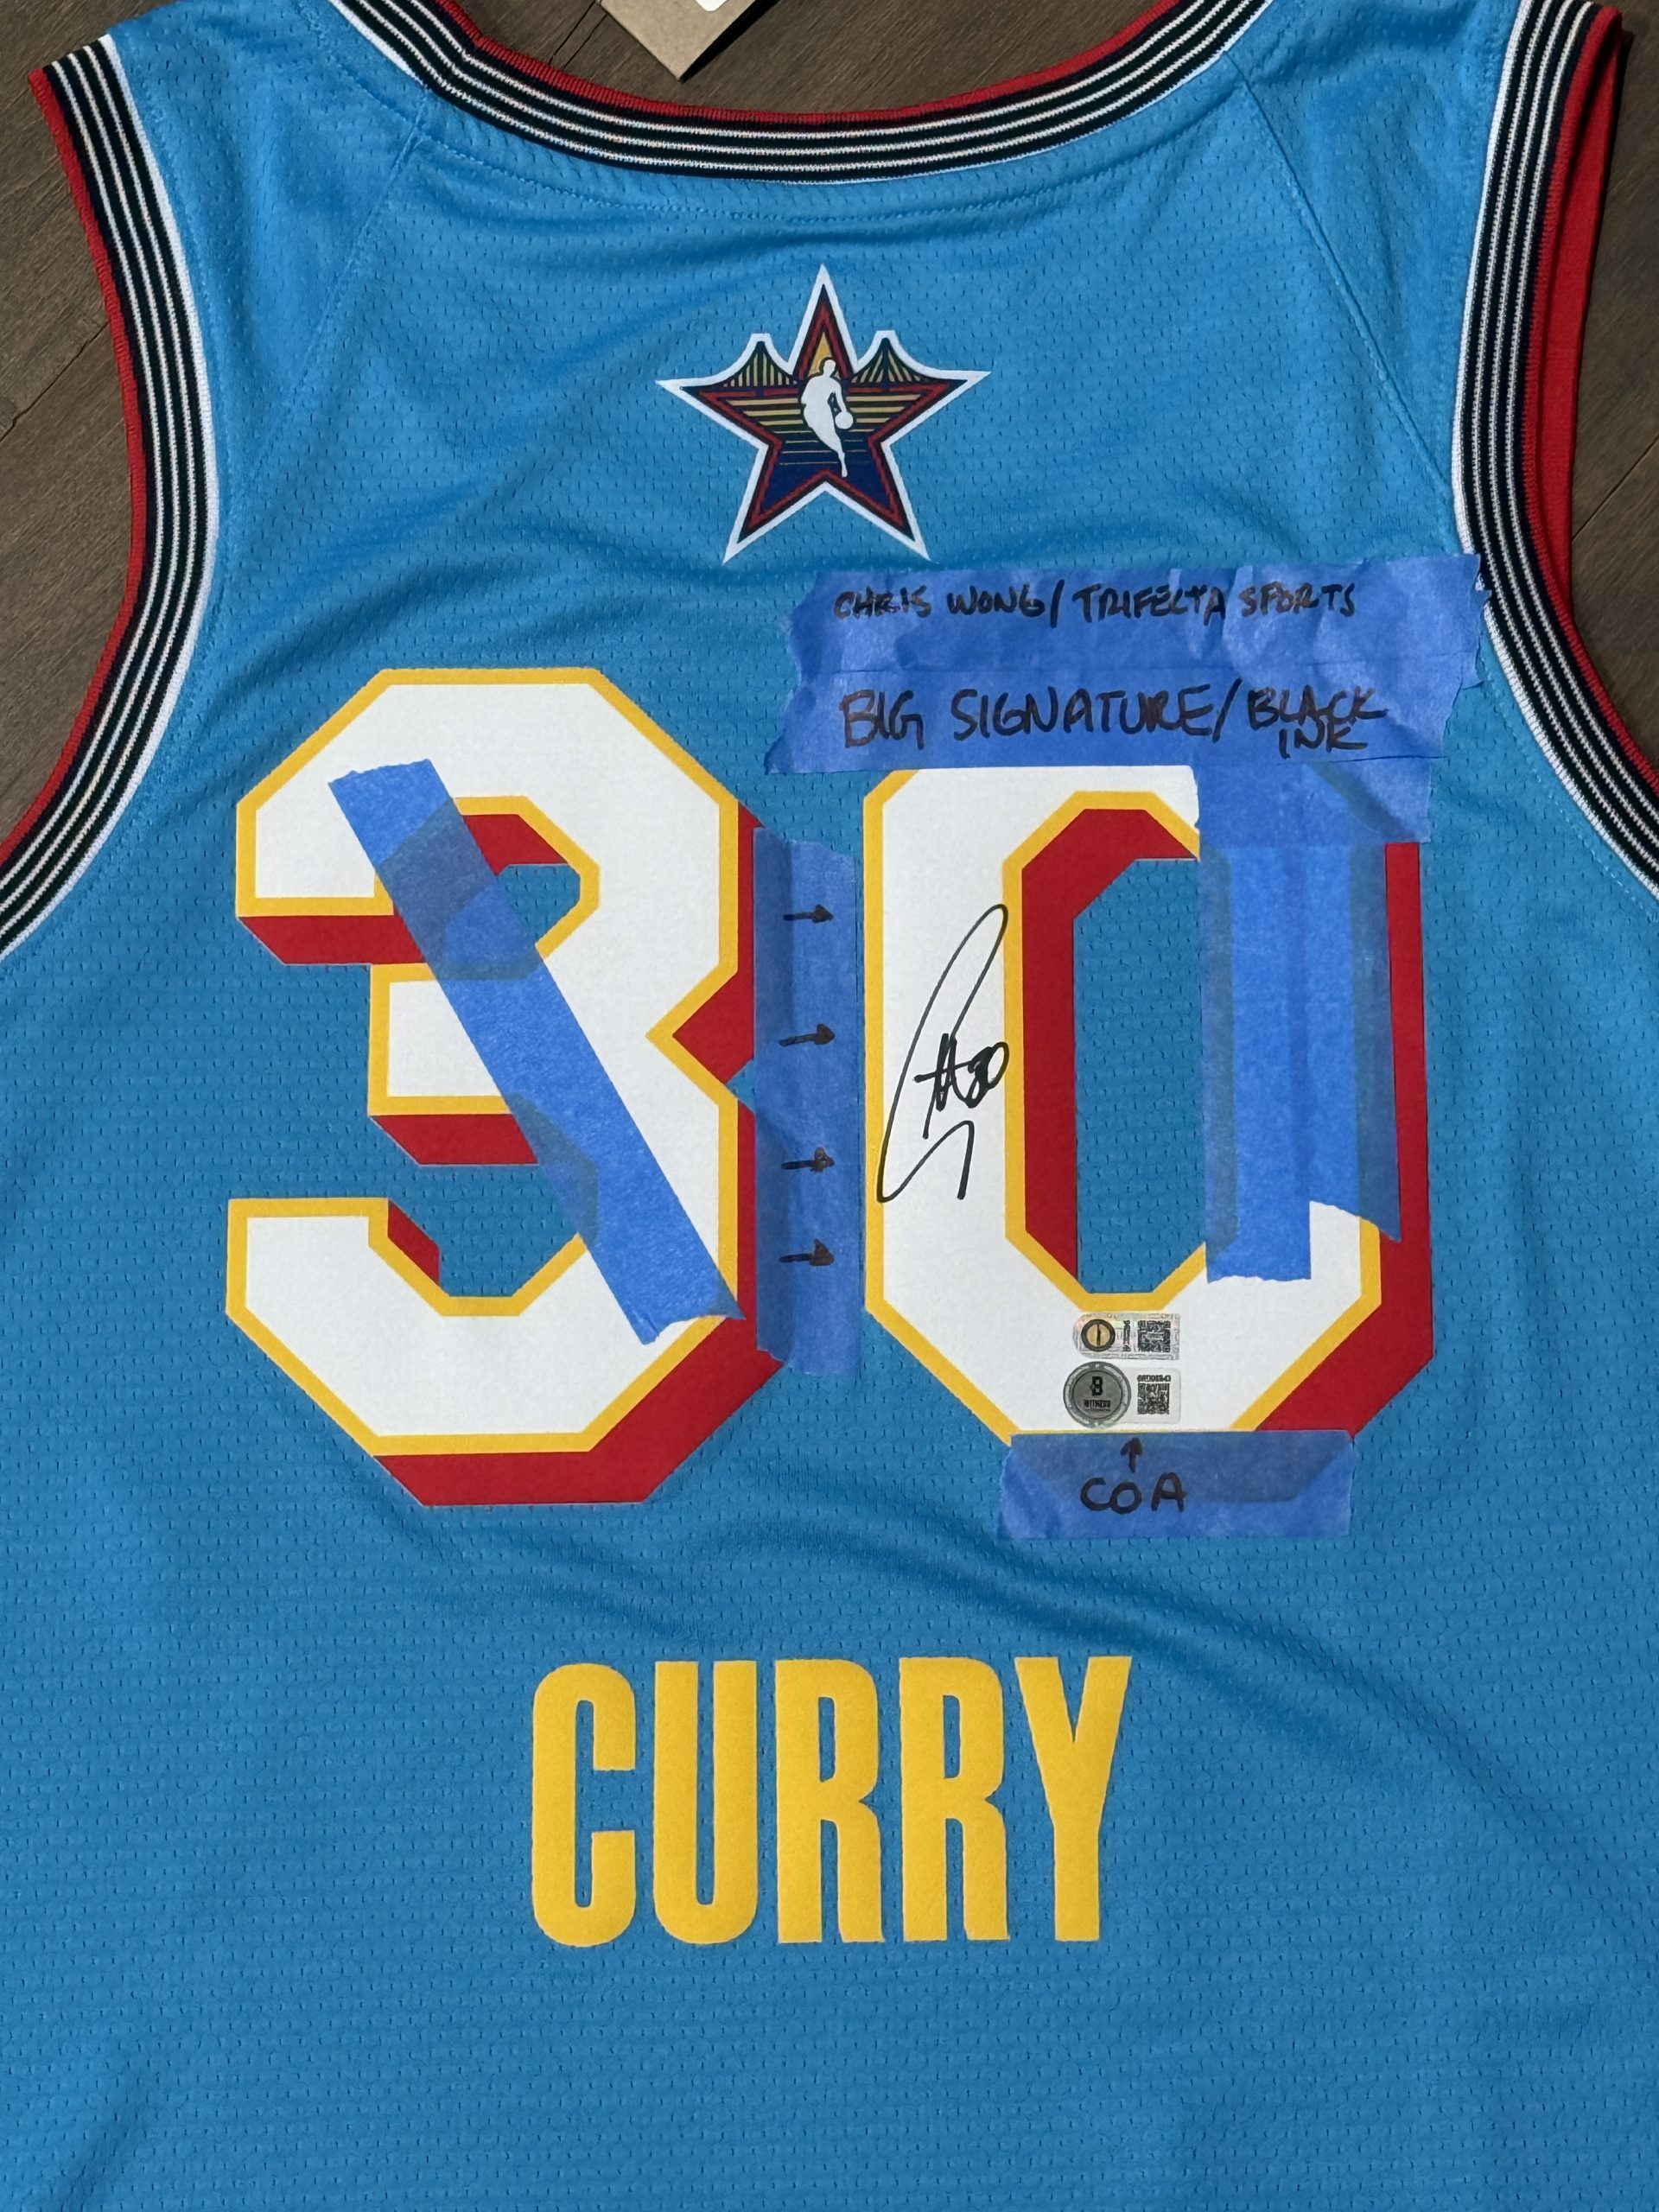
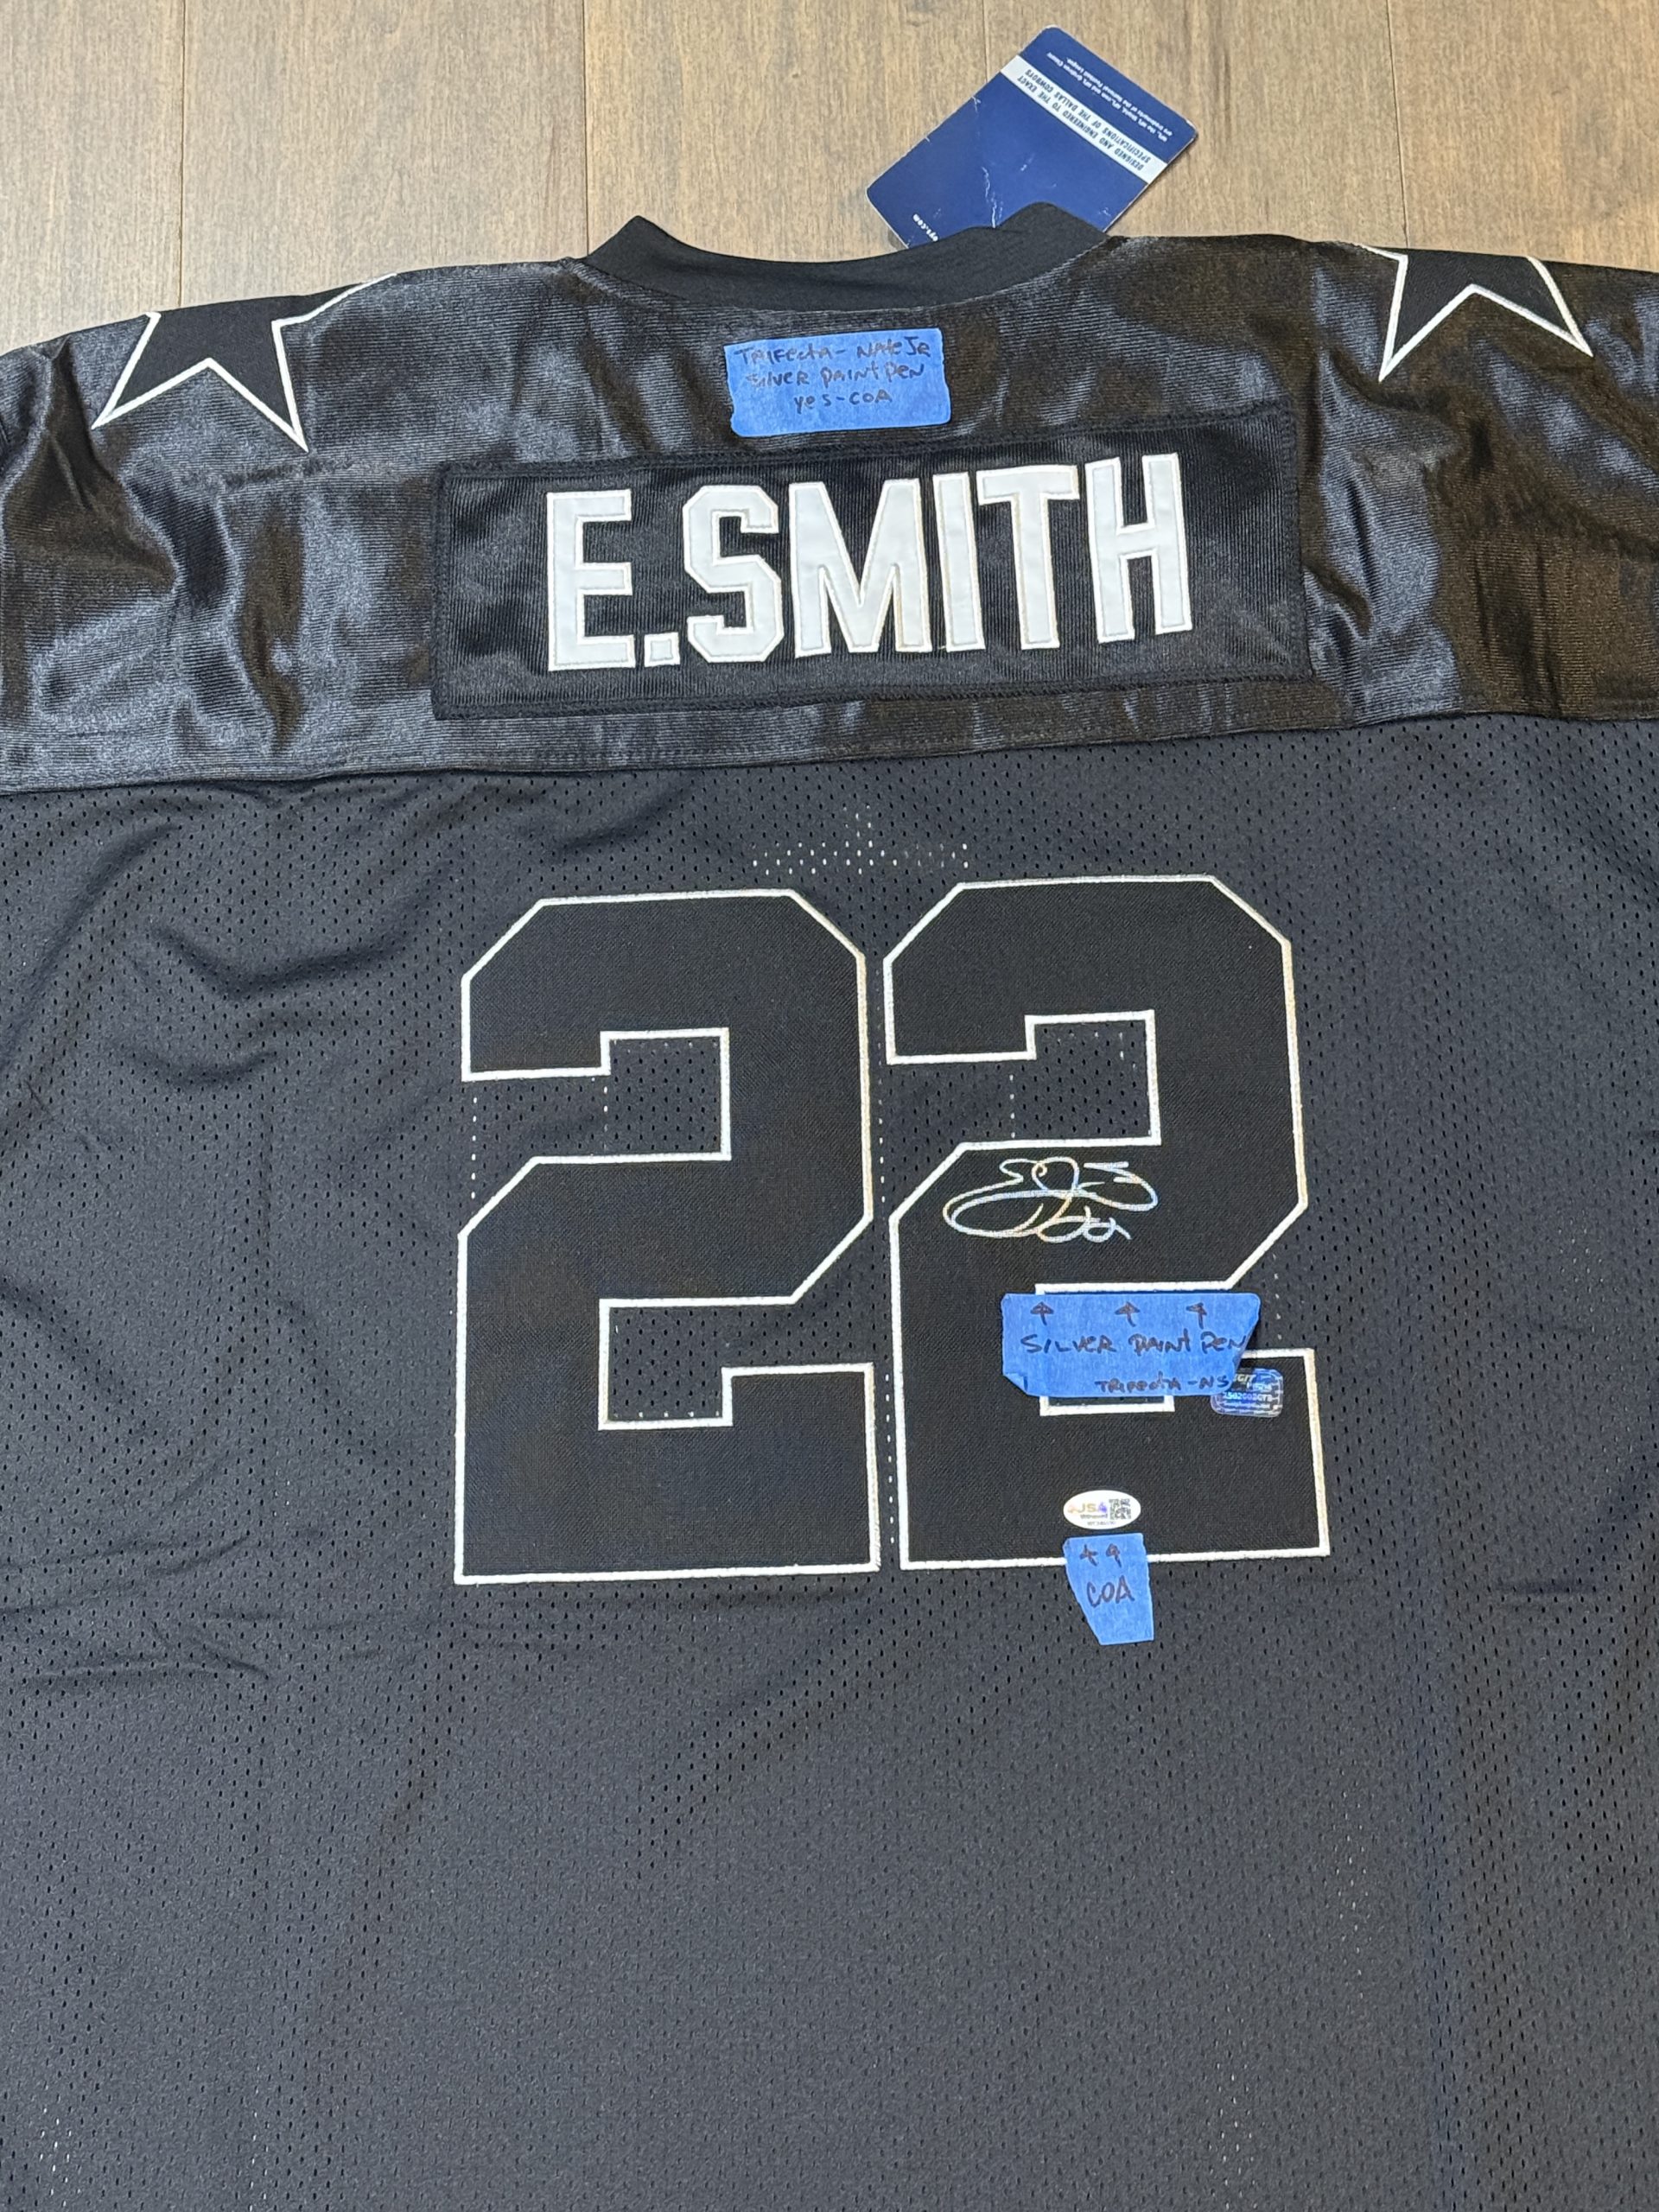
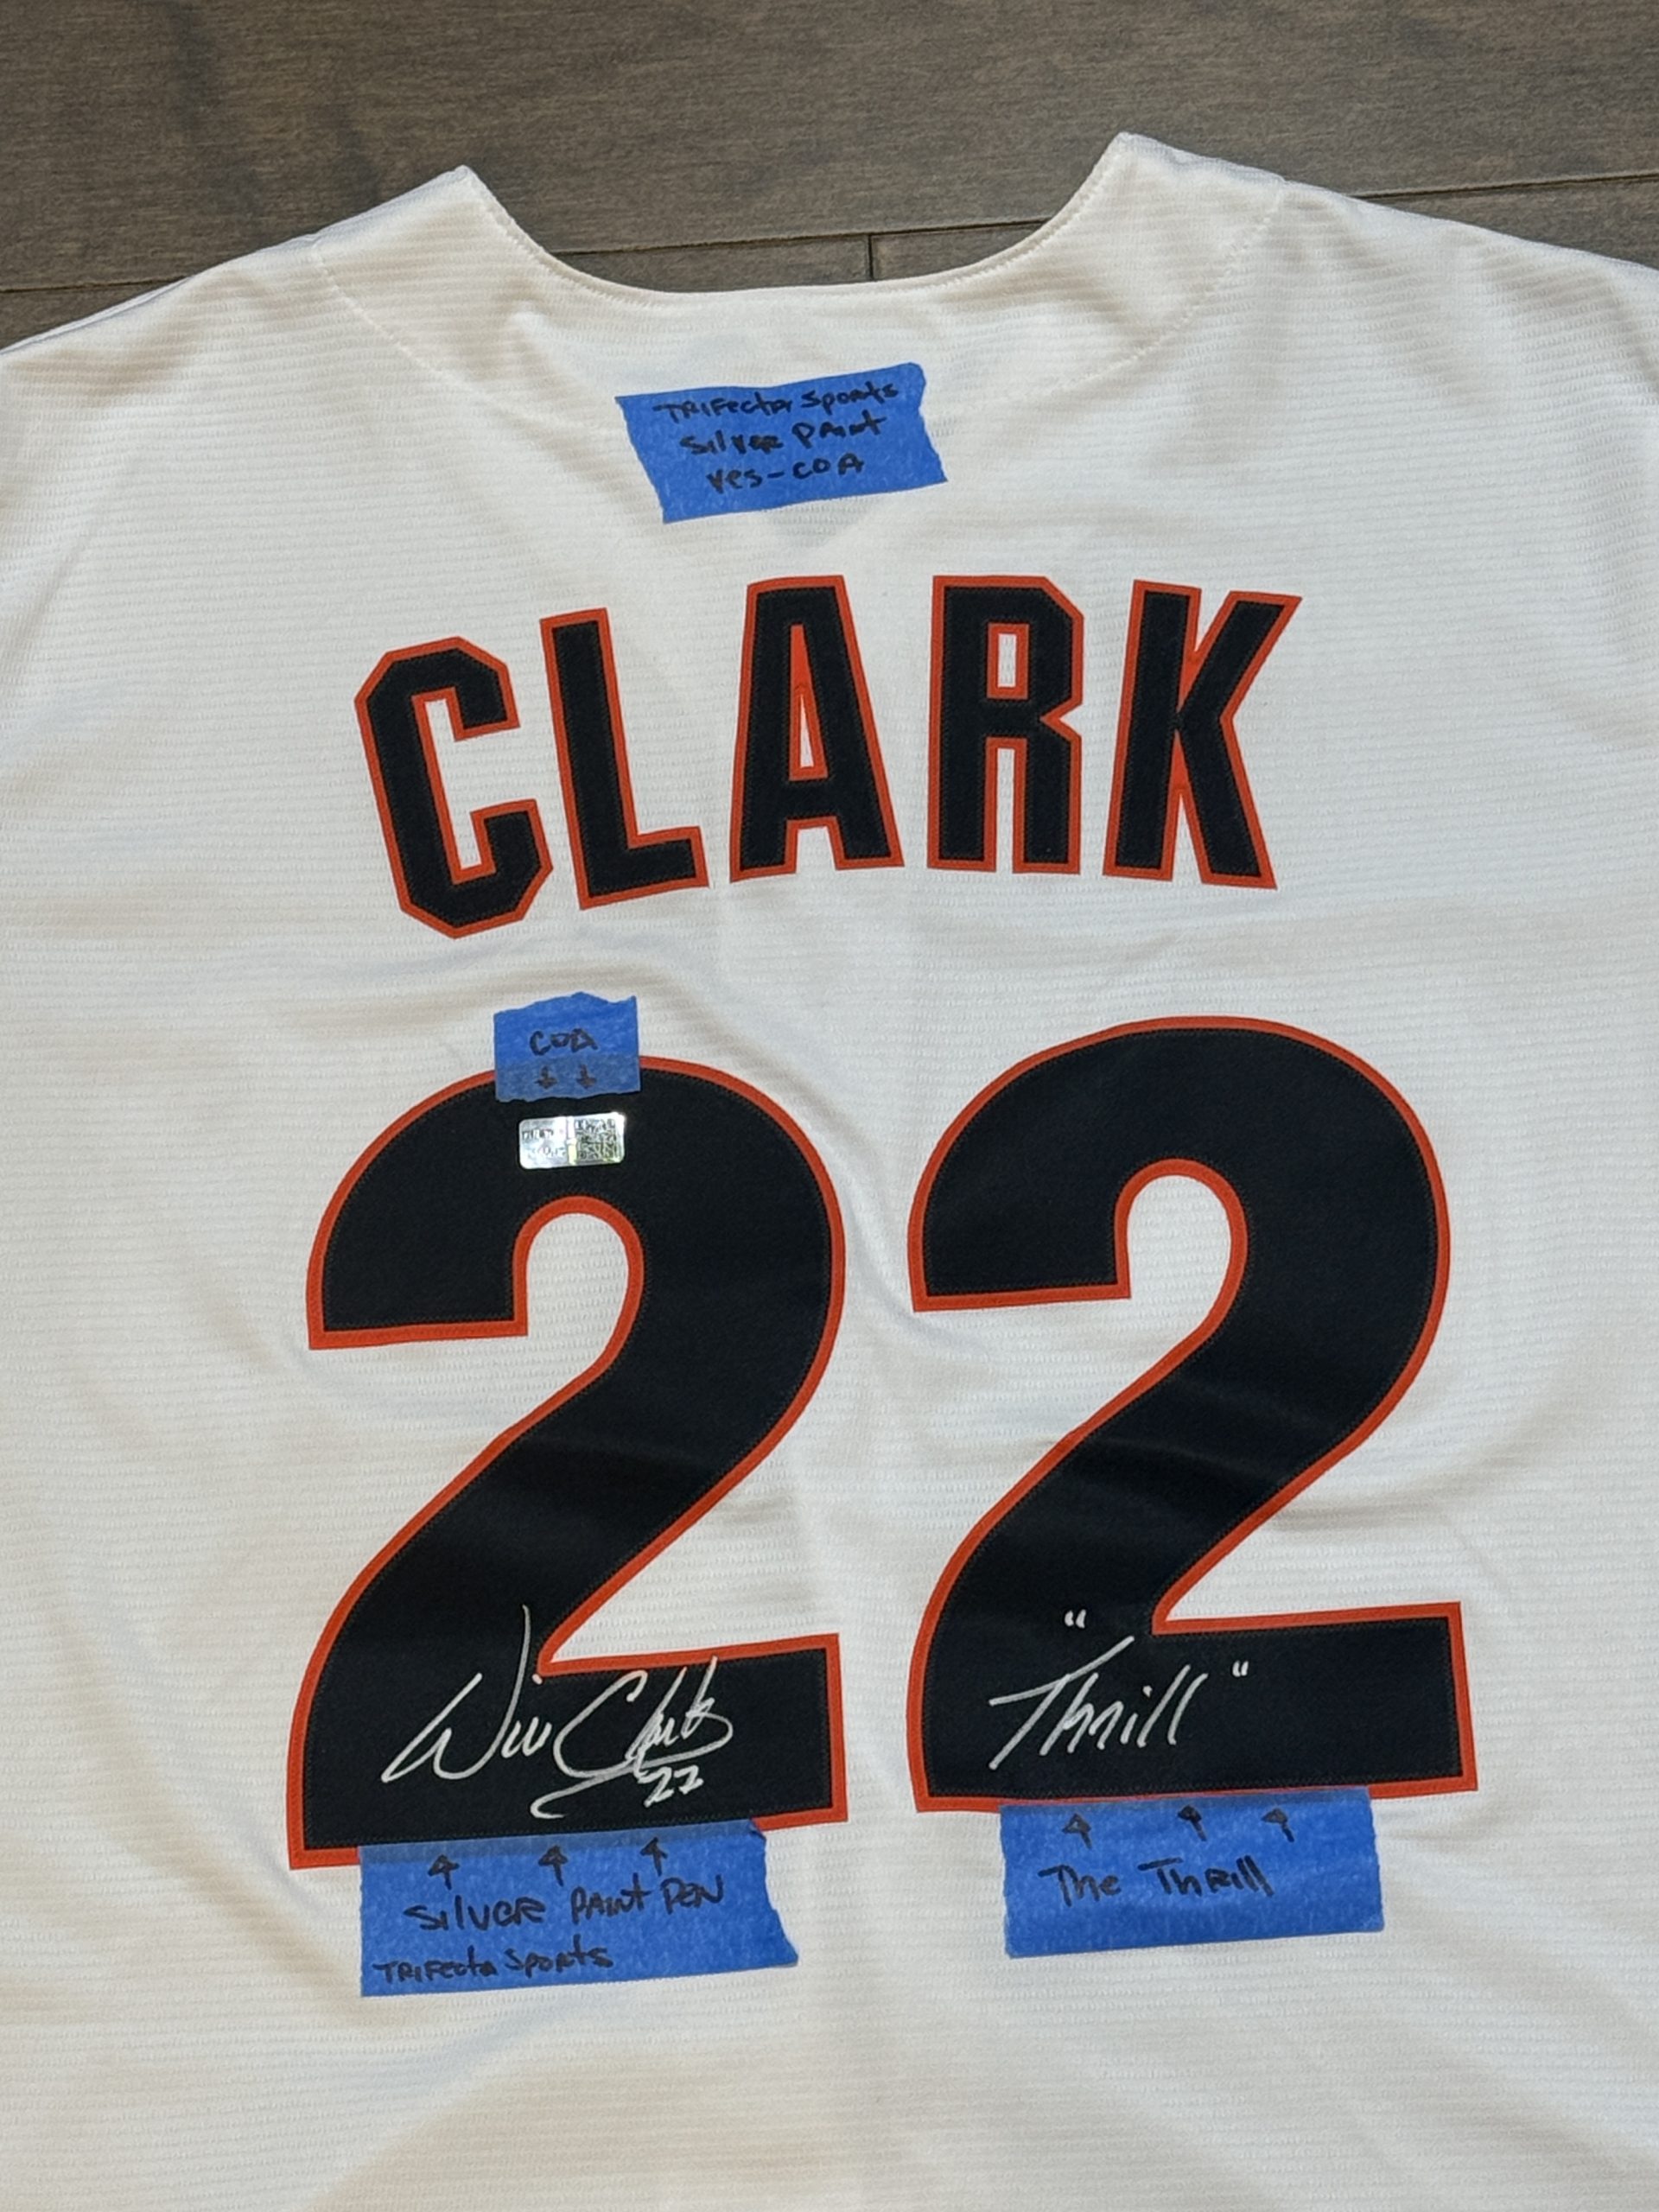
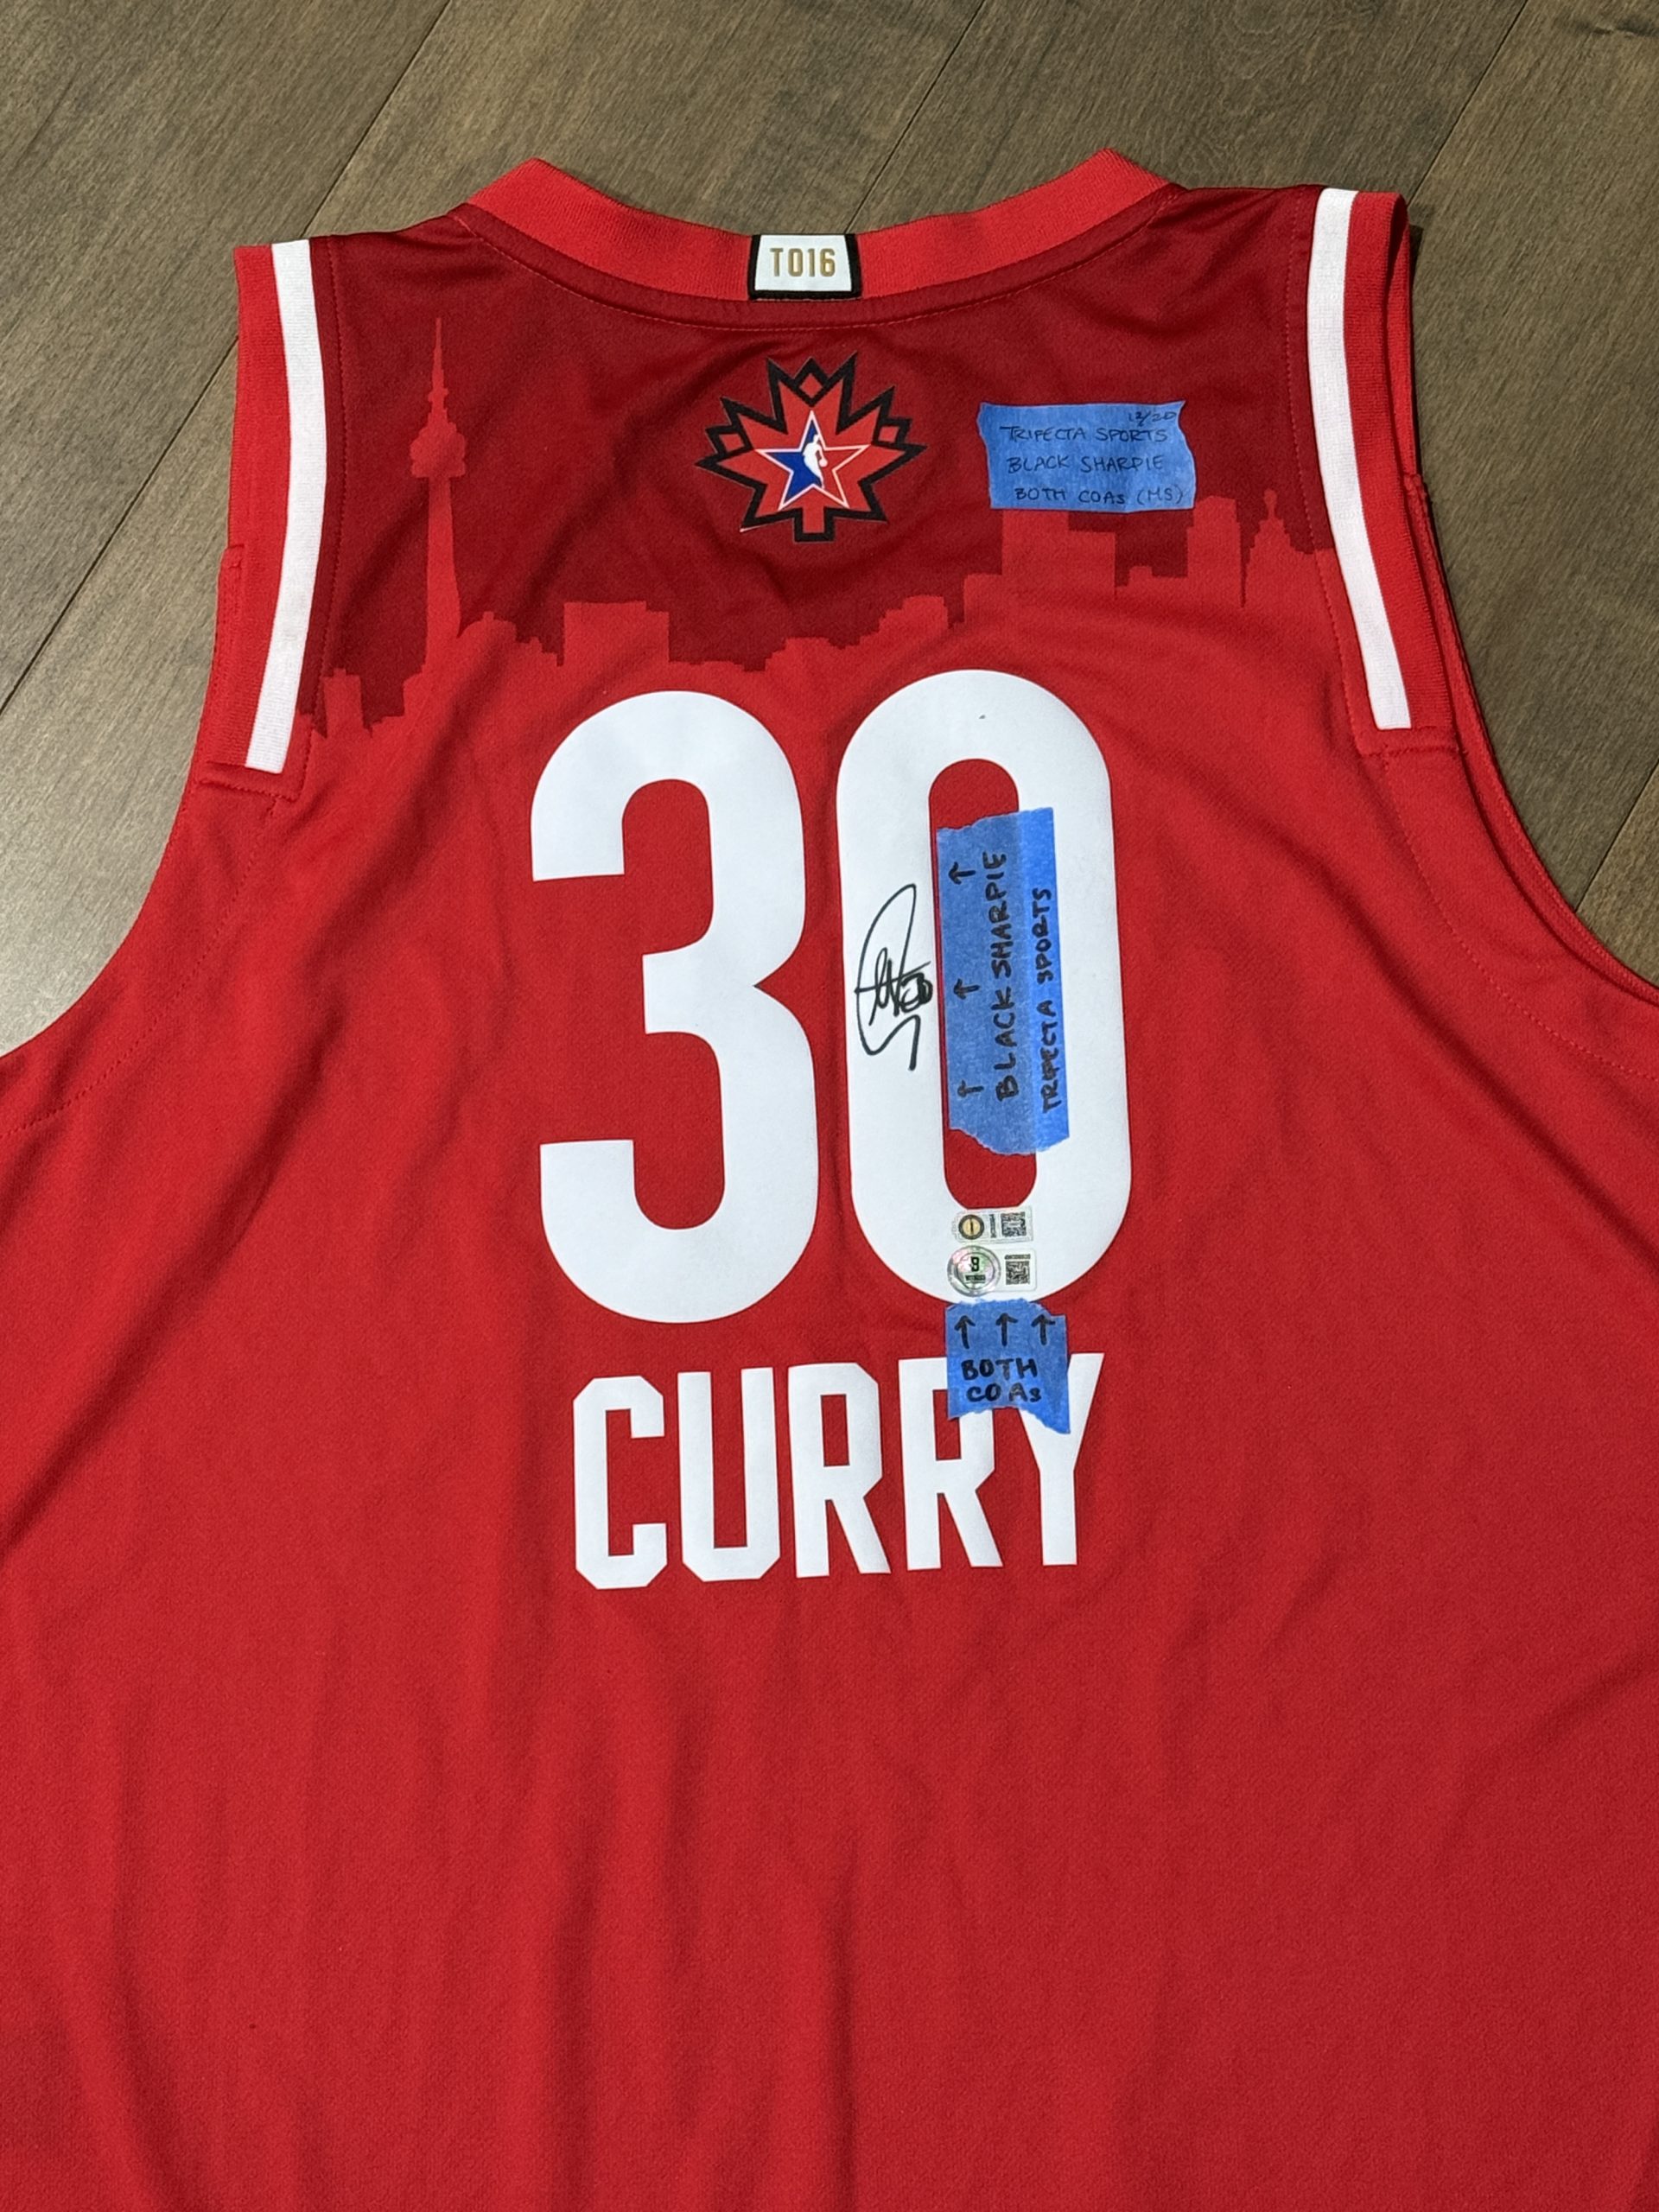
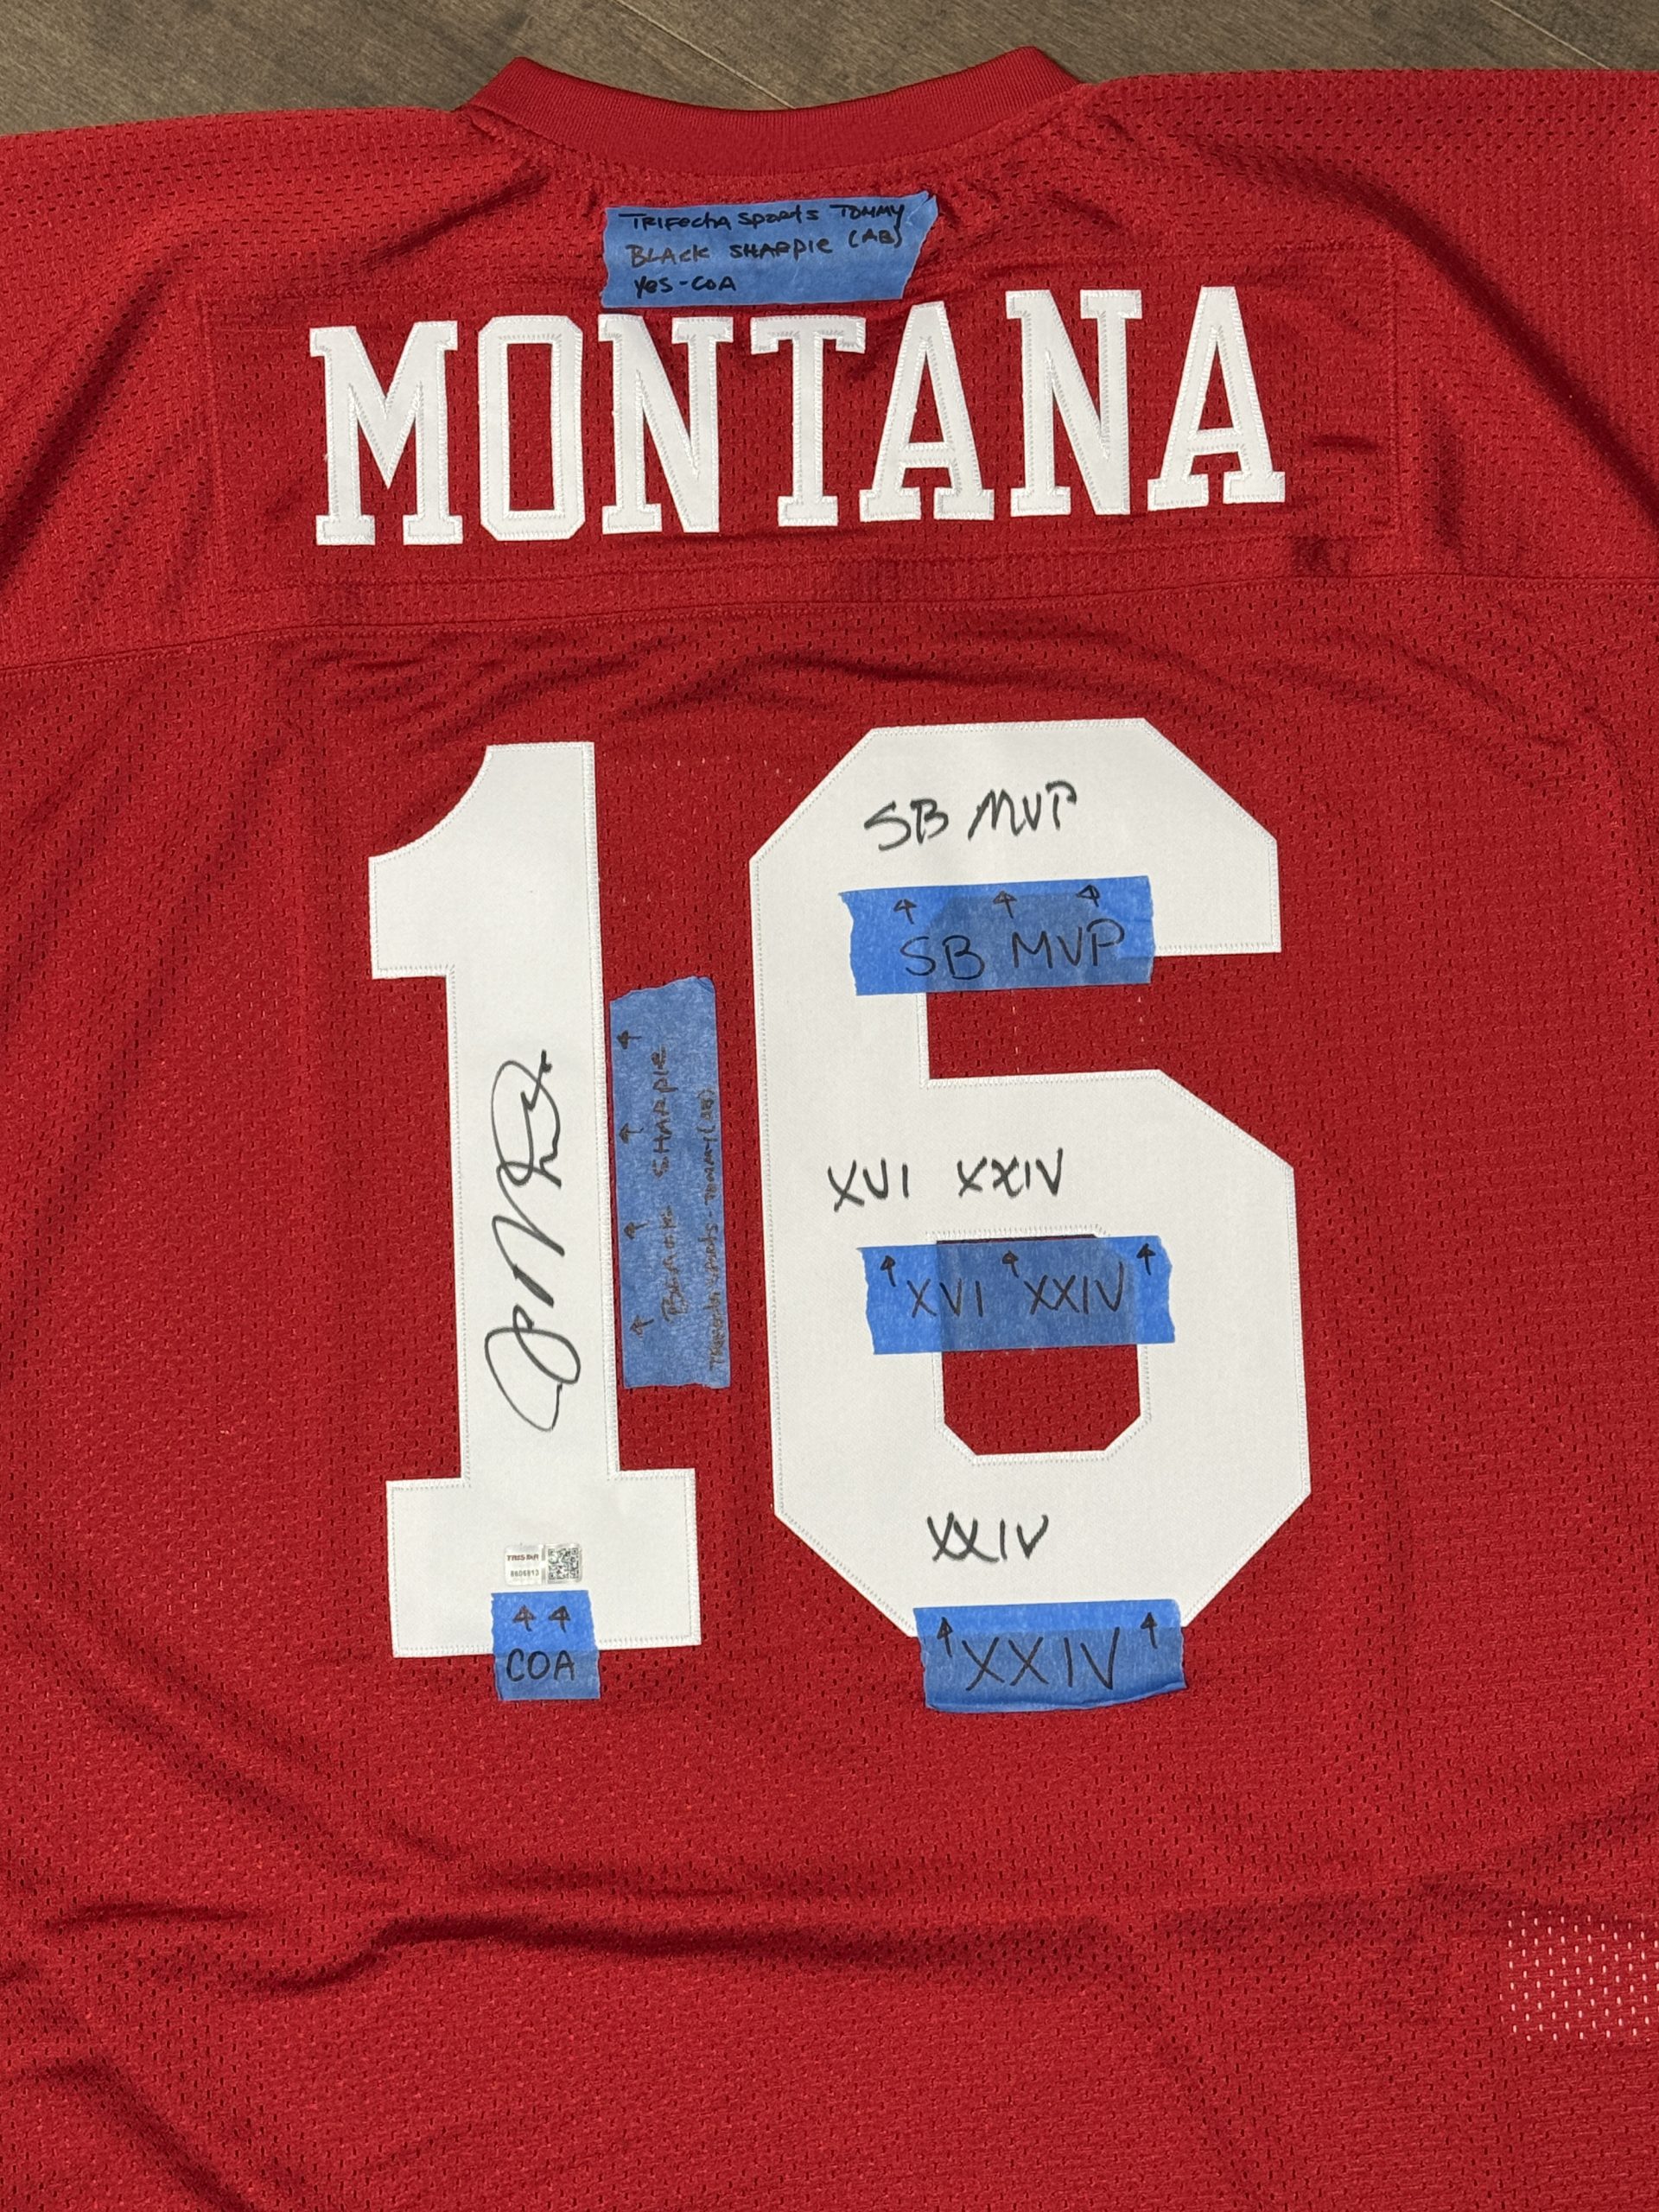
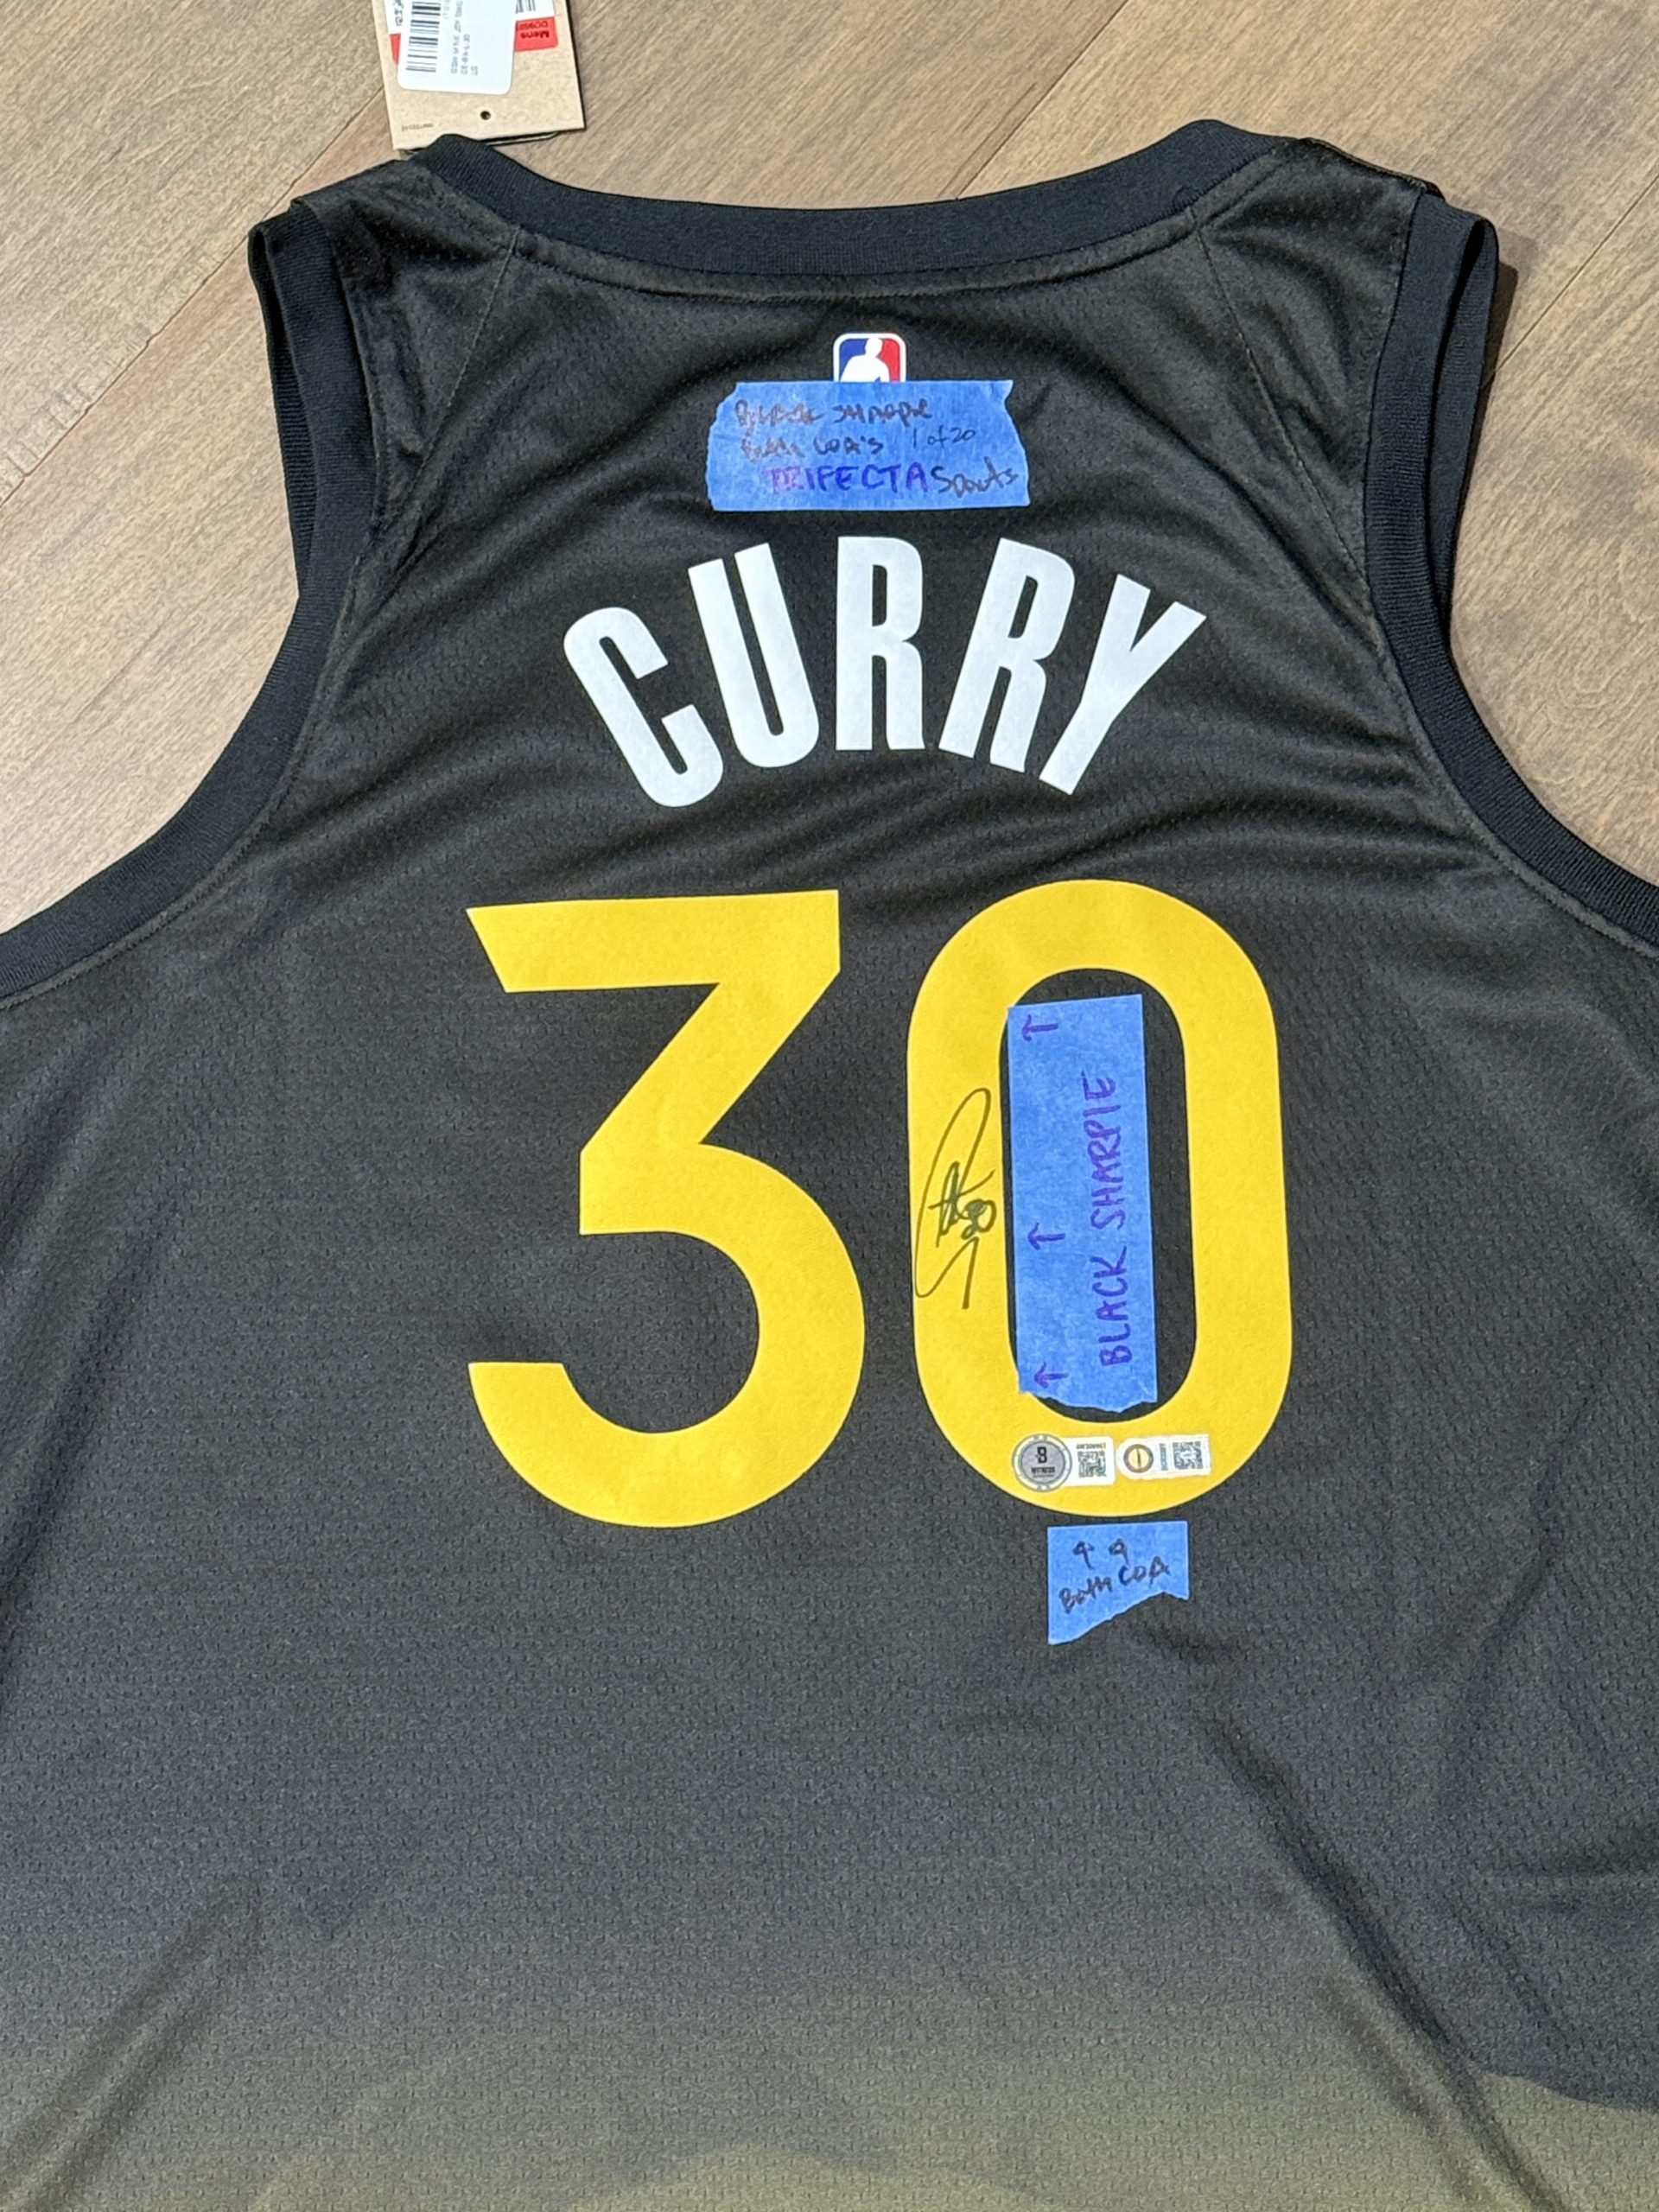
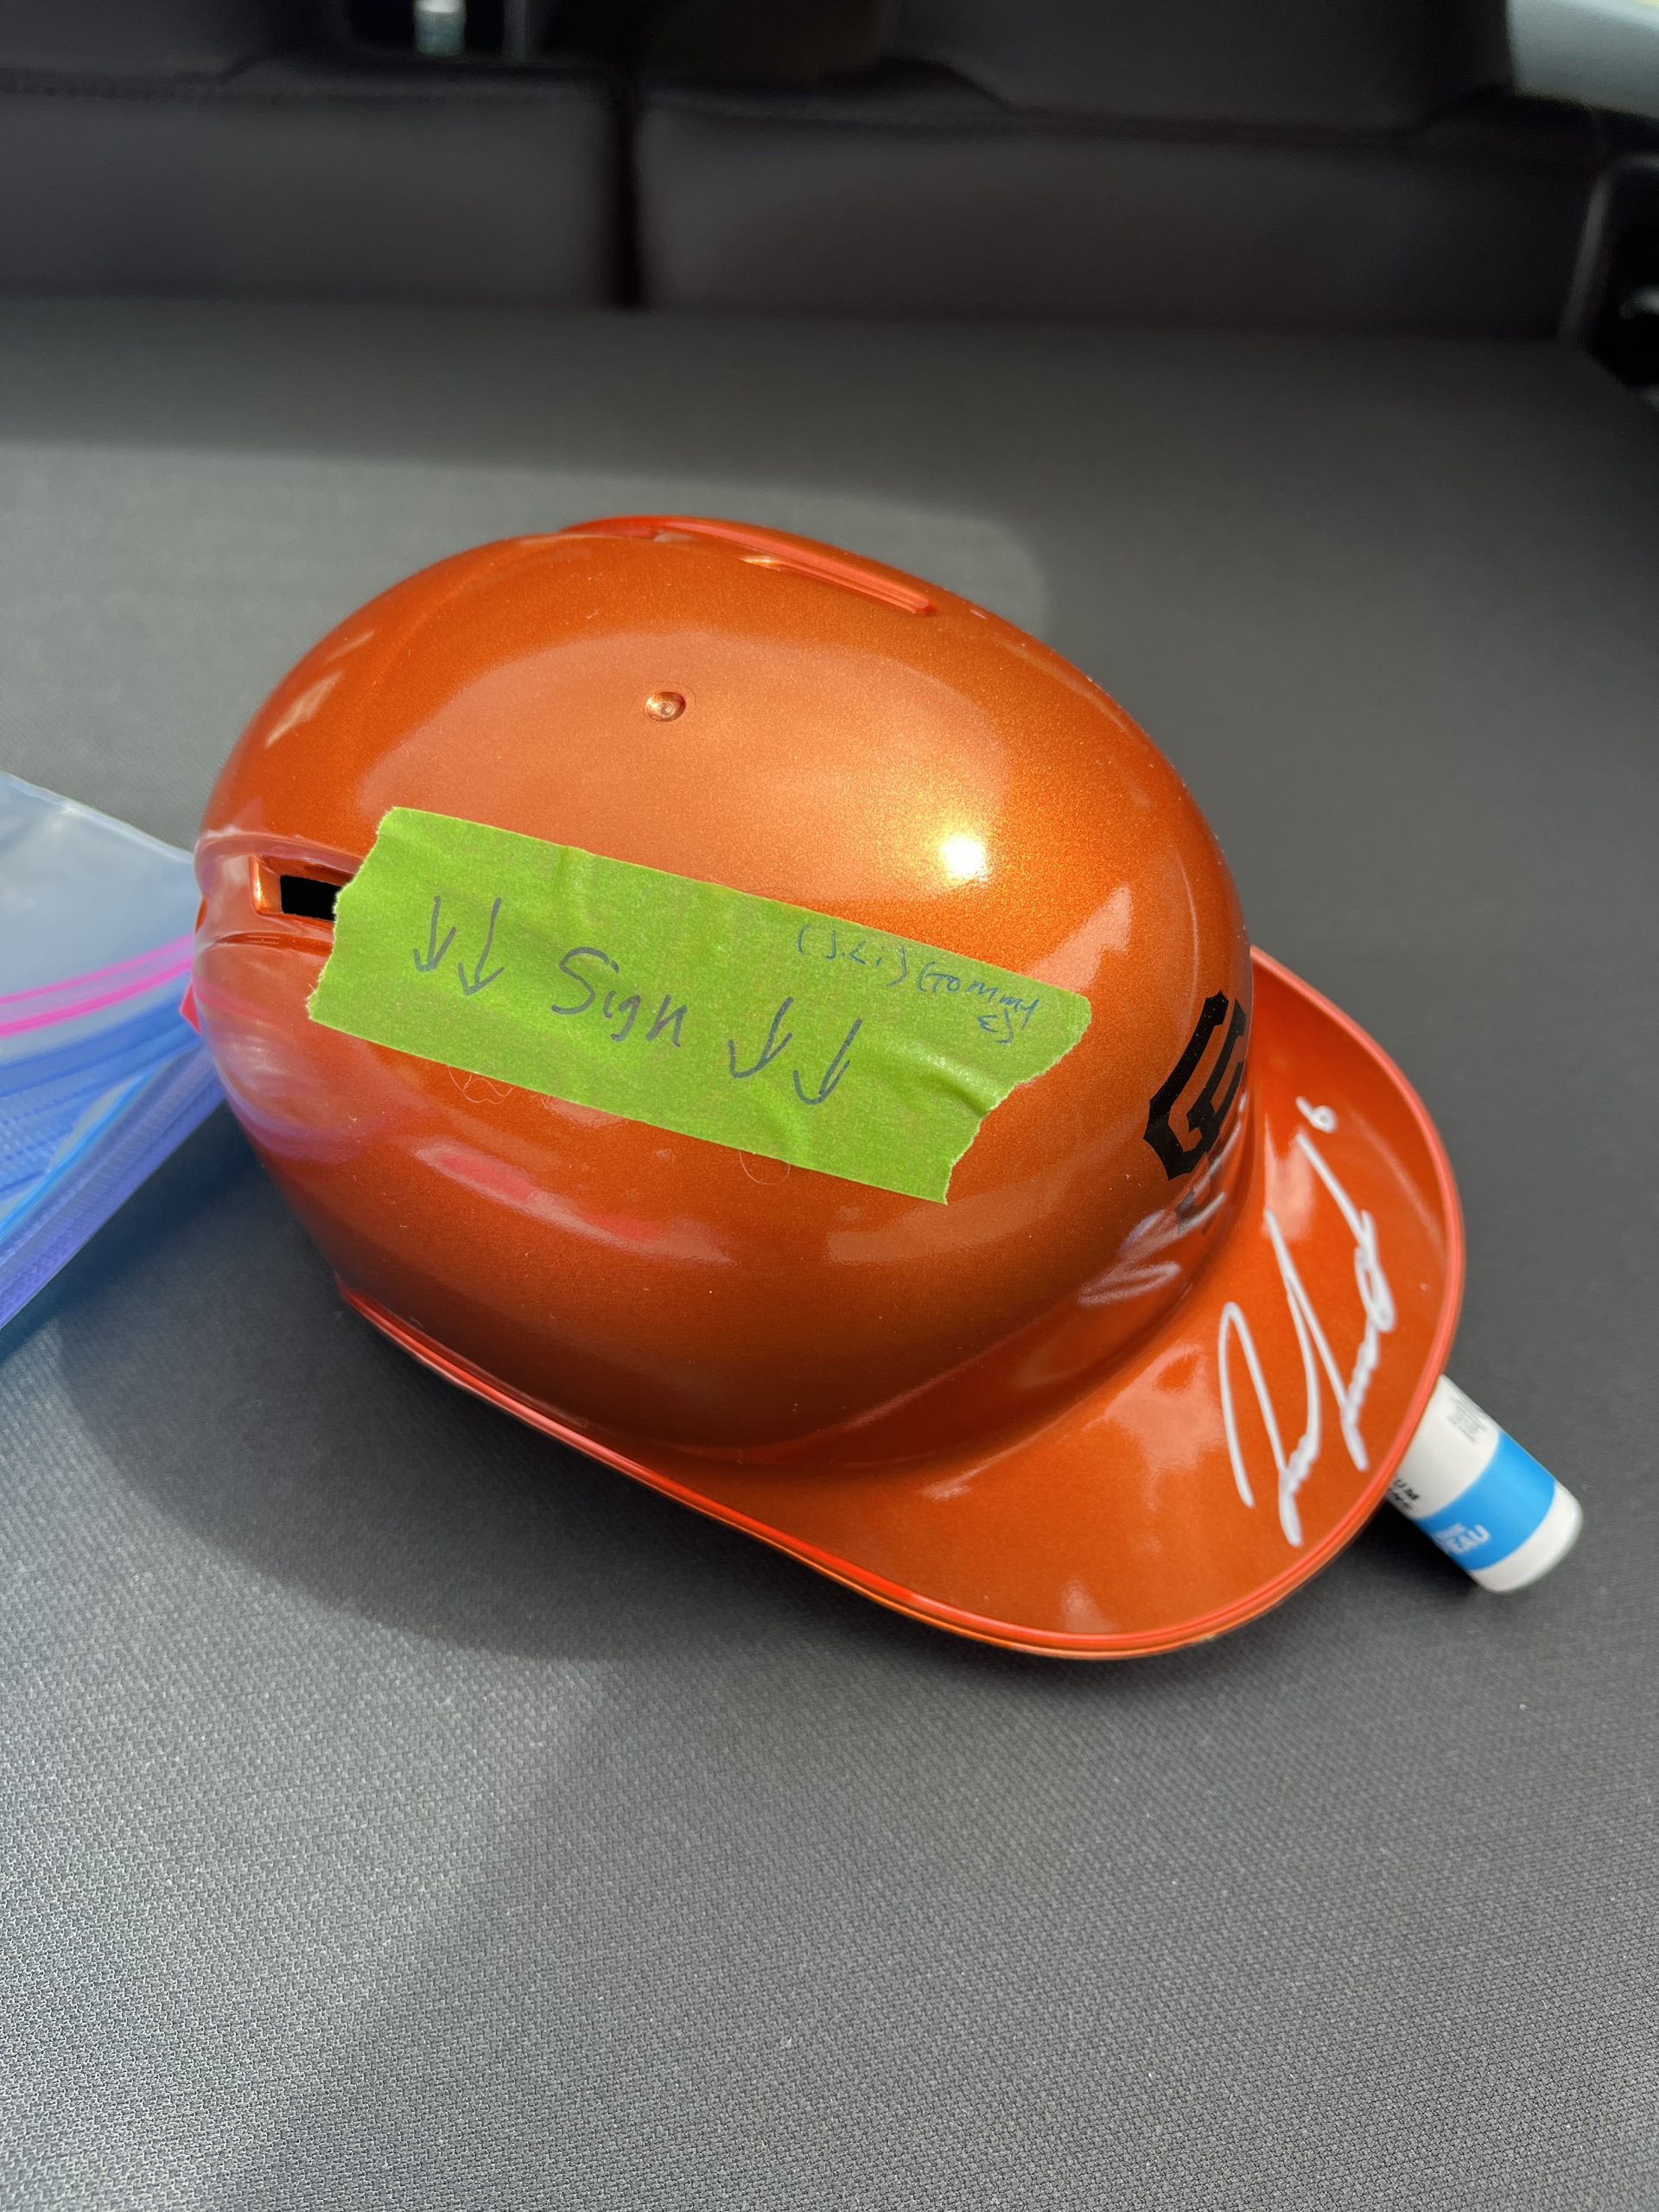
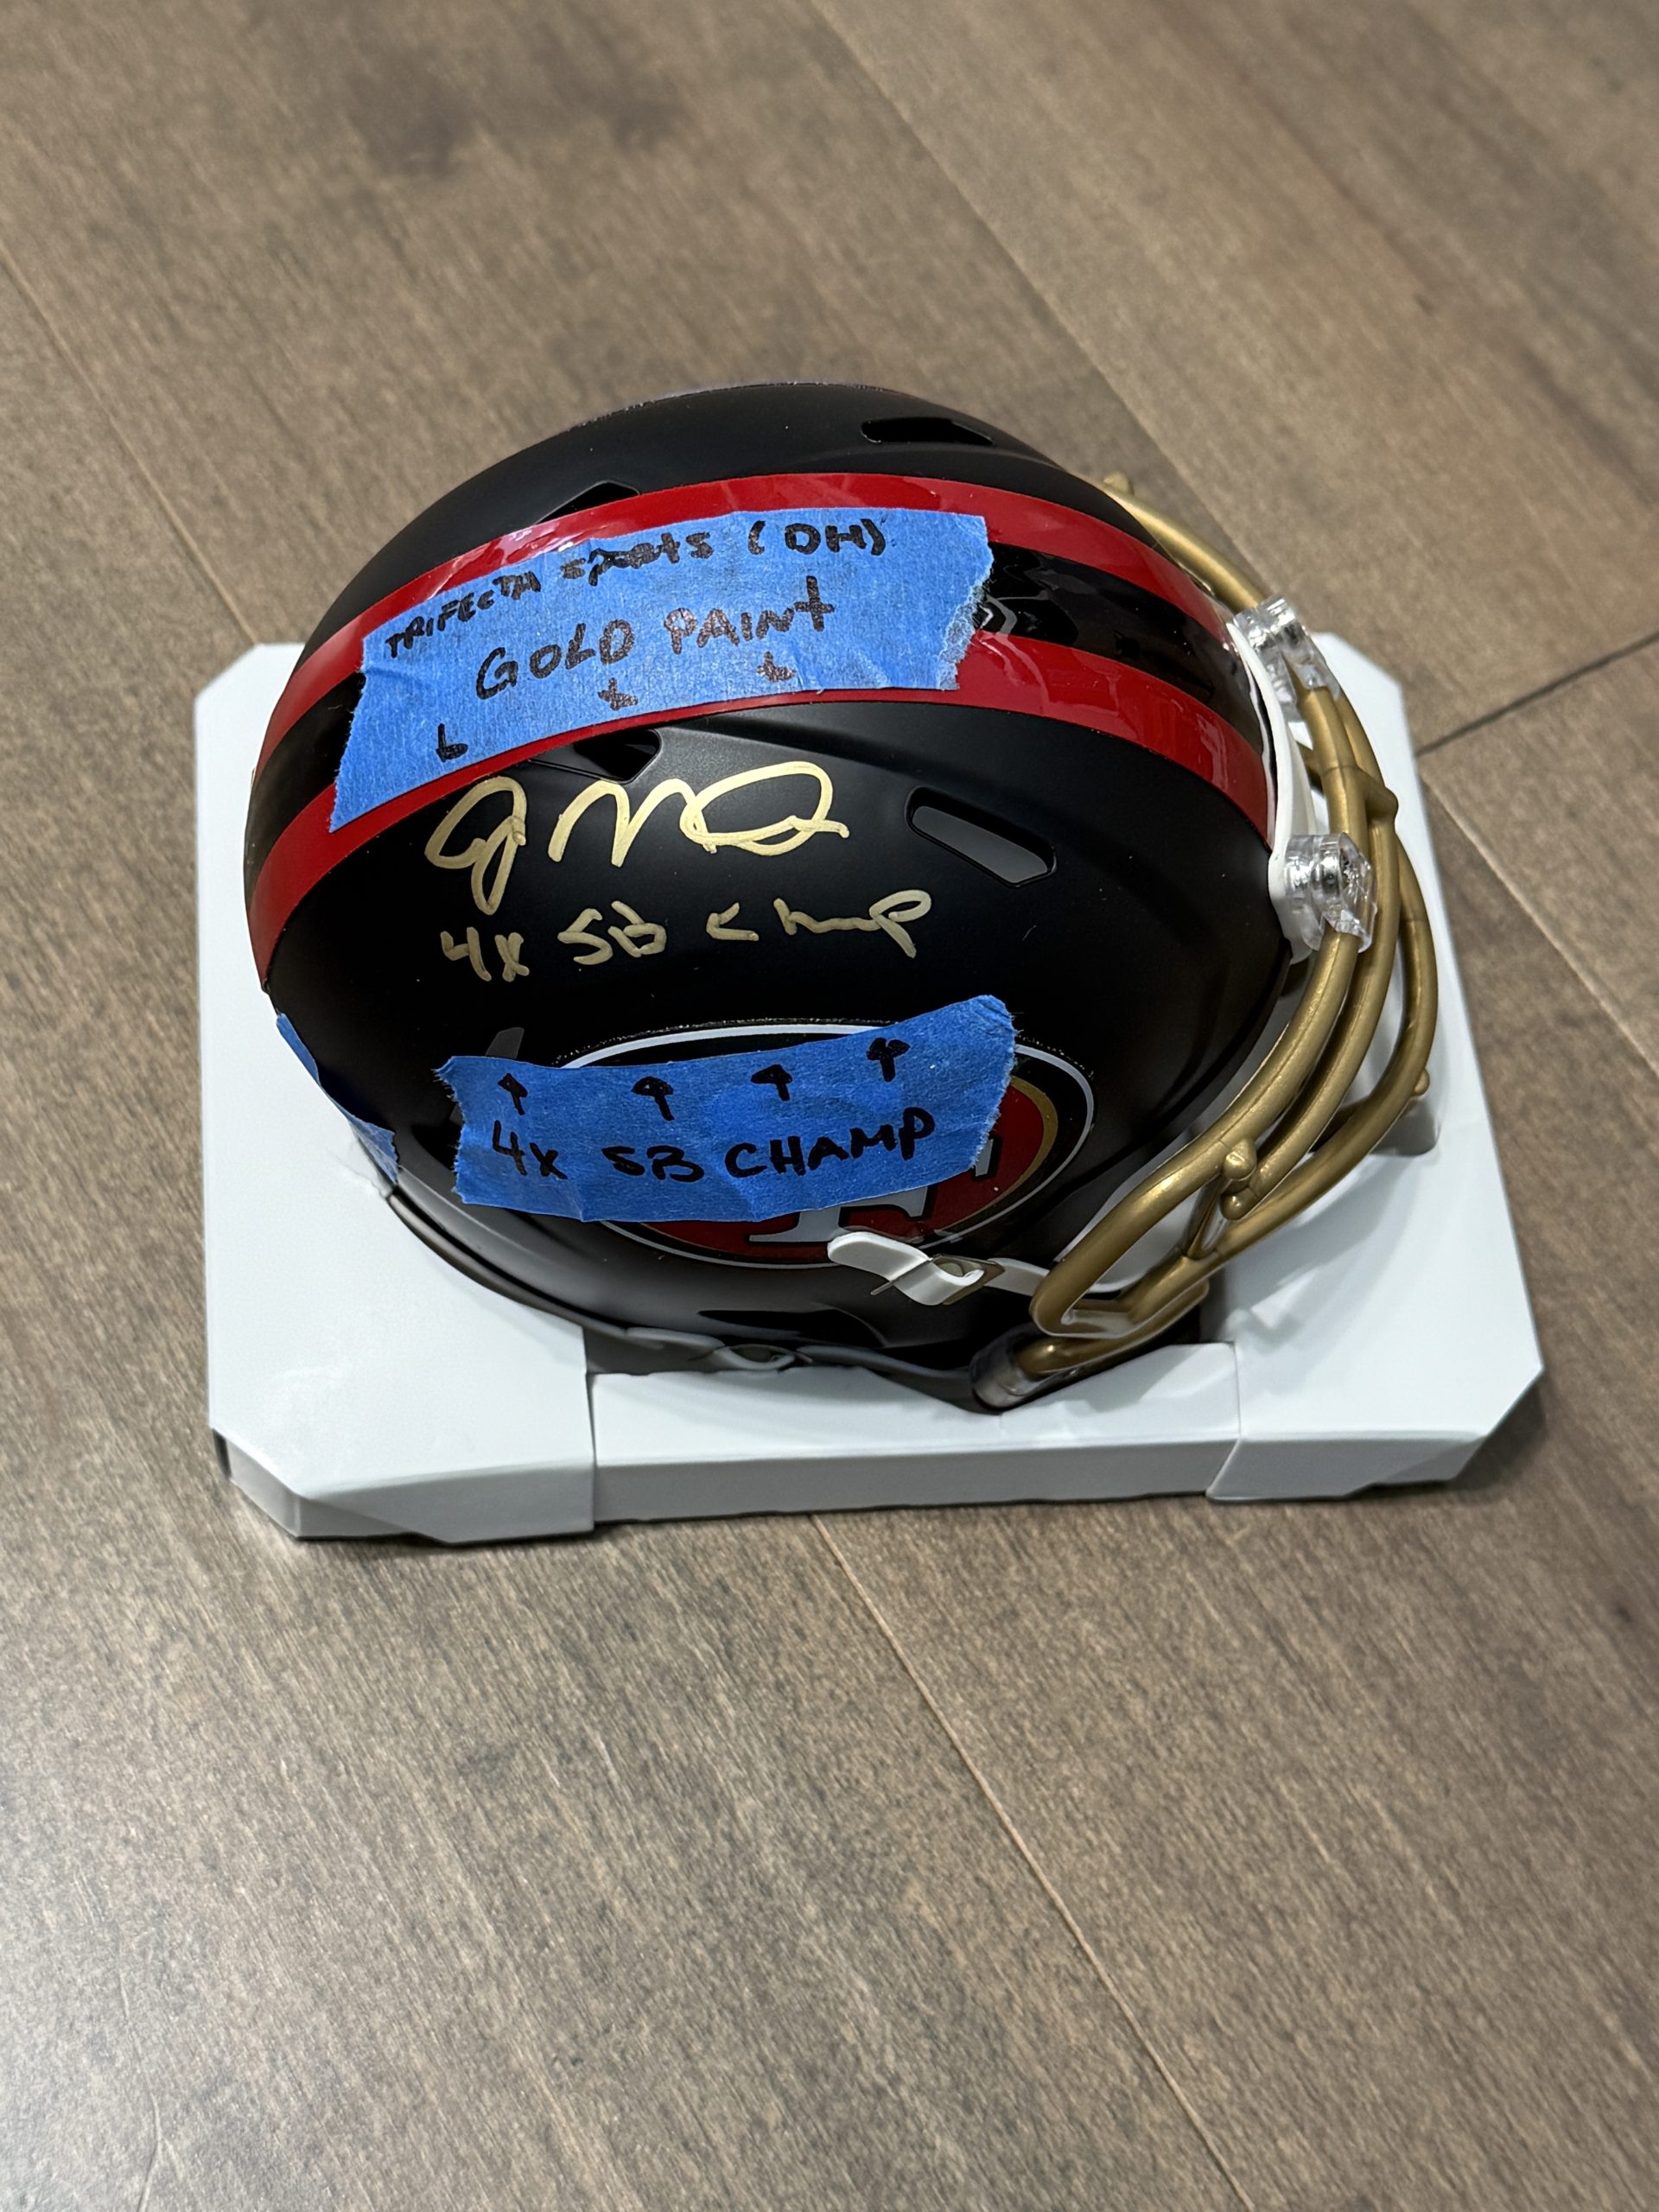
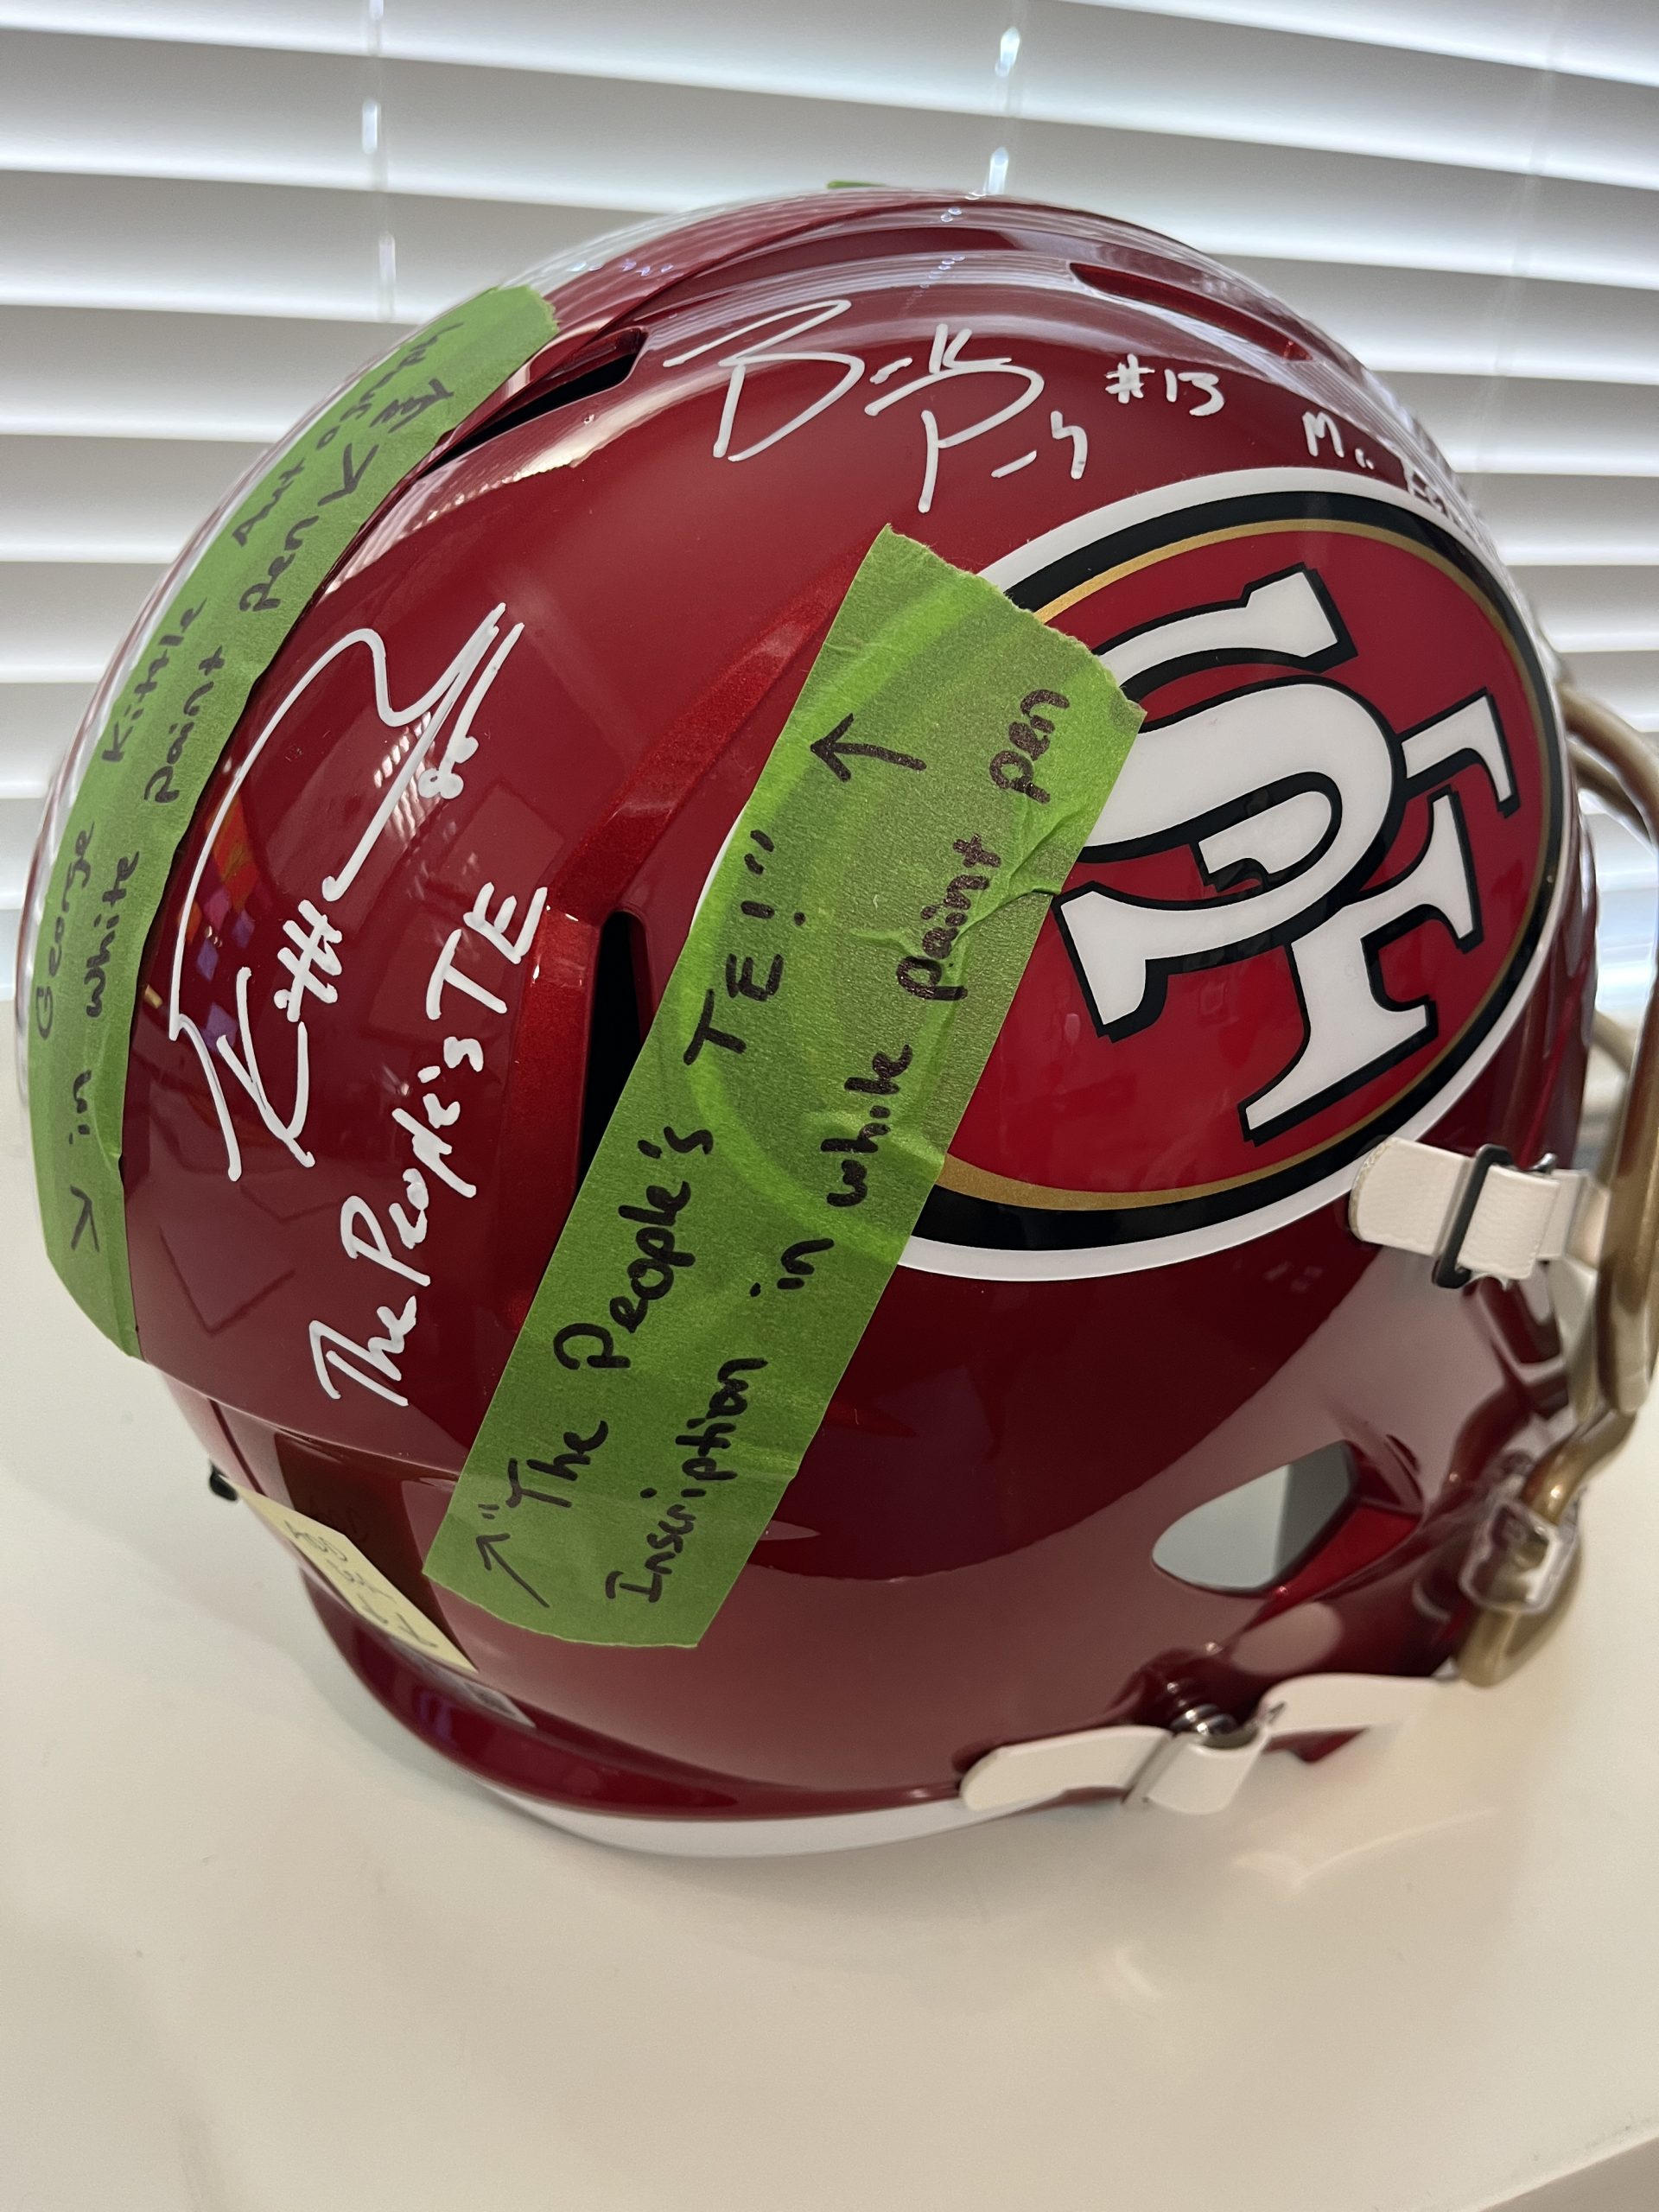
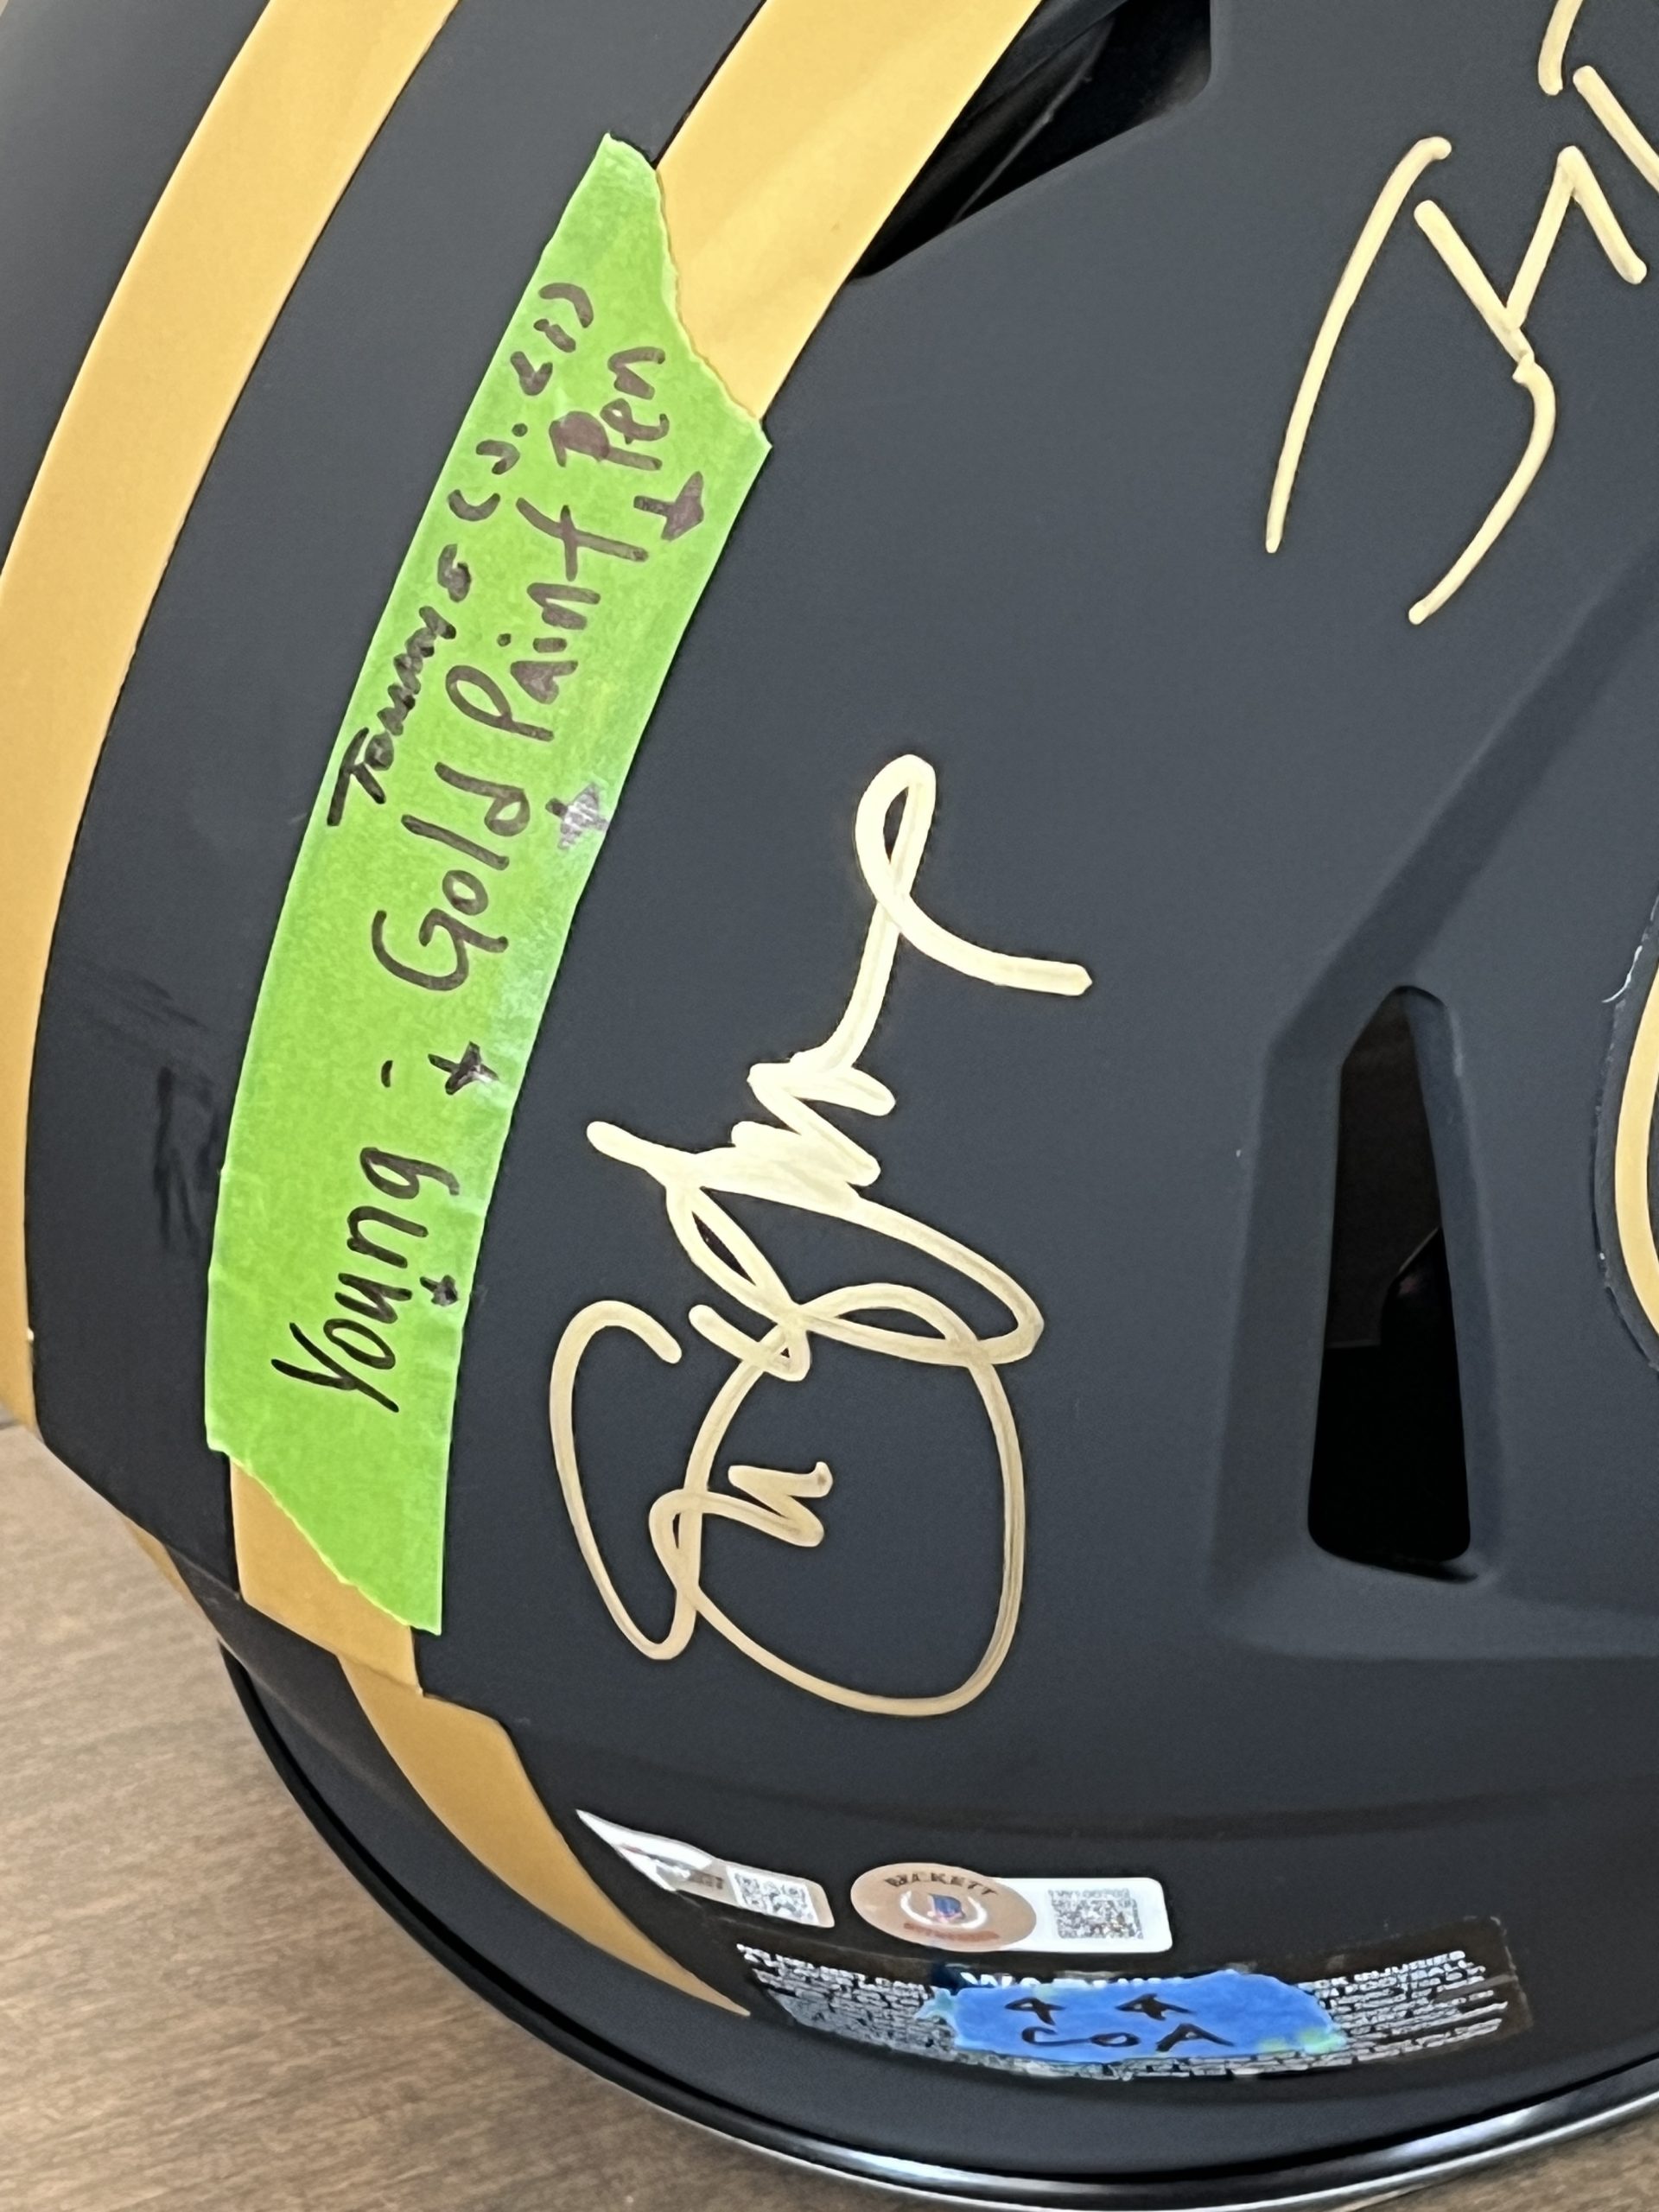
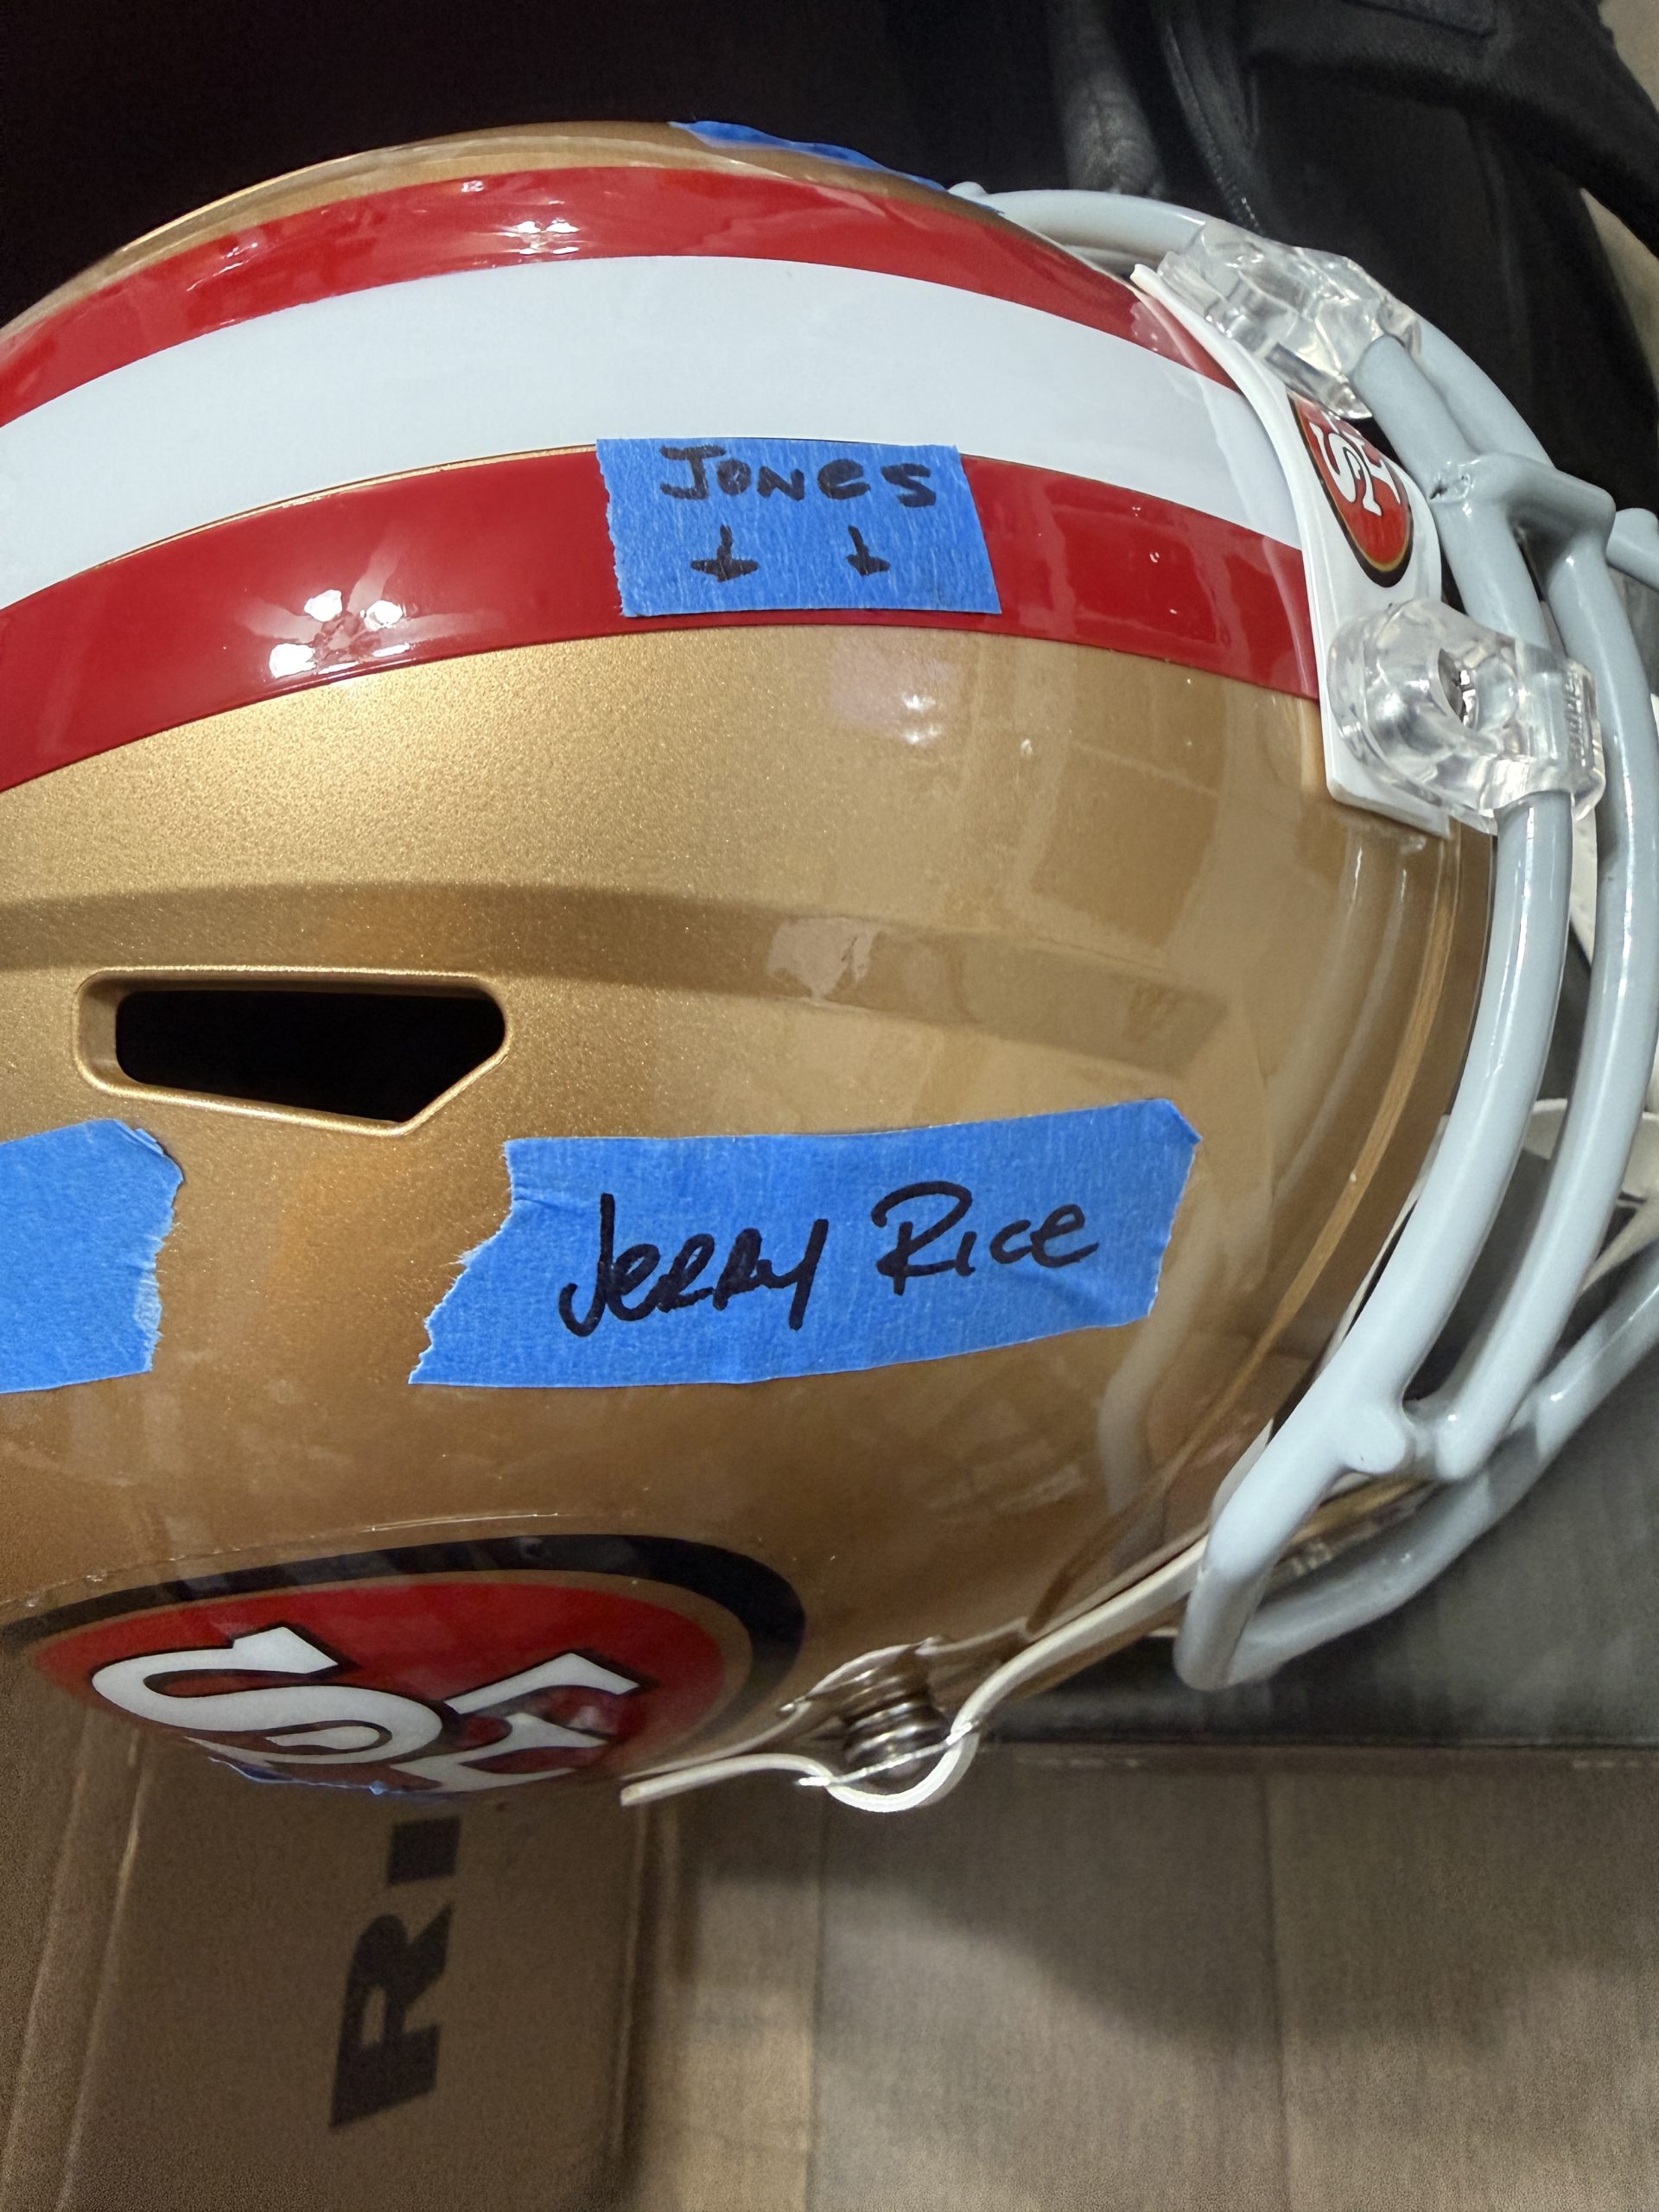
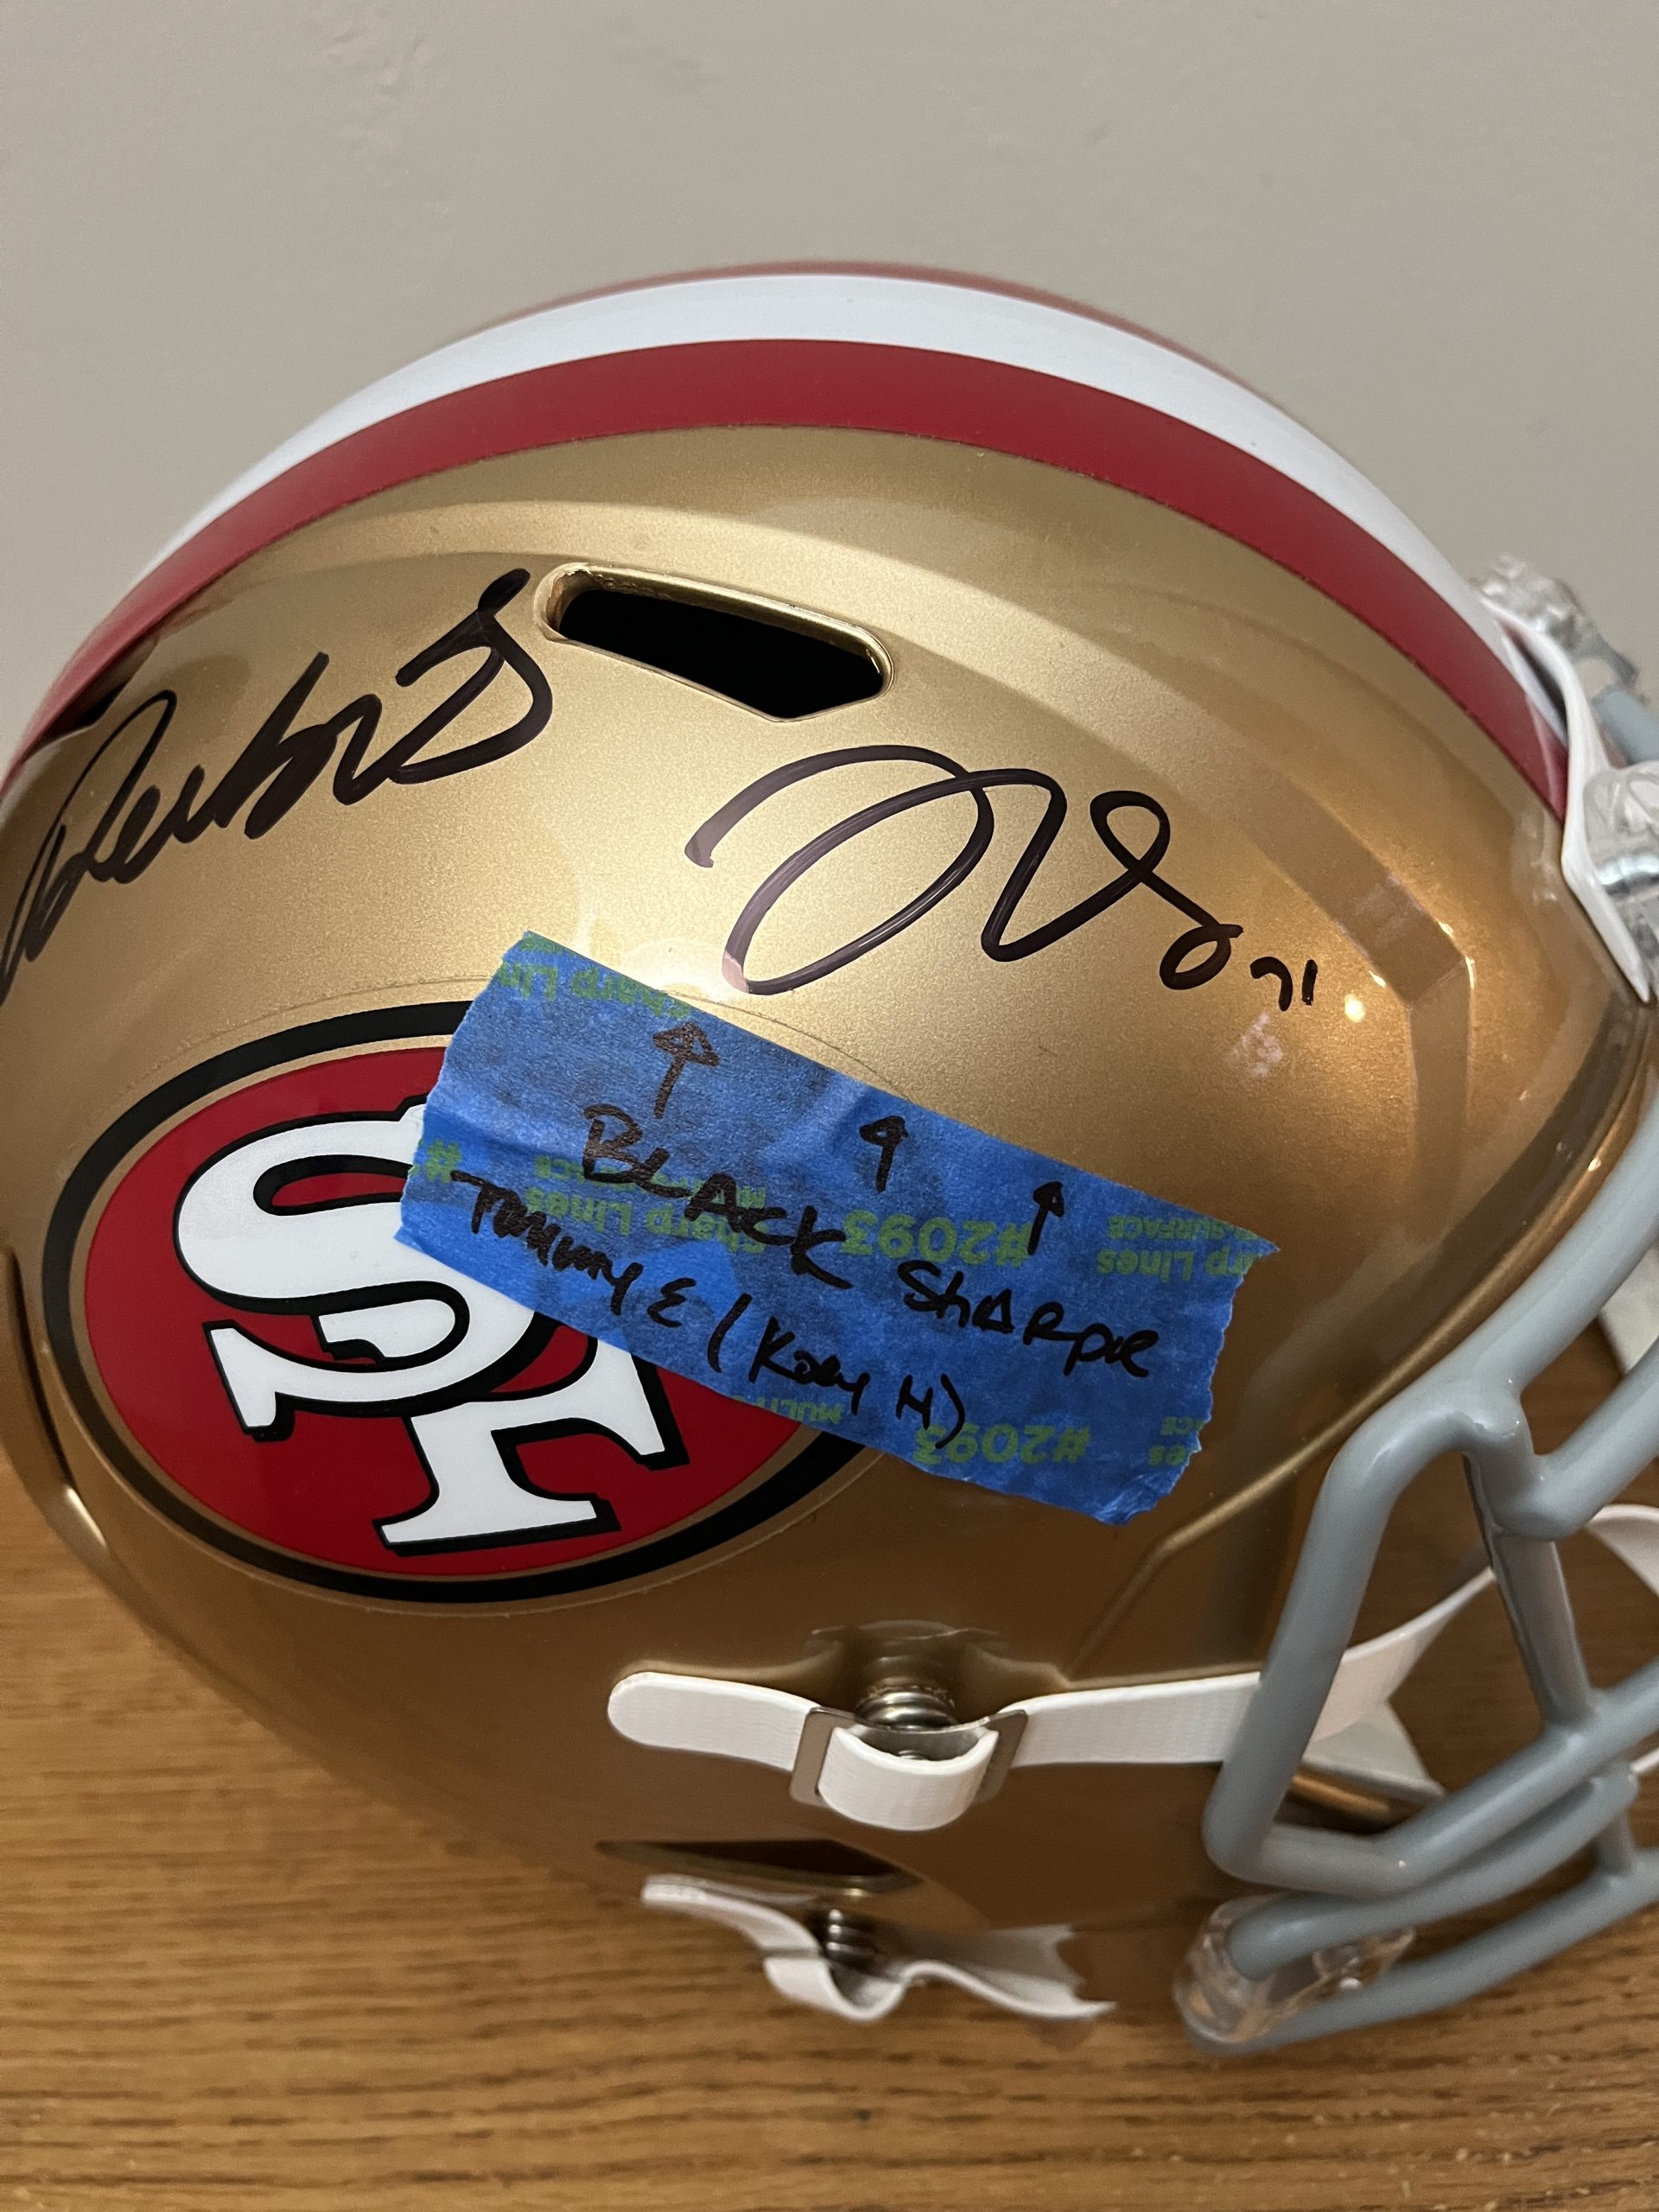
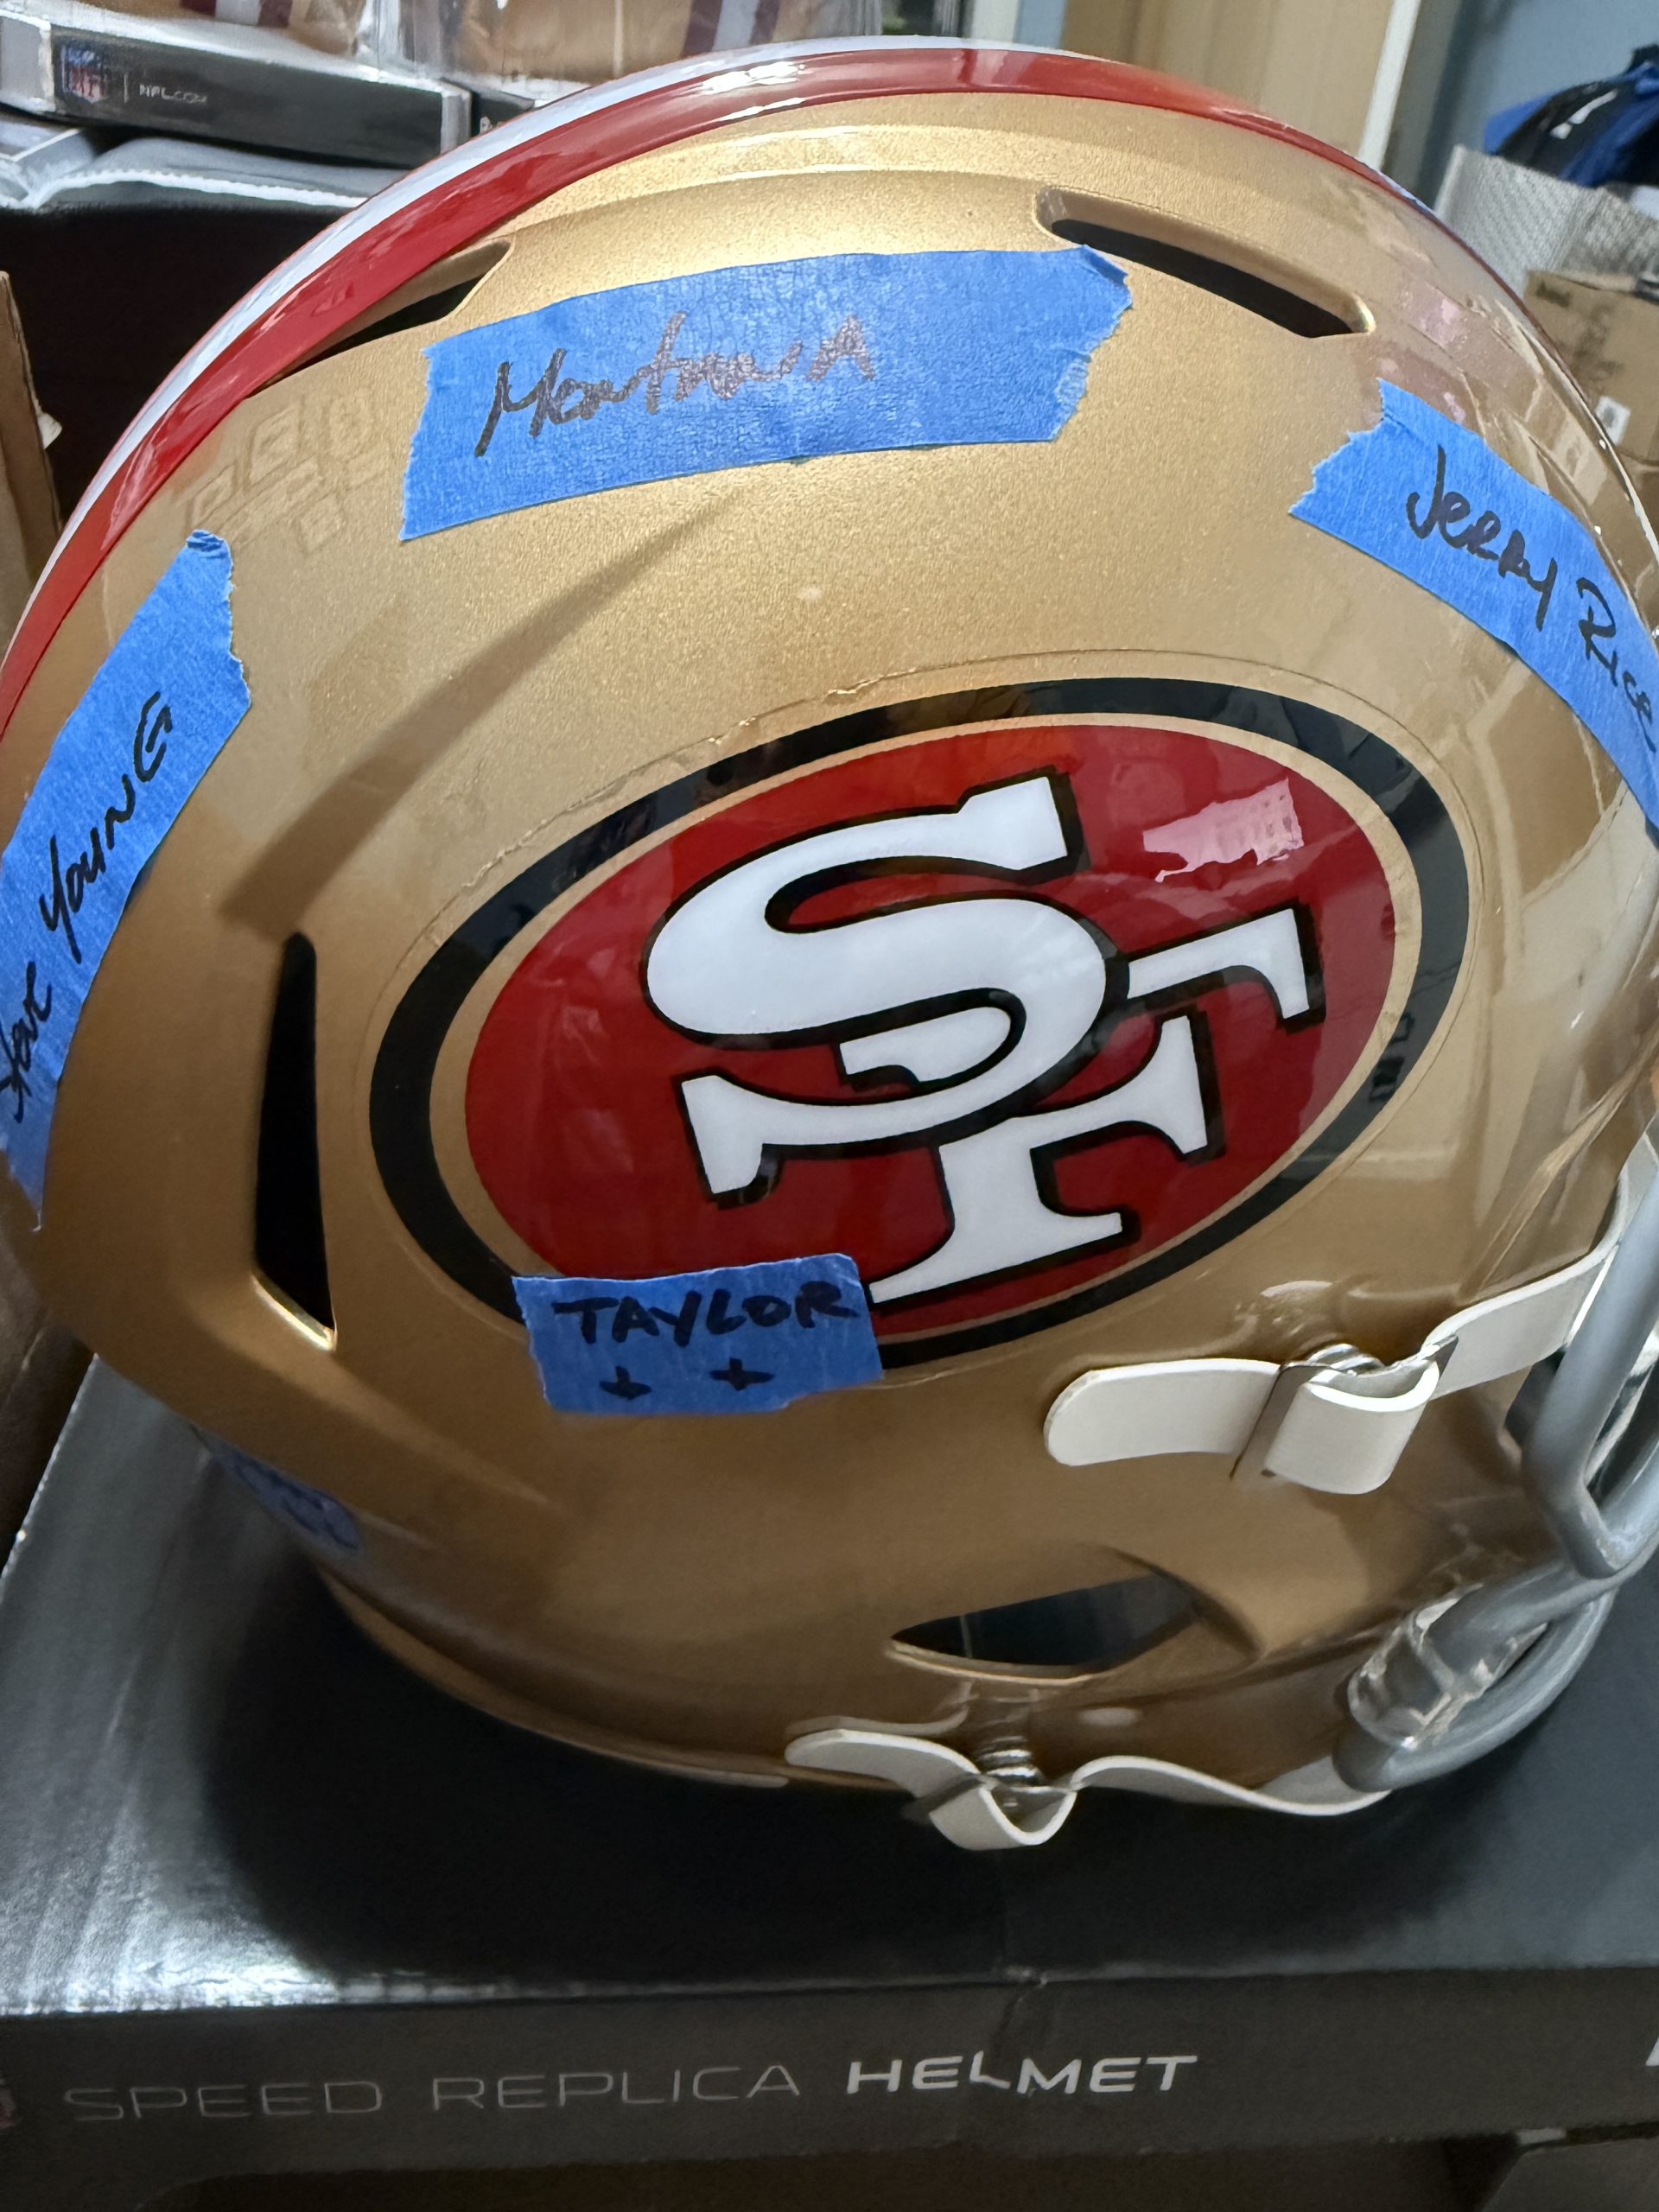
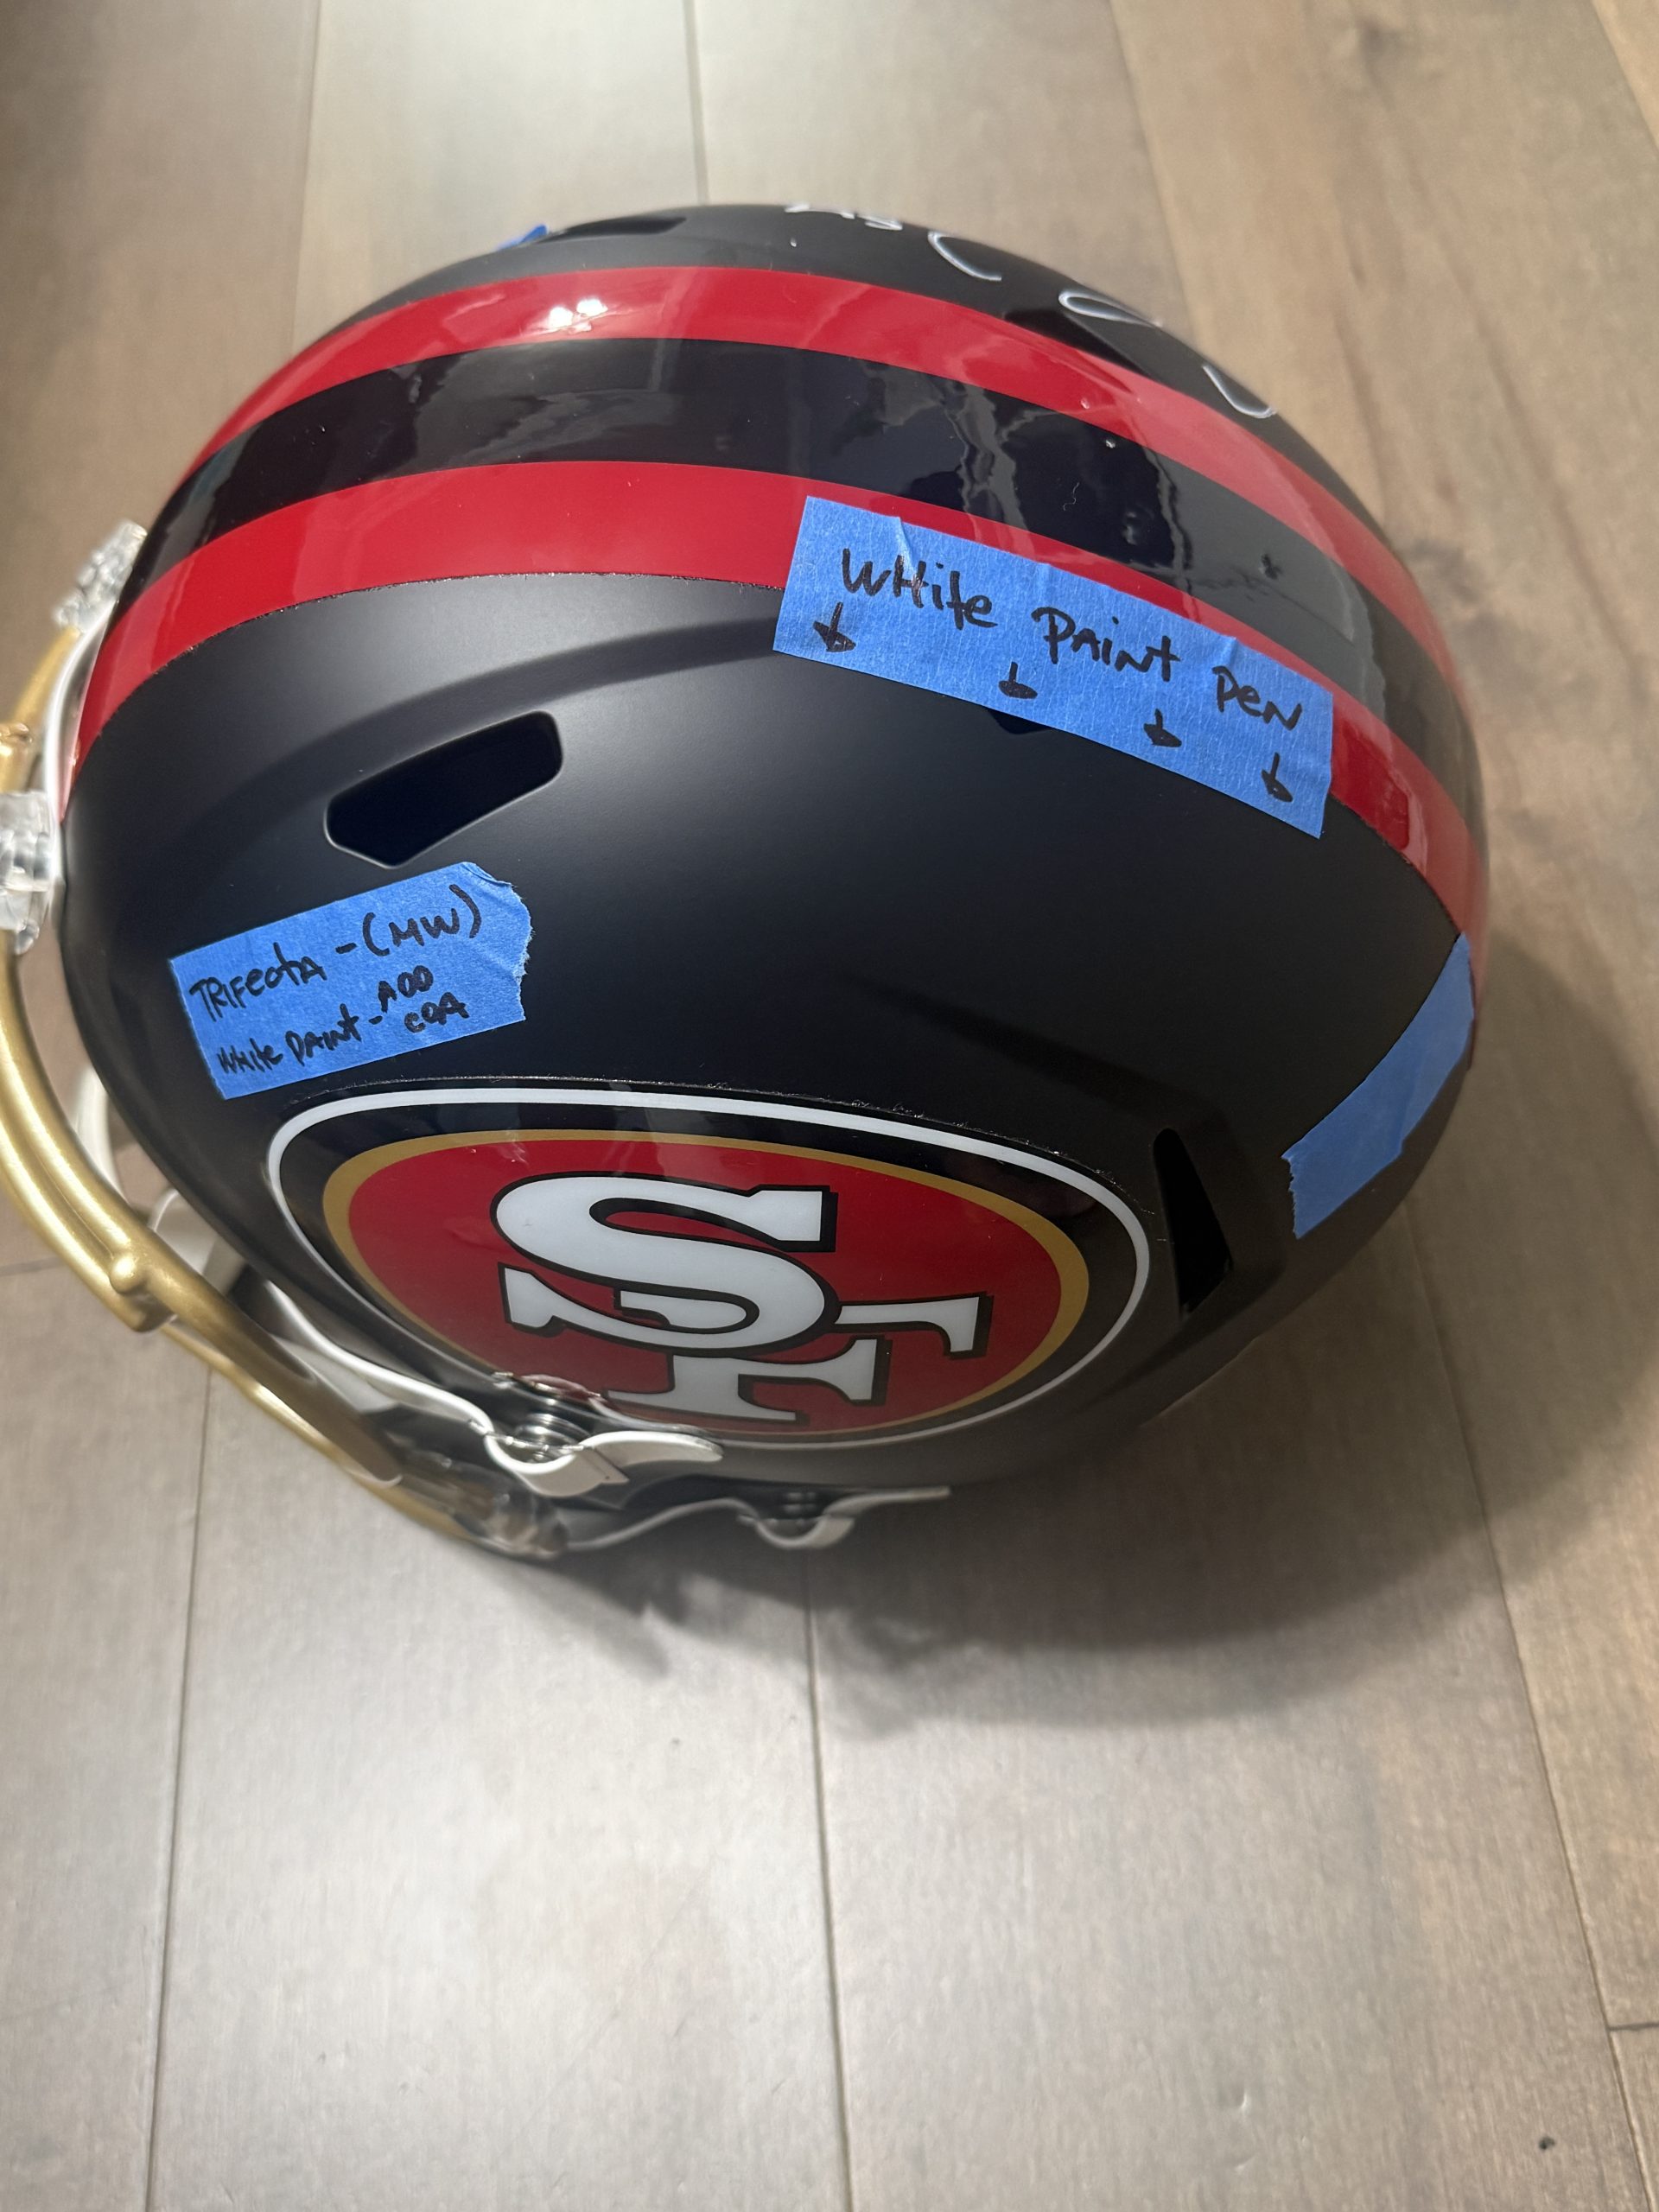
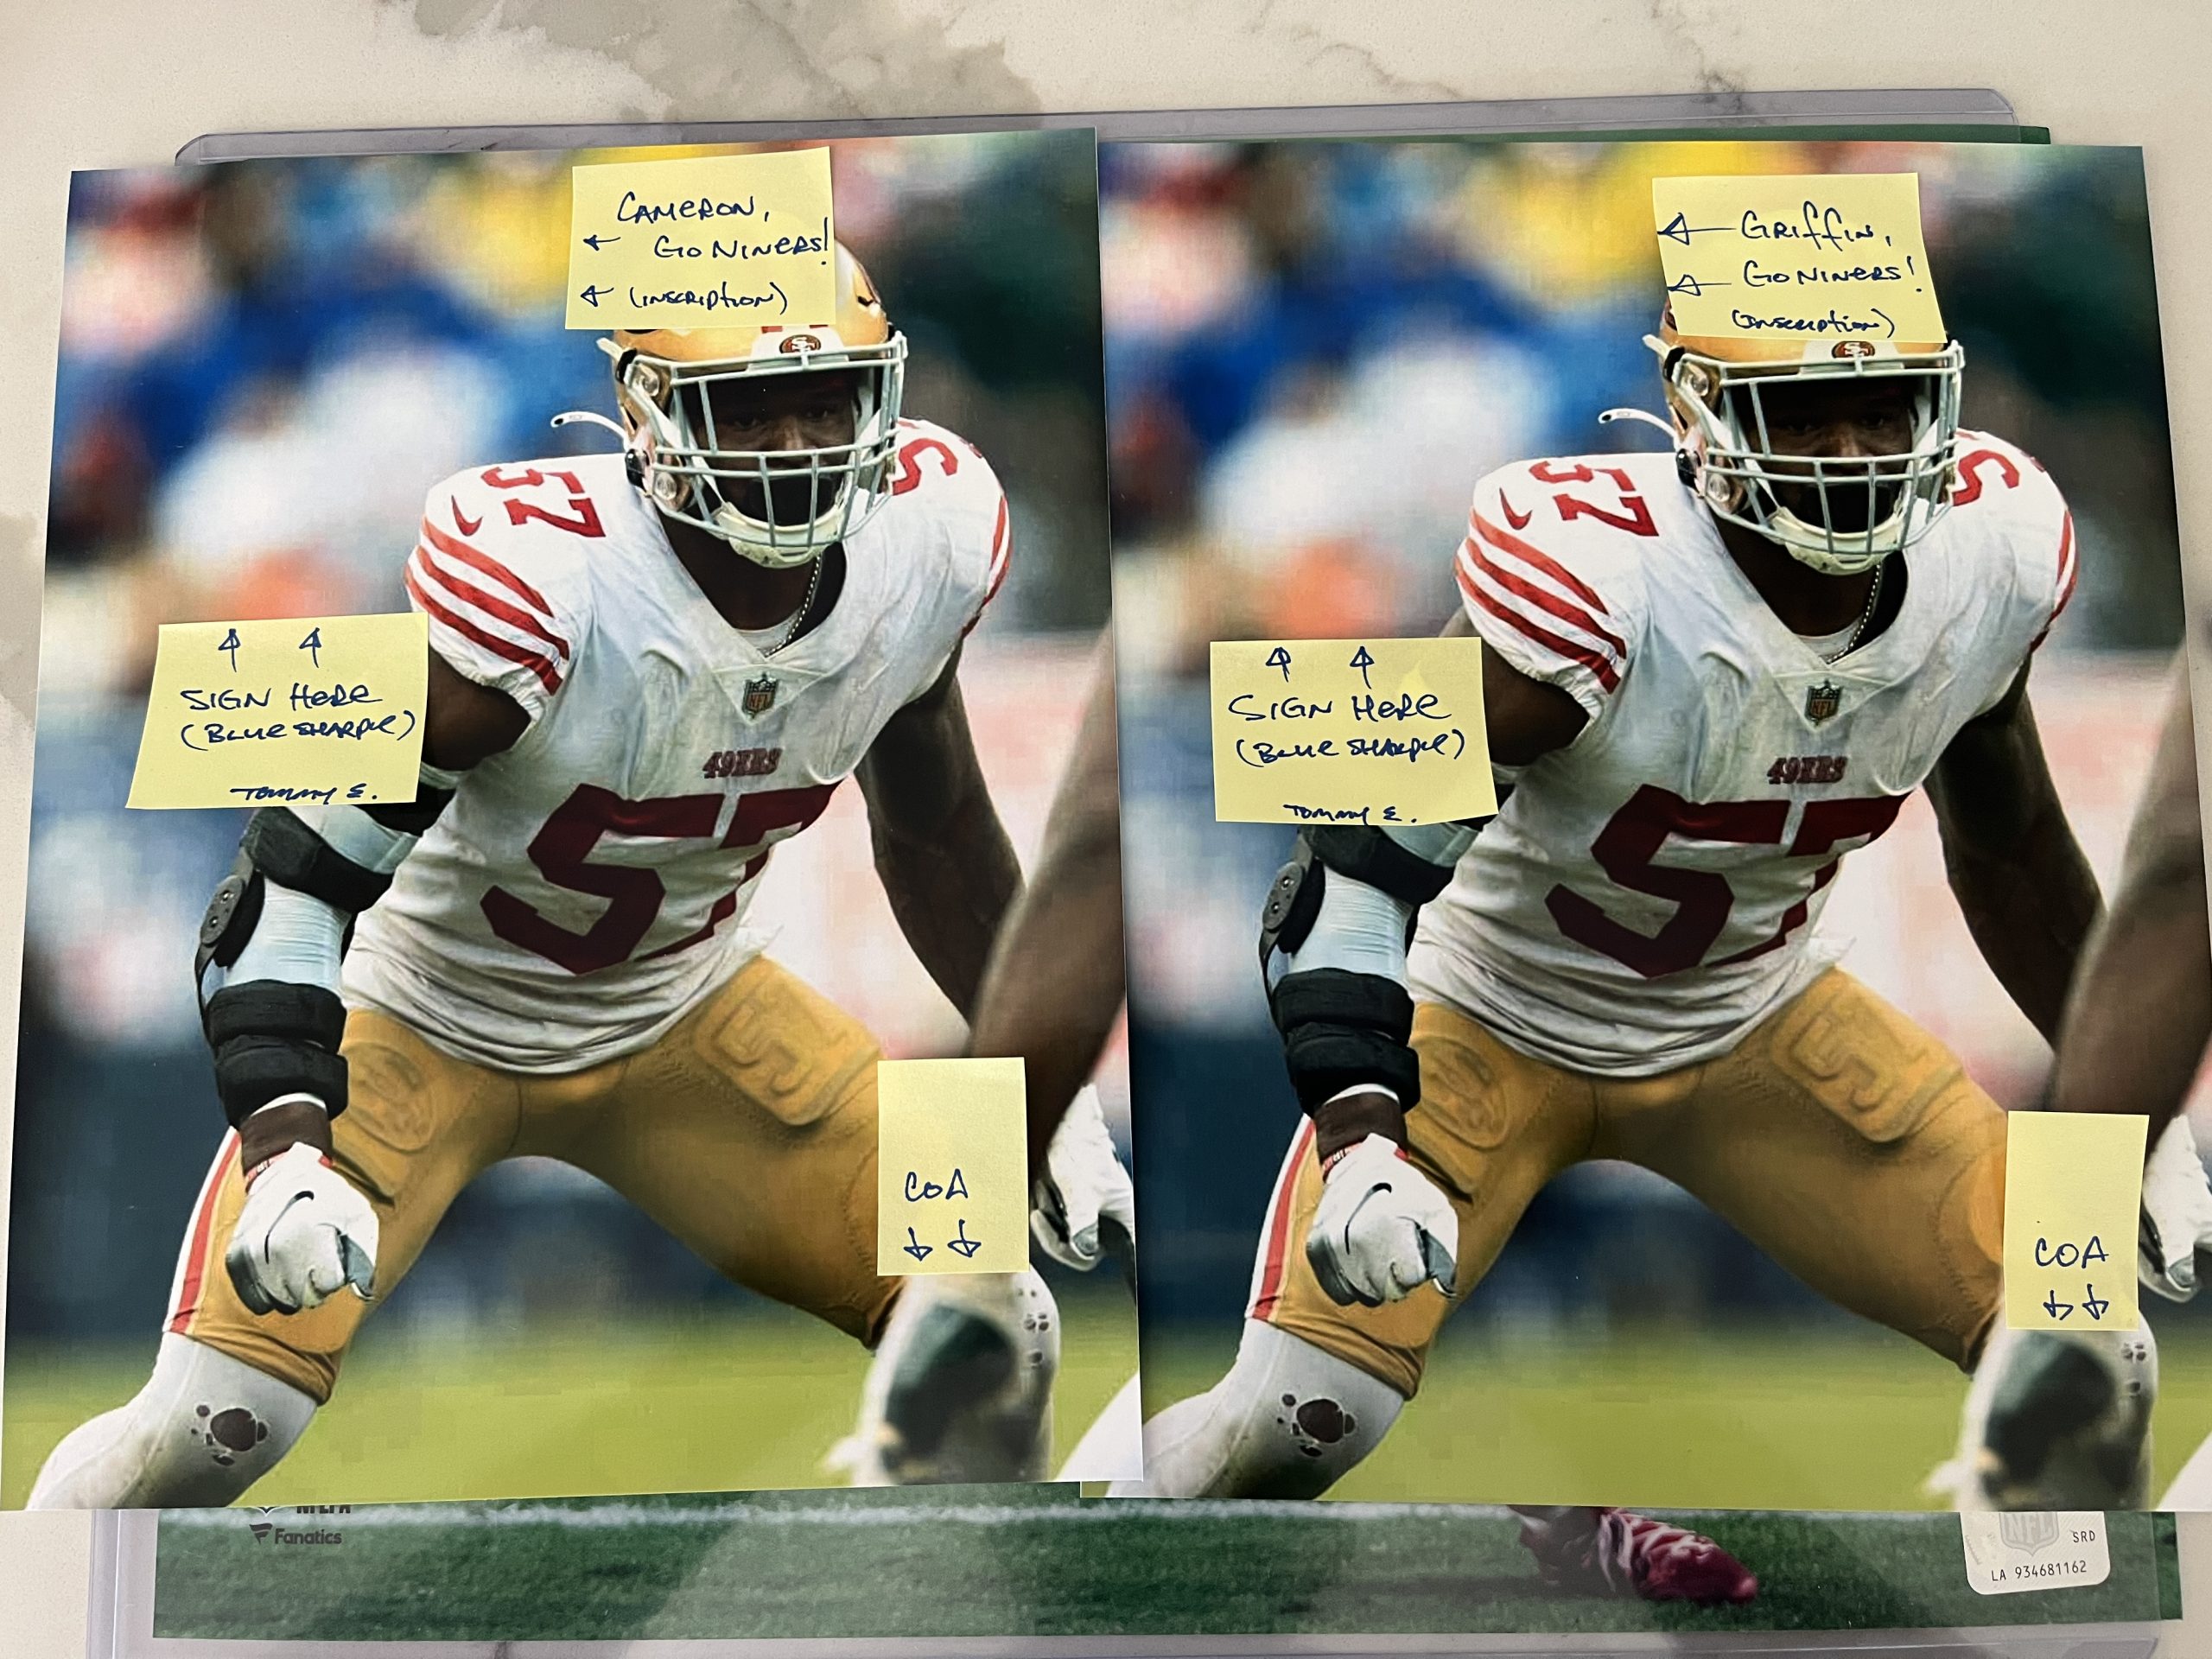
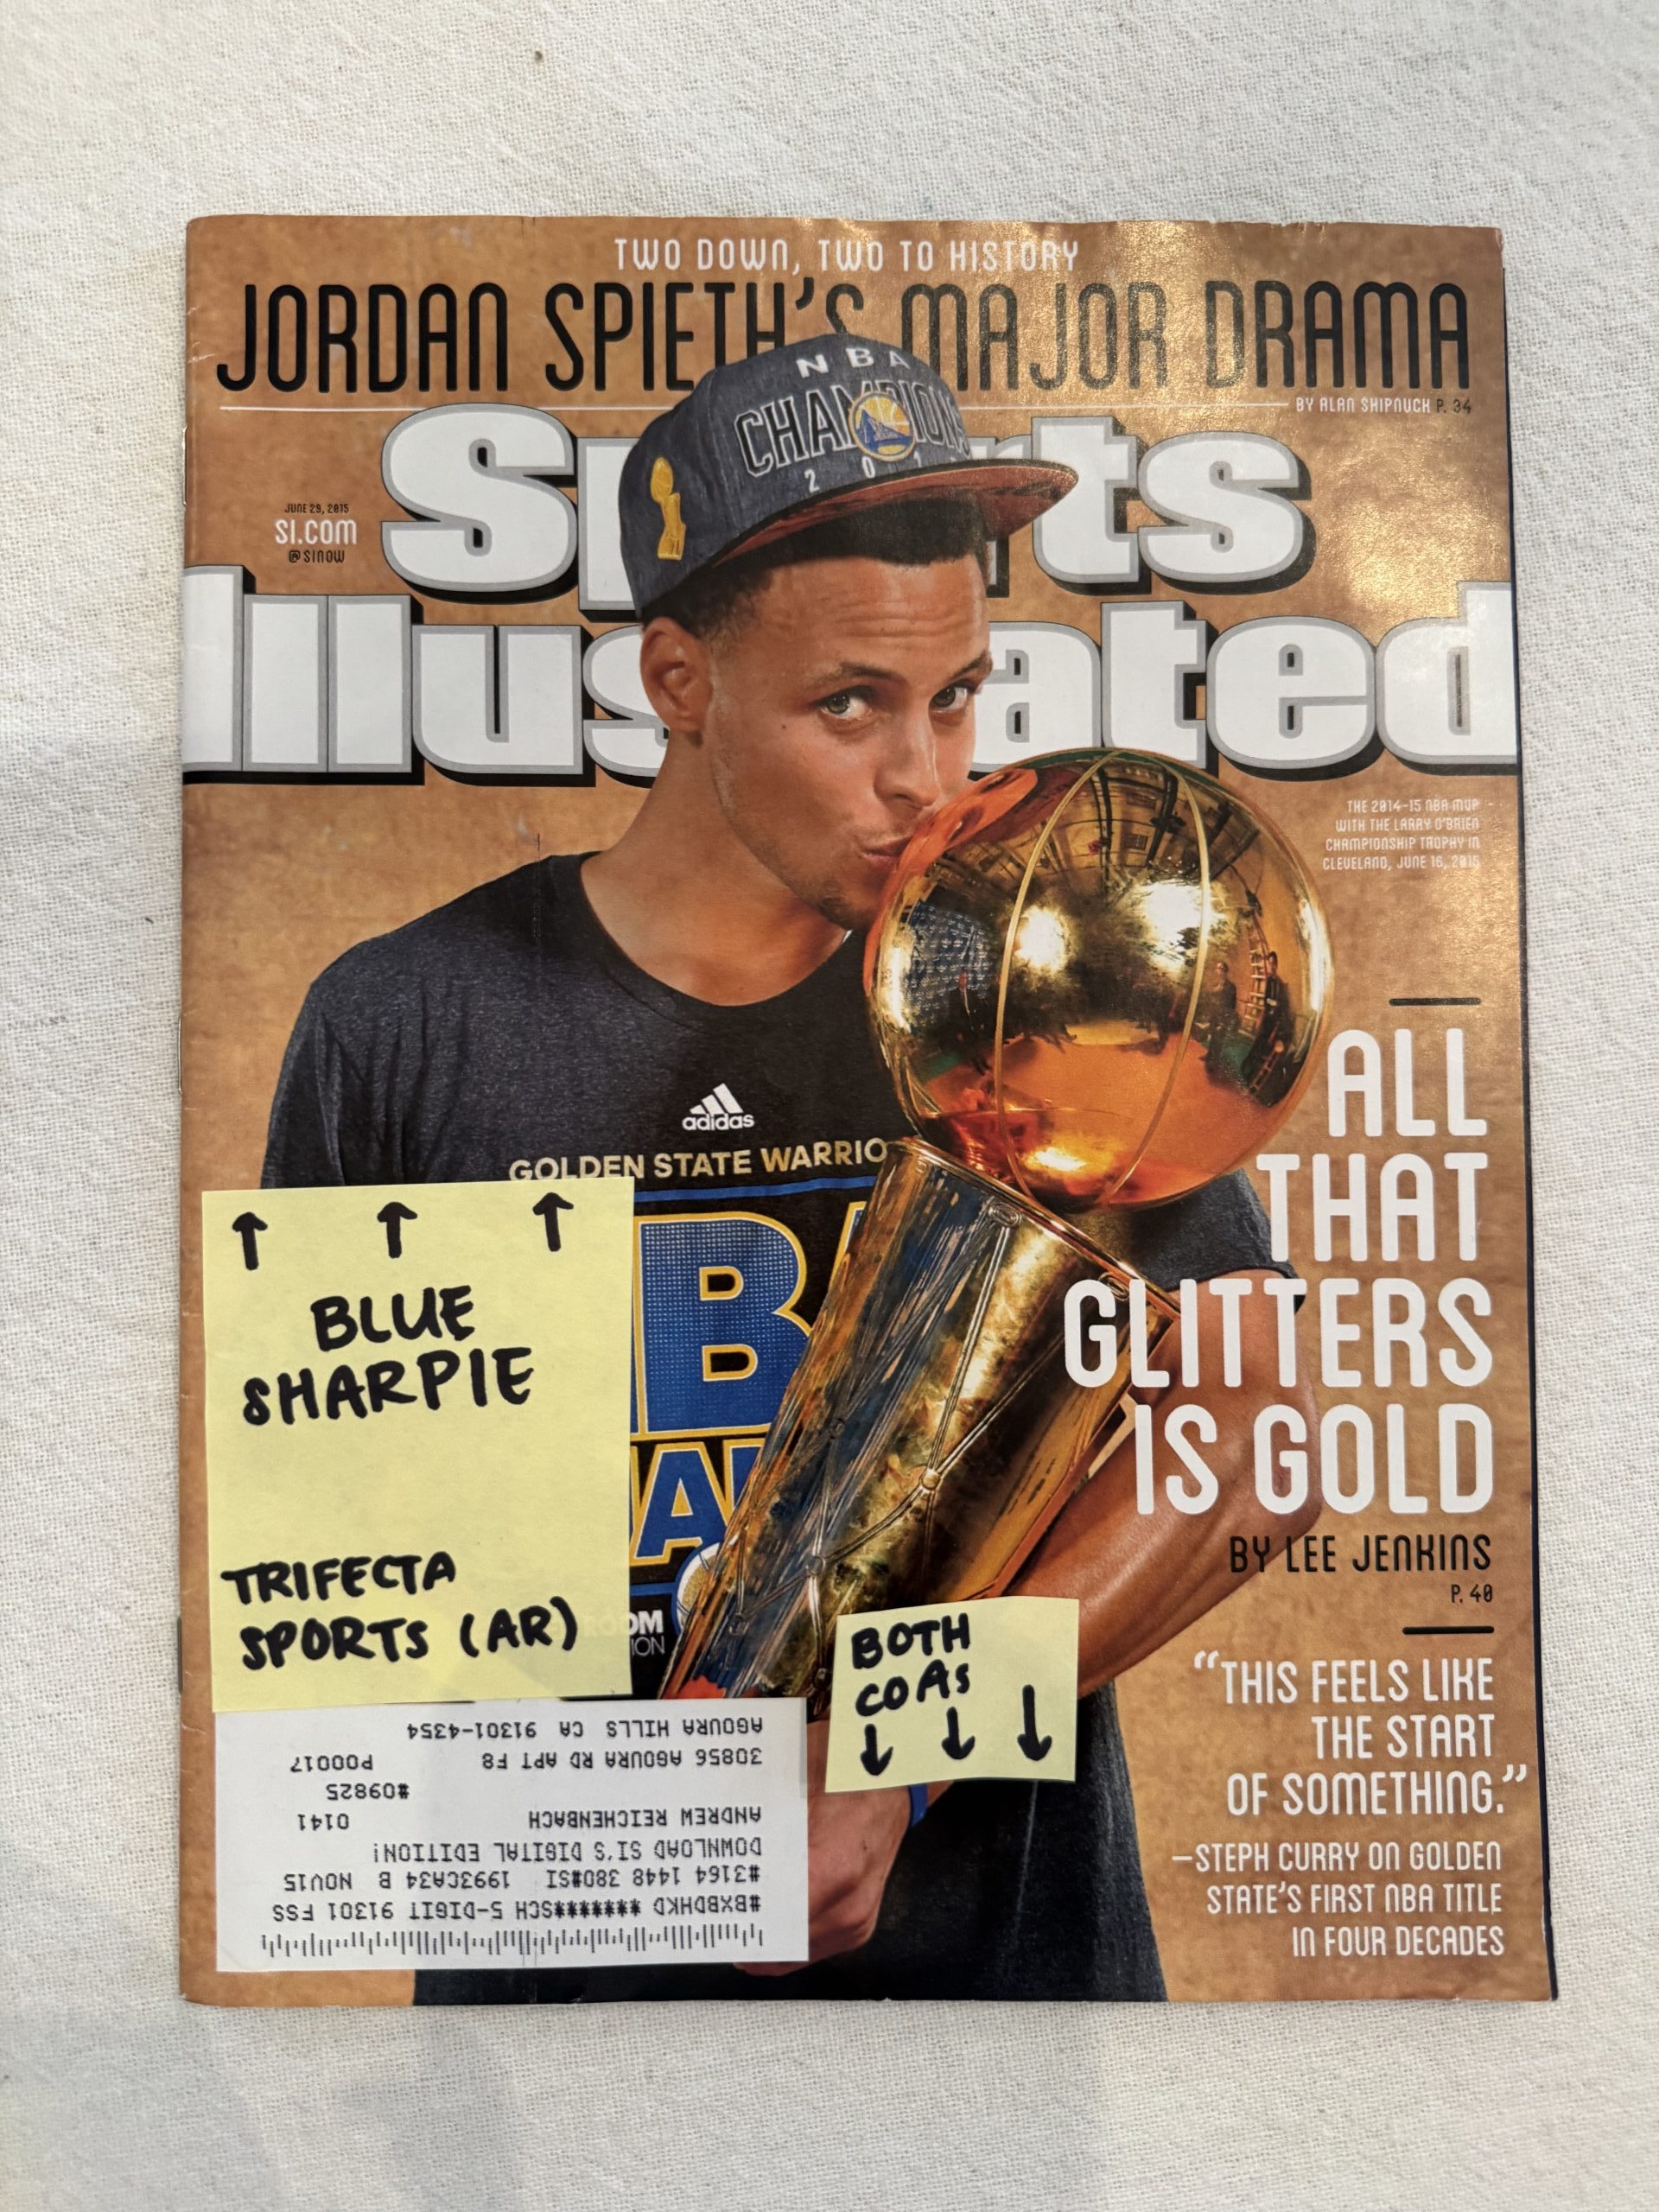
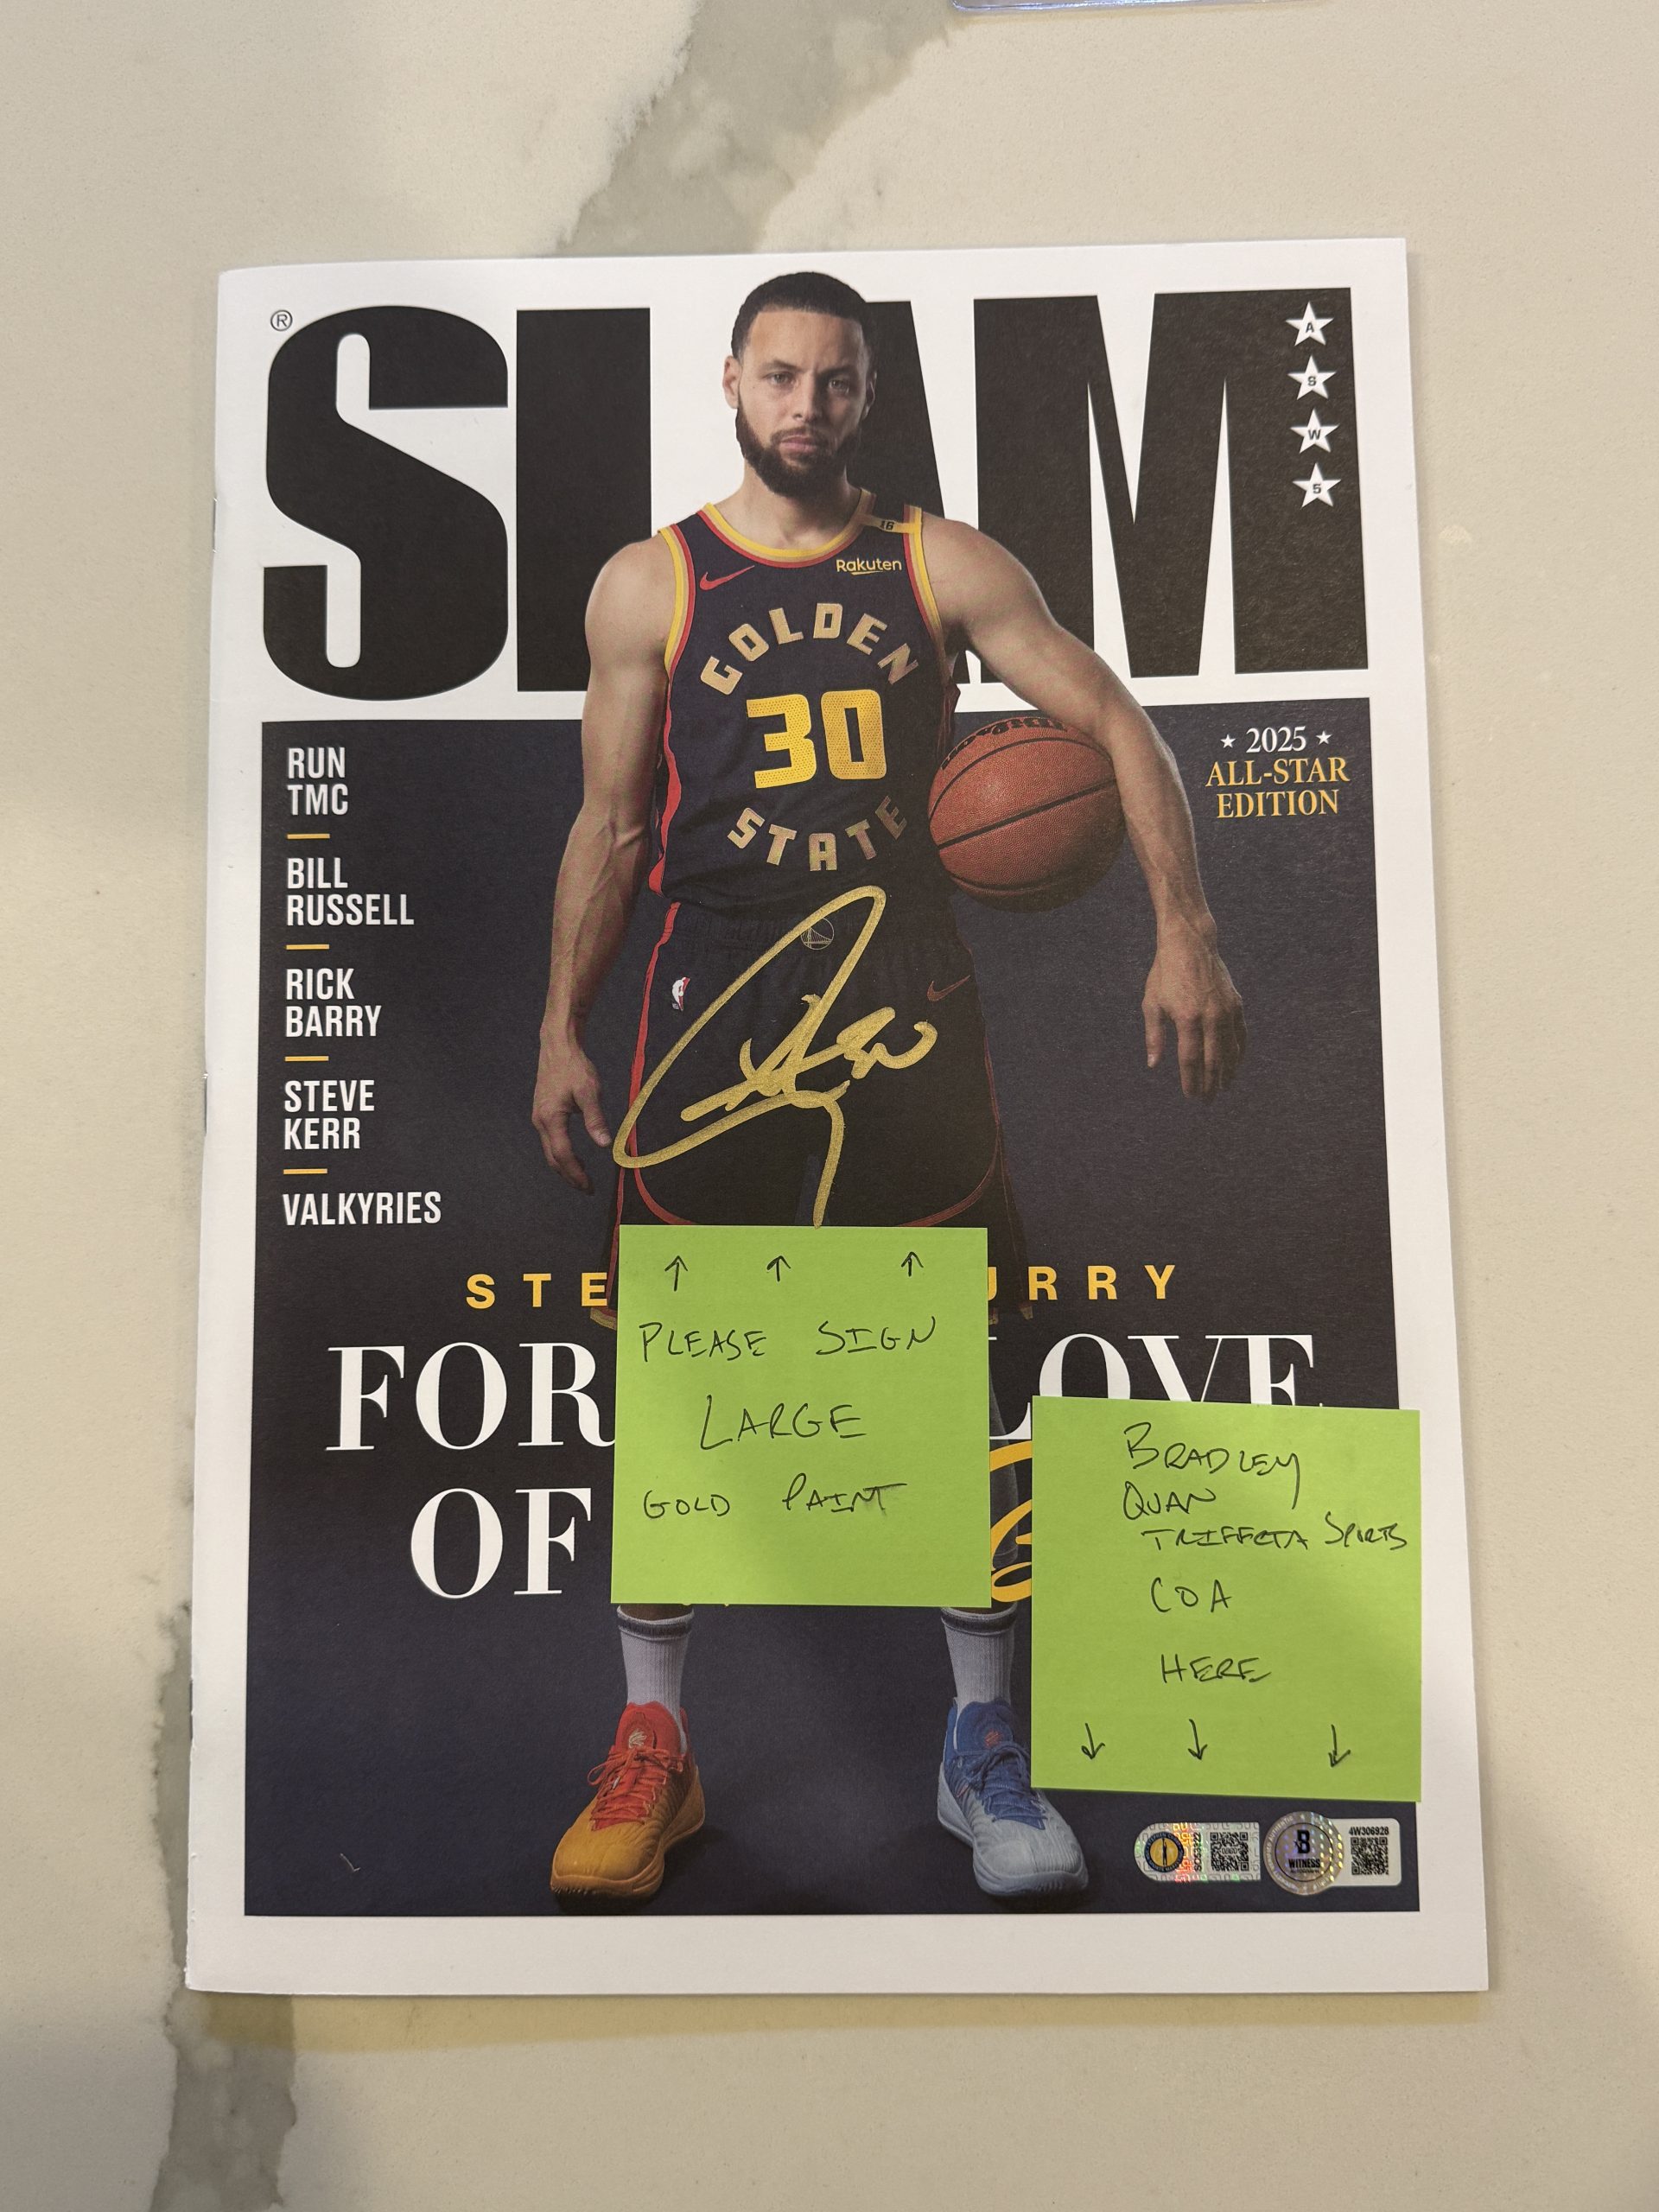
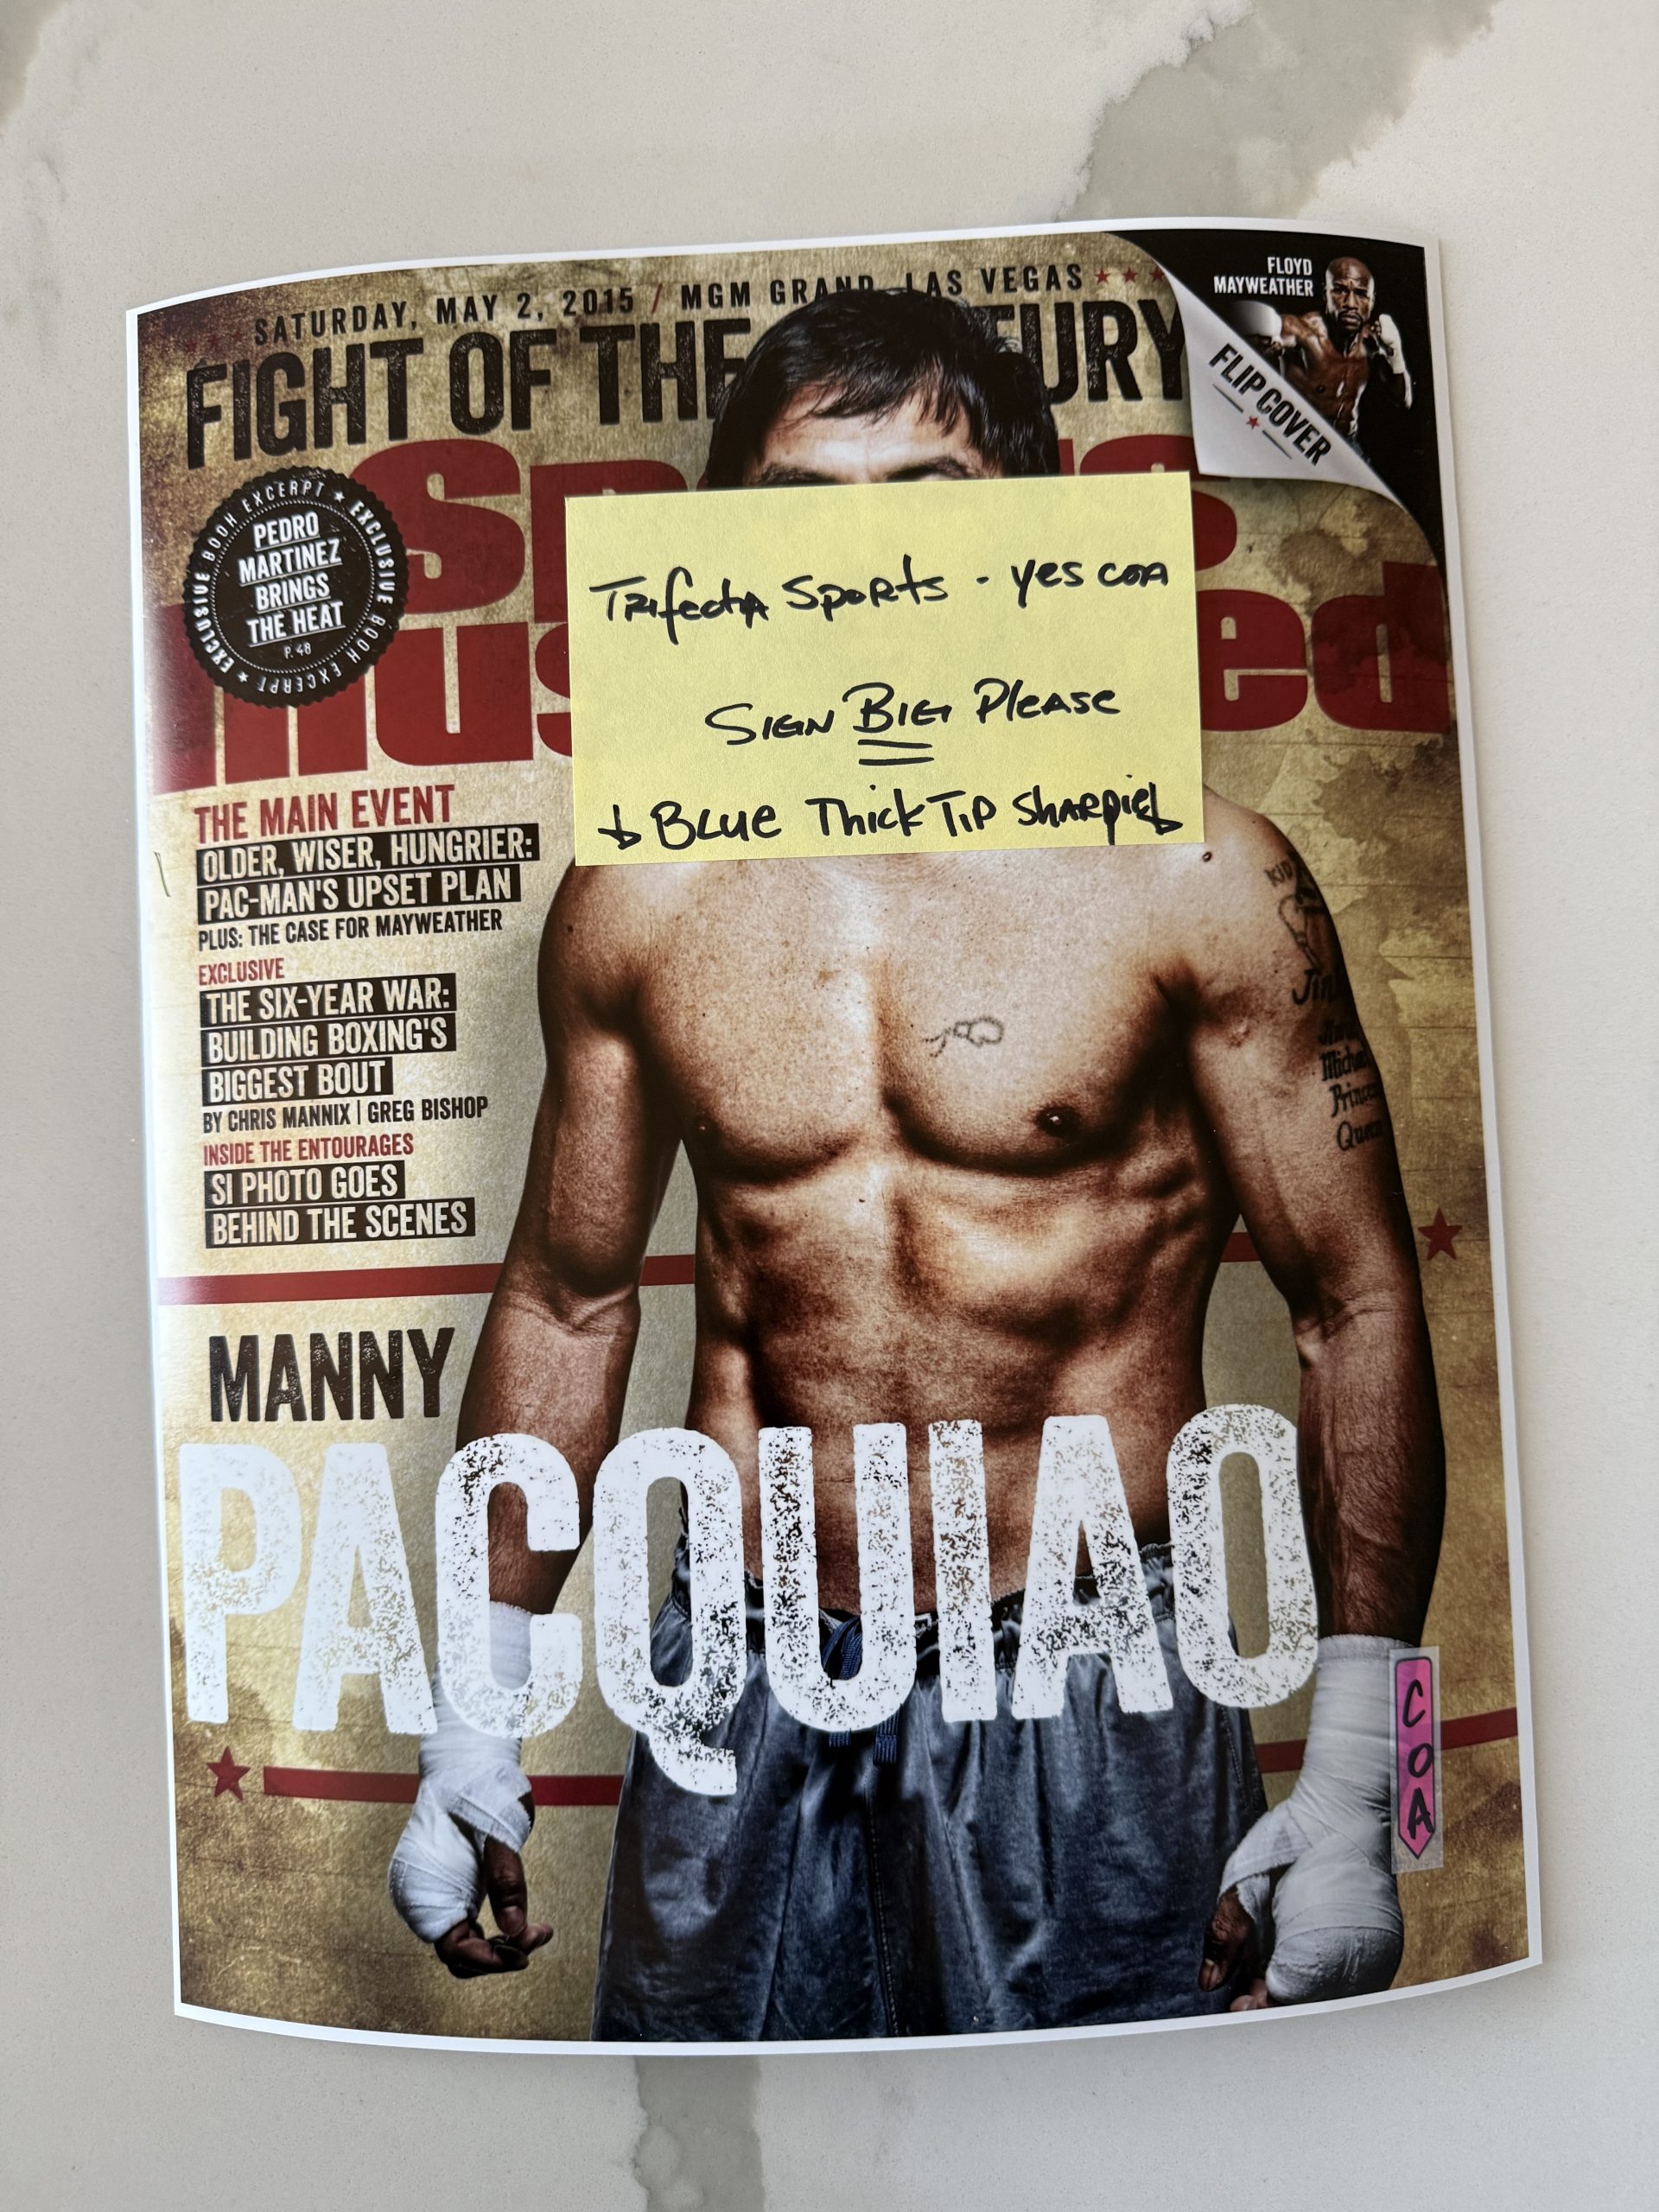
Labeling Your Items
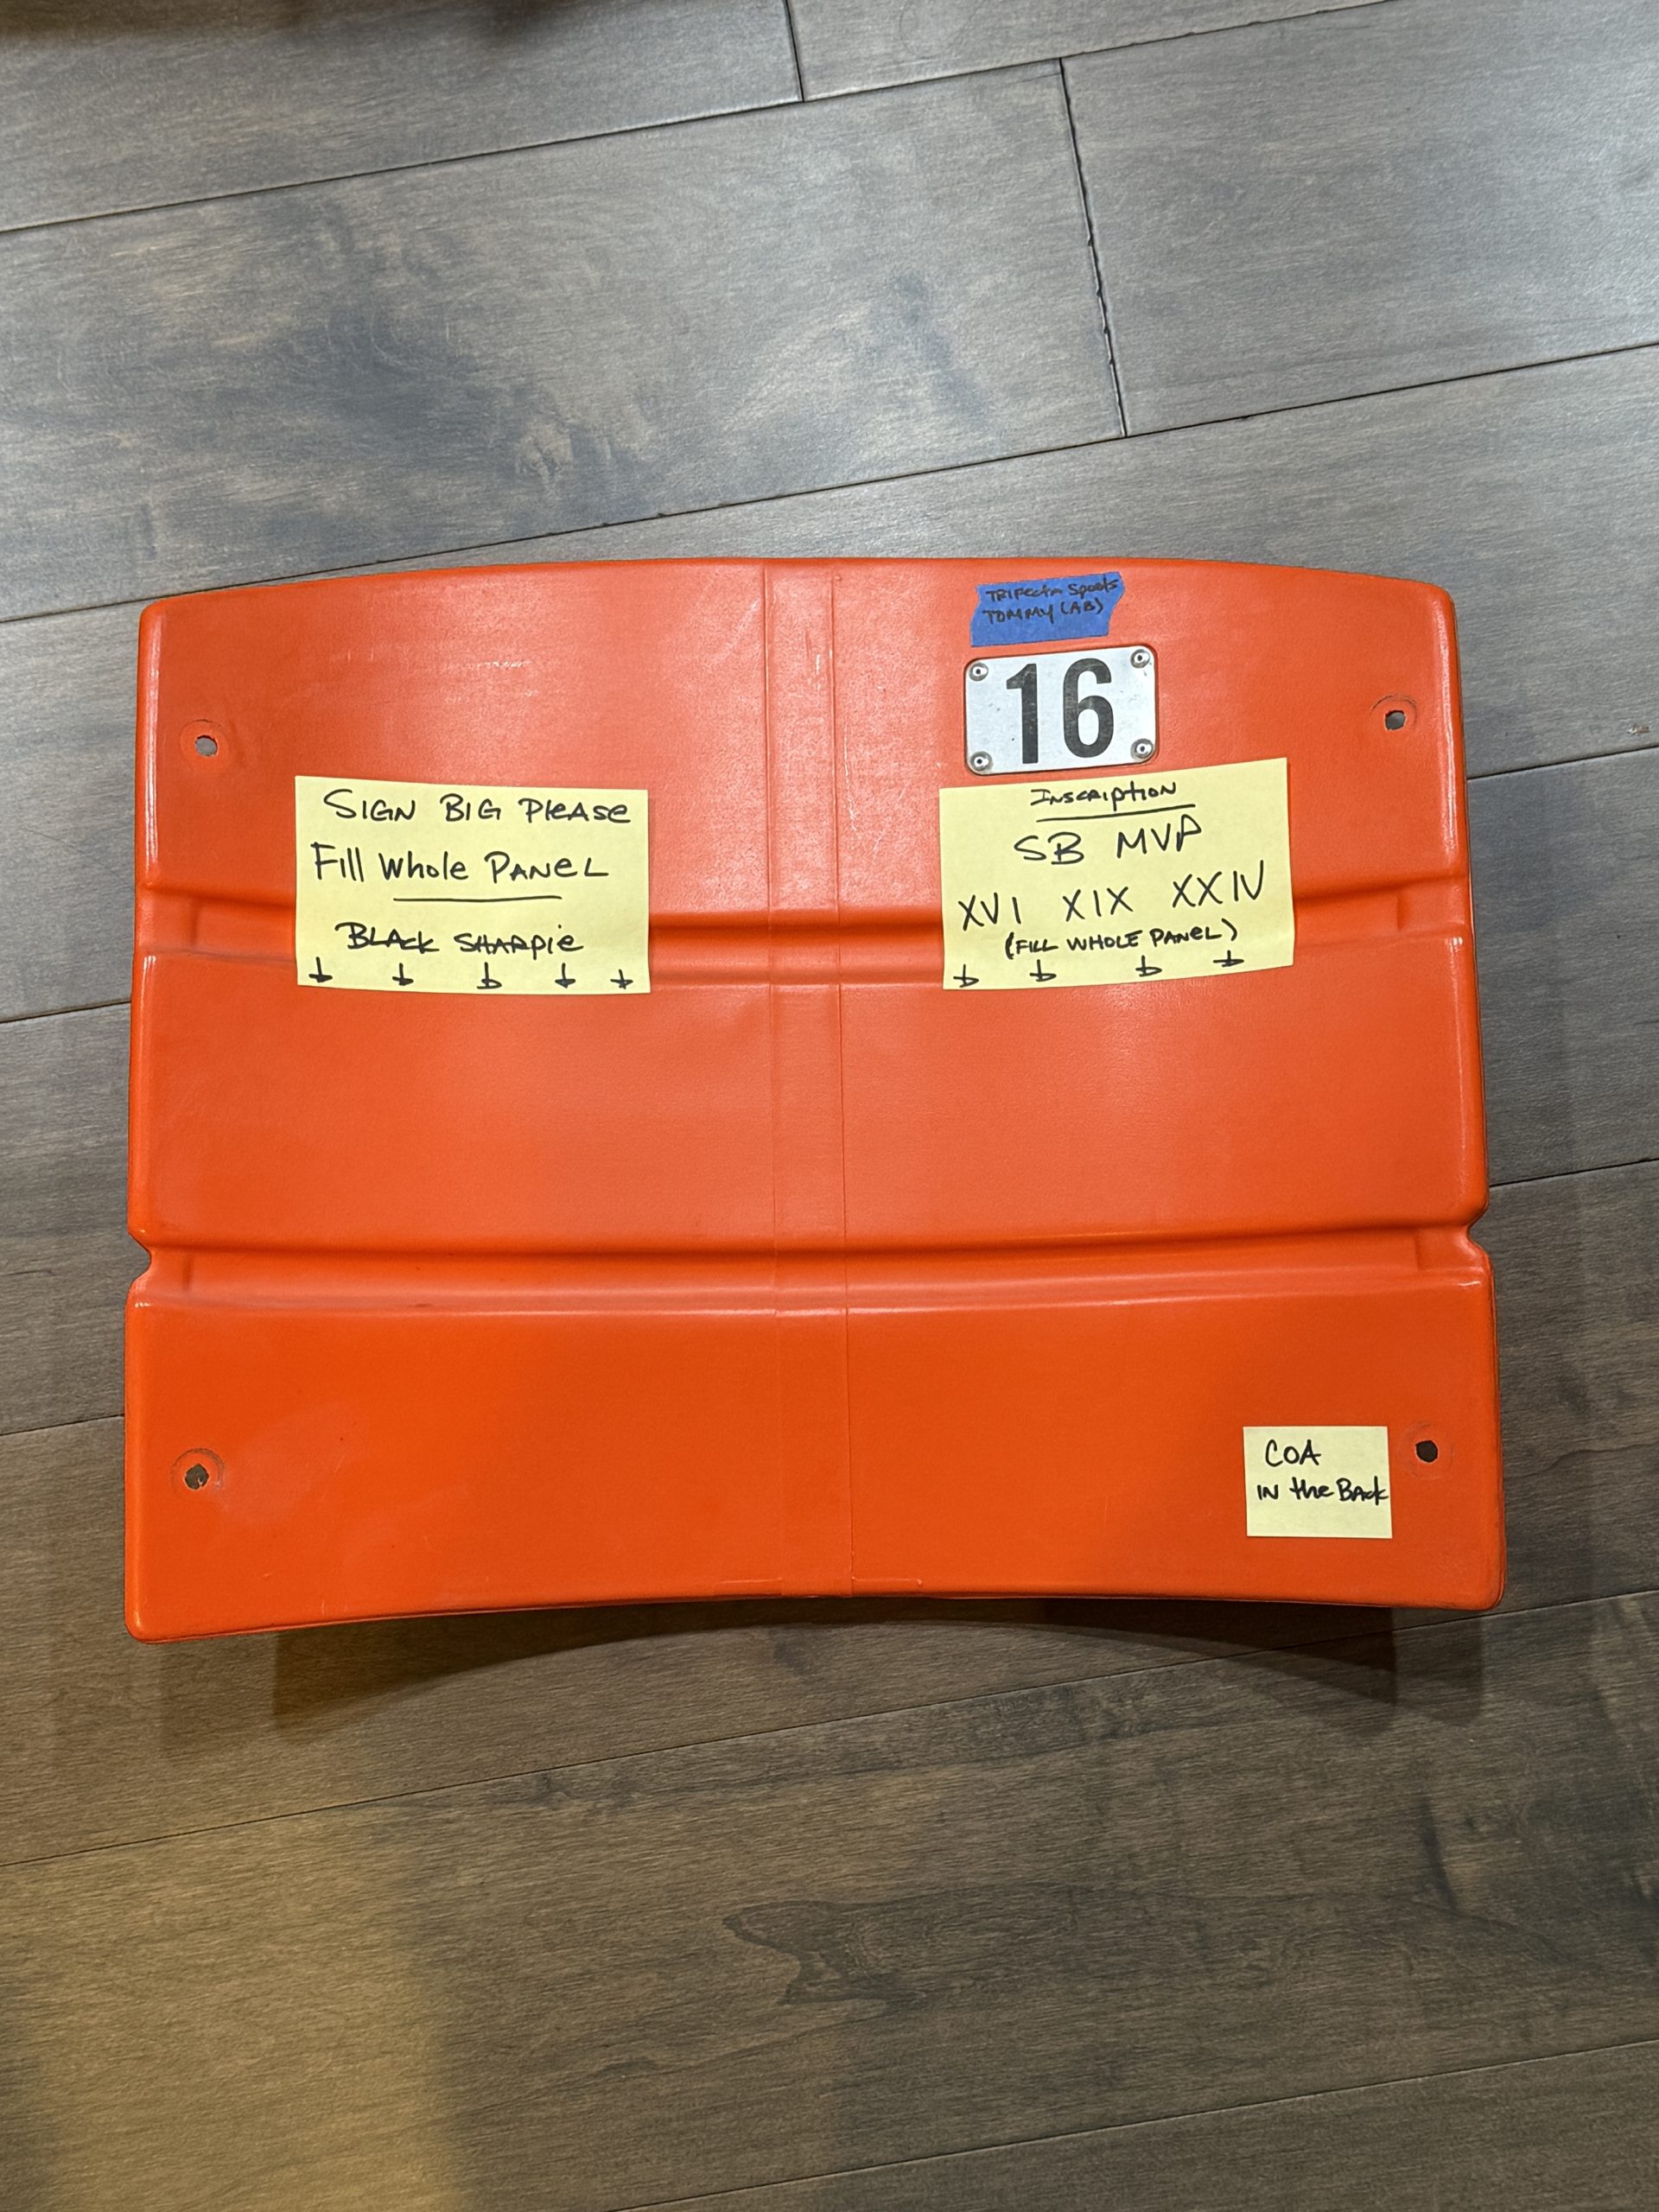
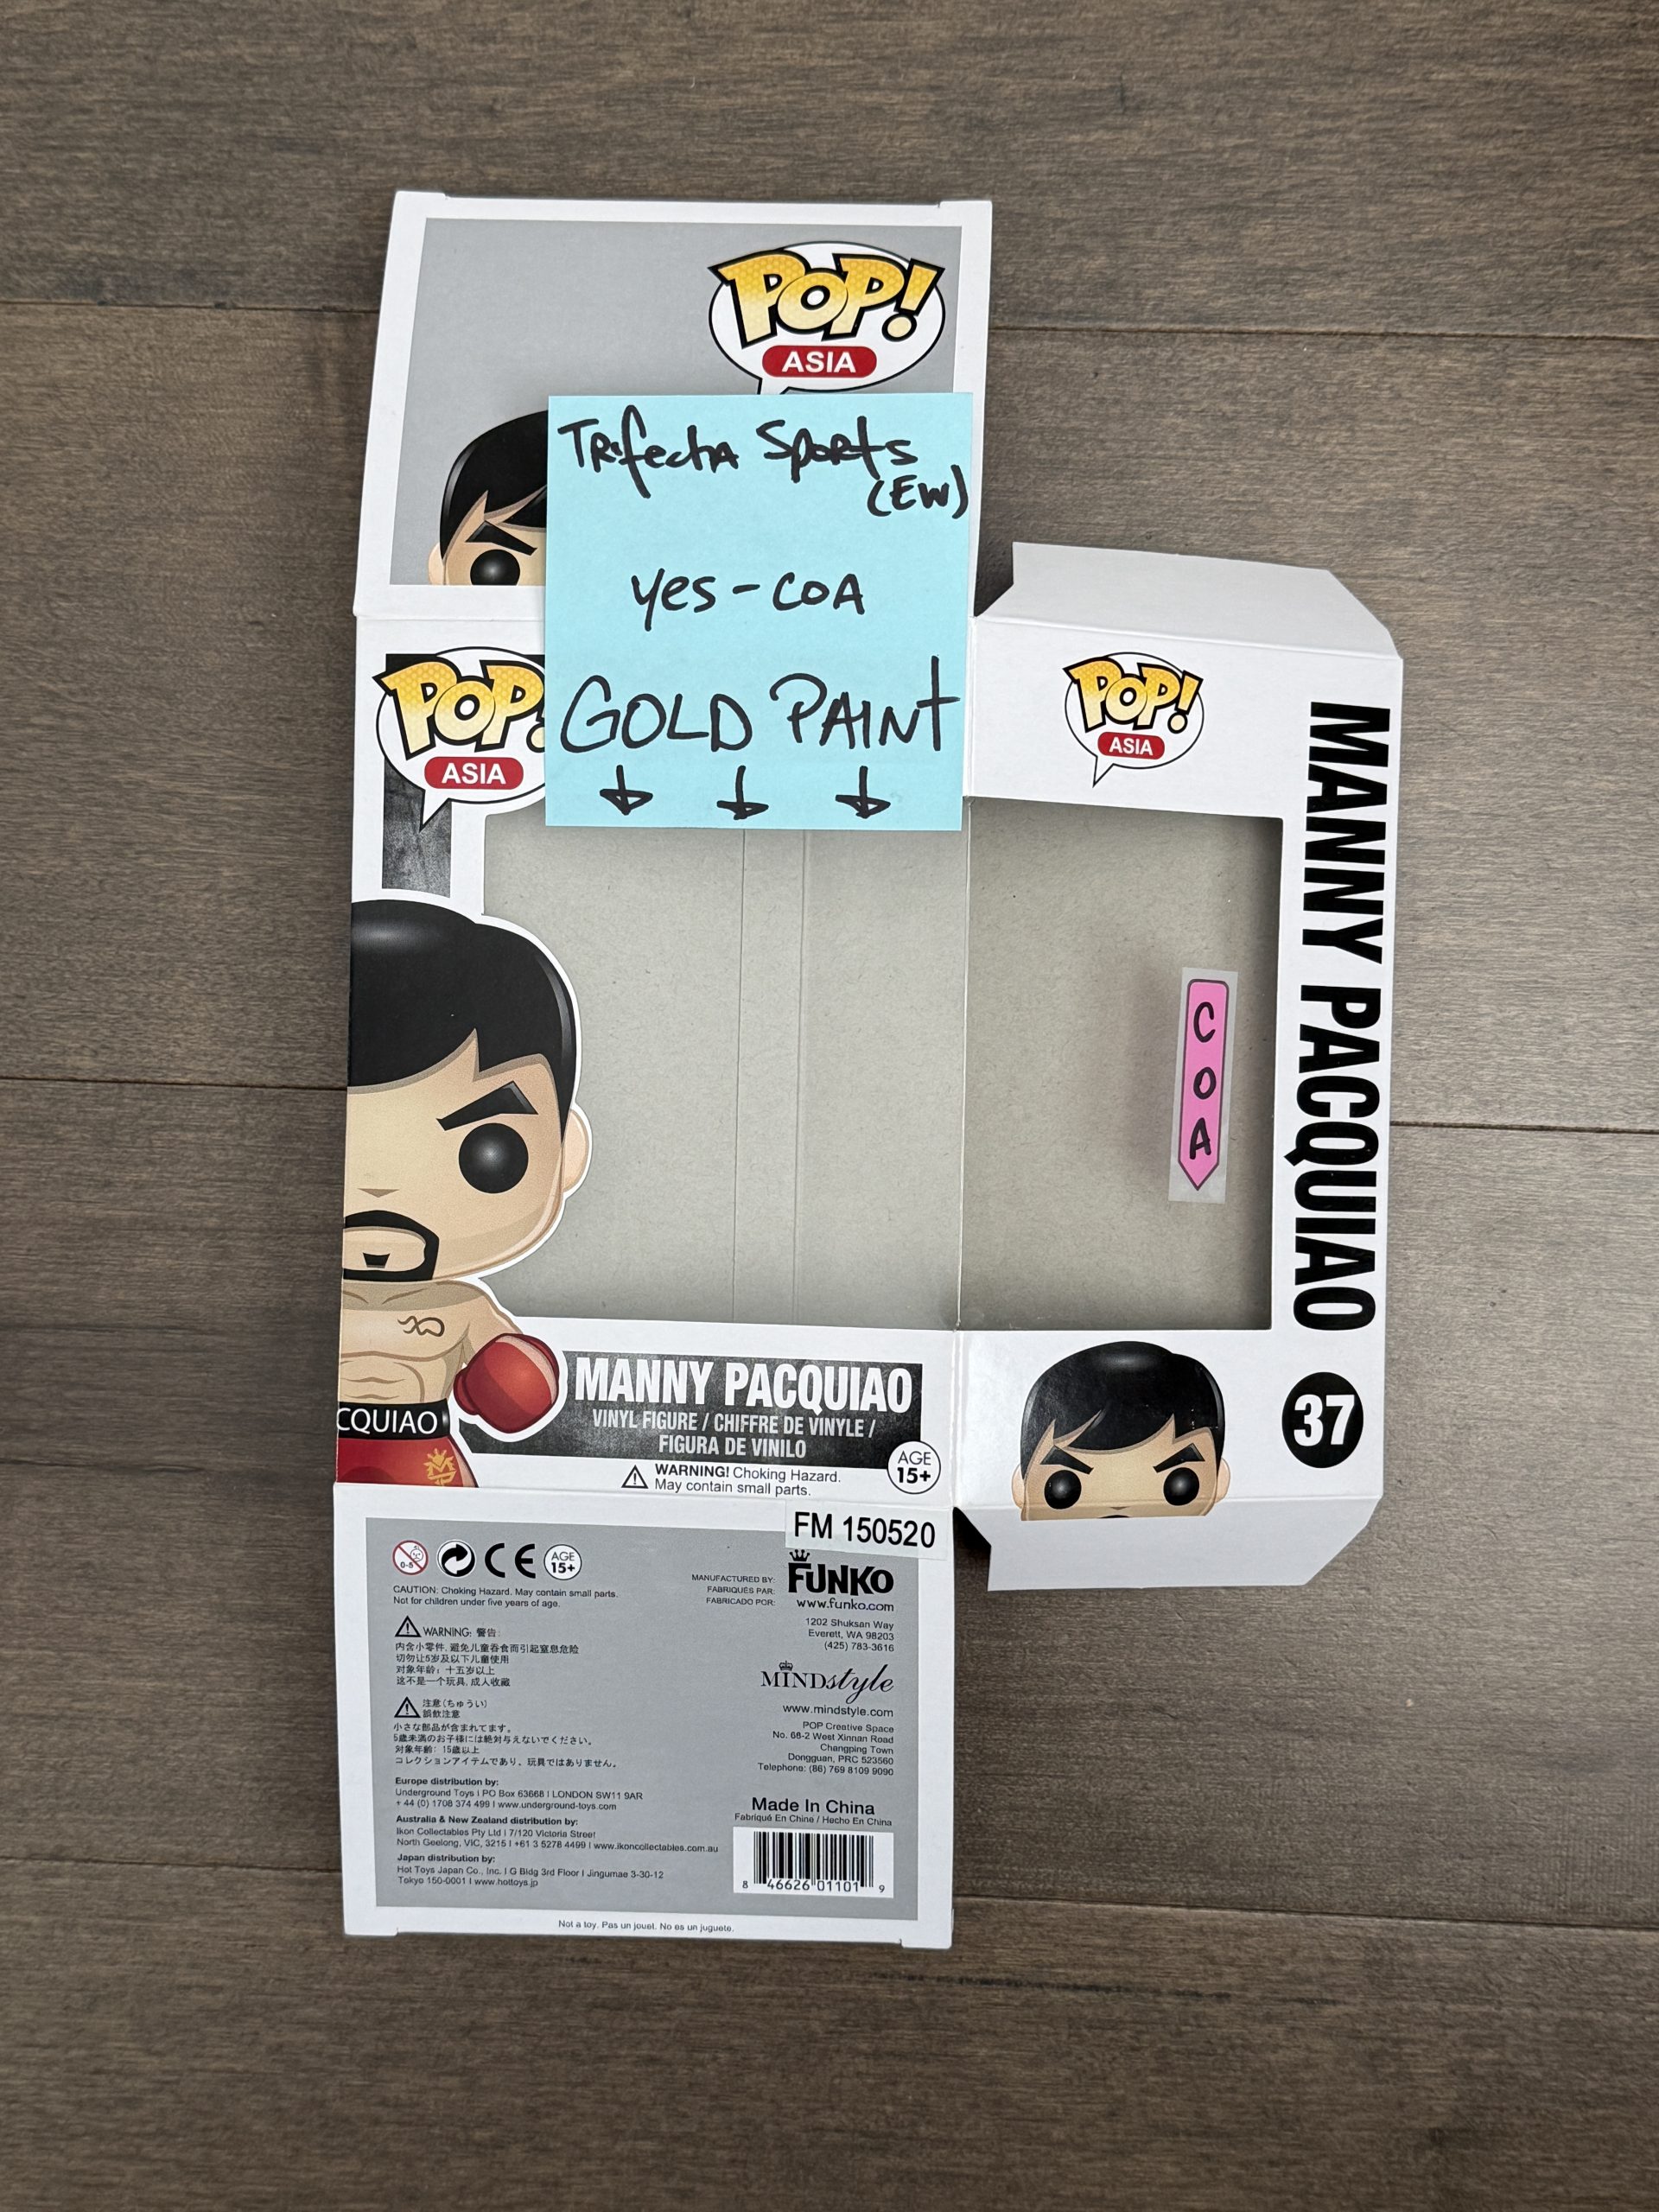
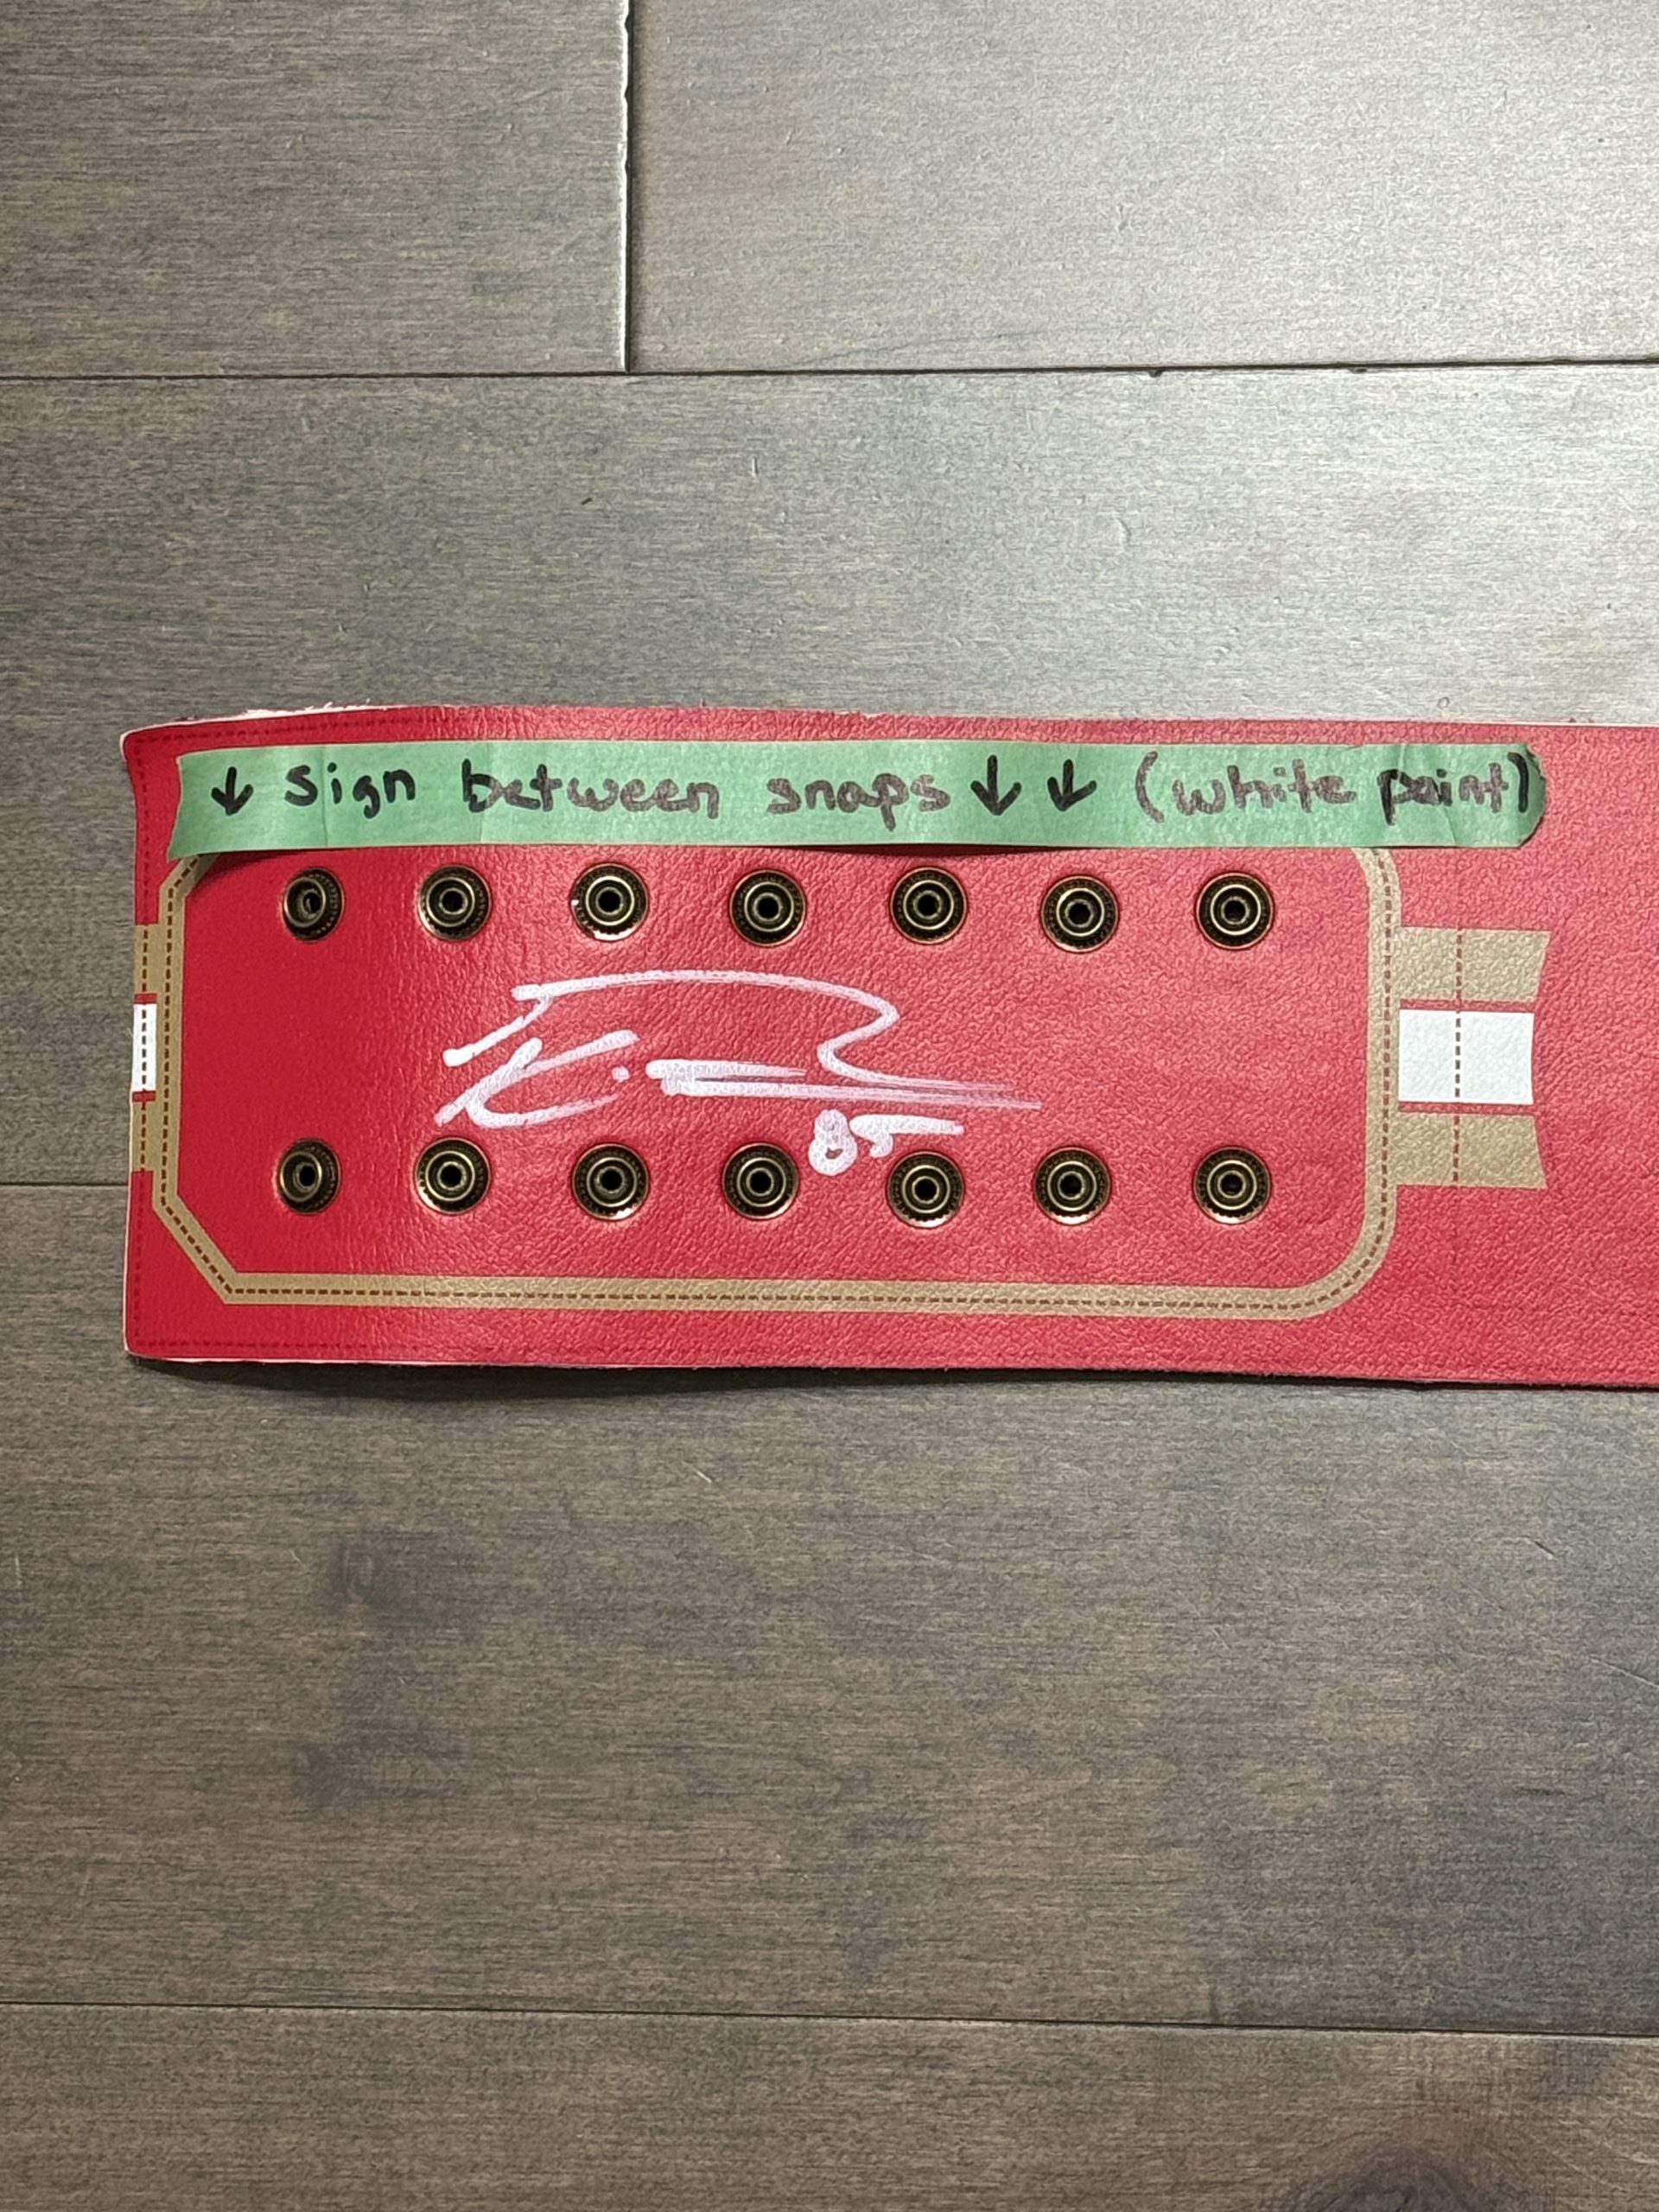
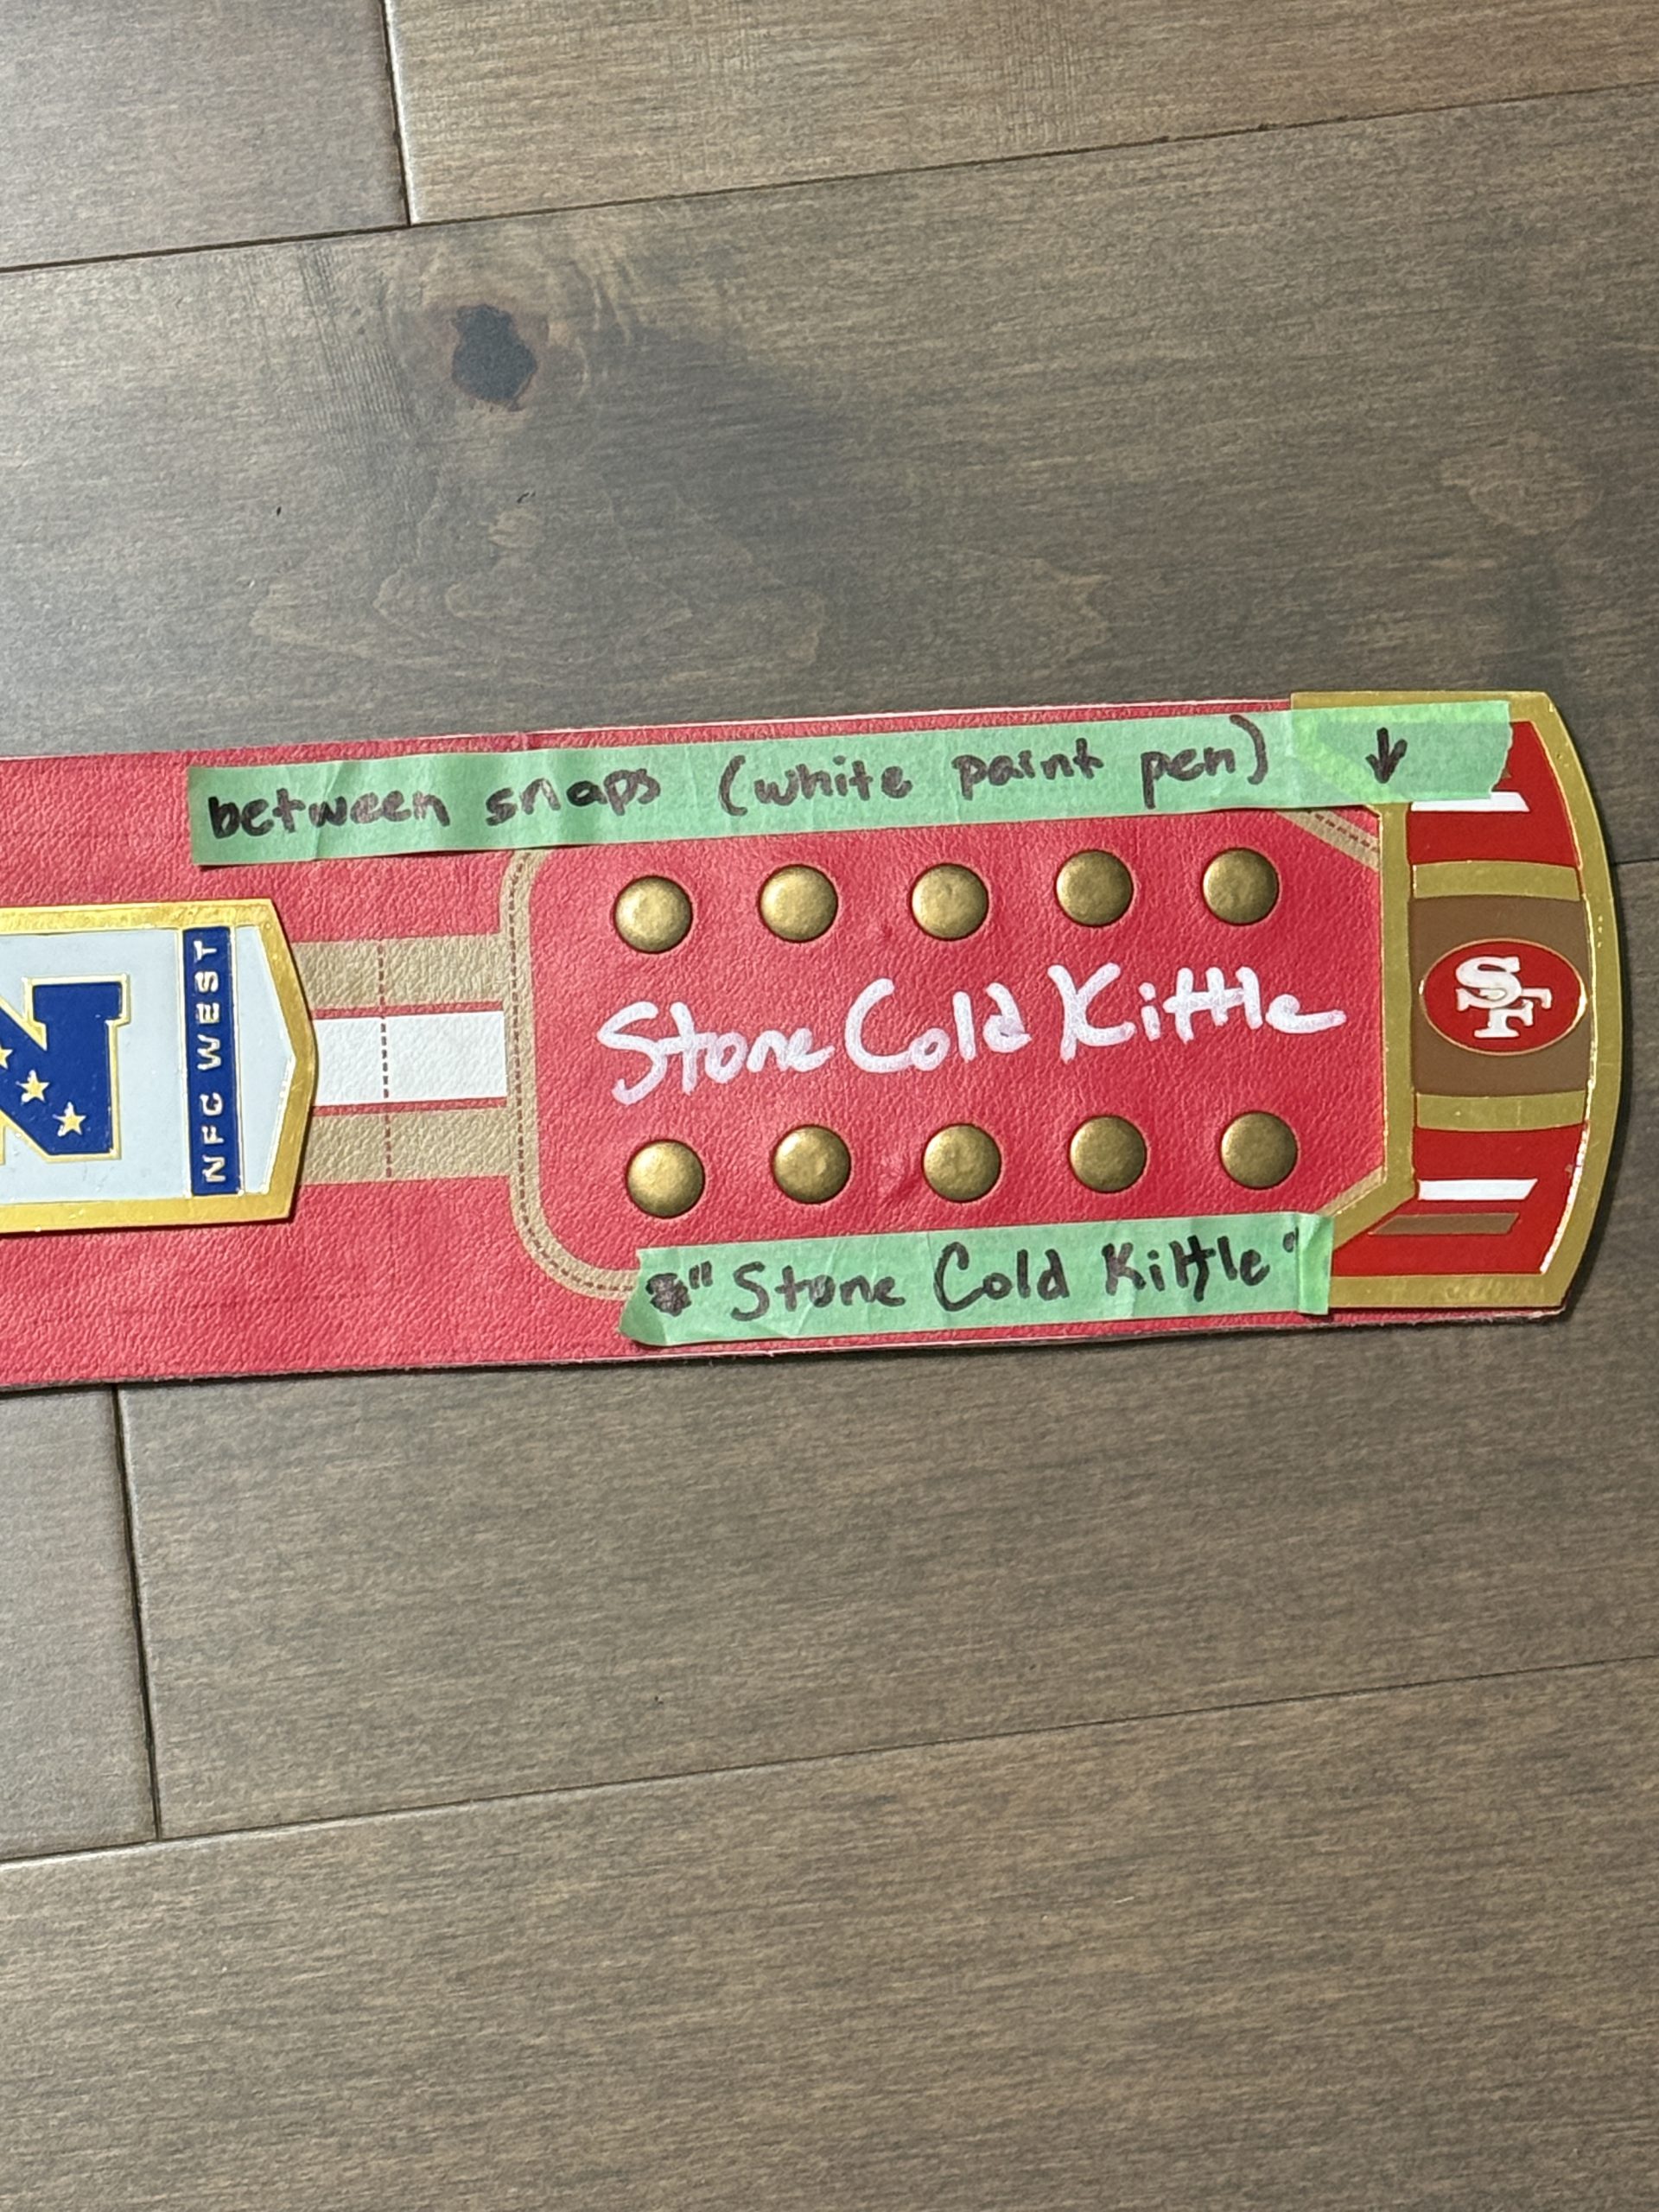
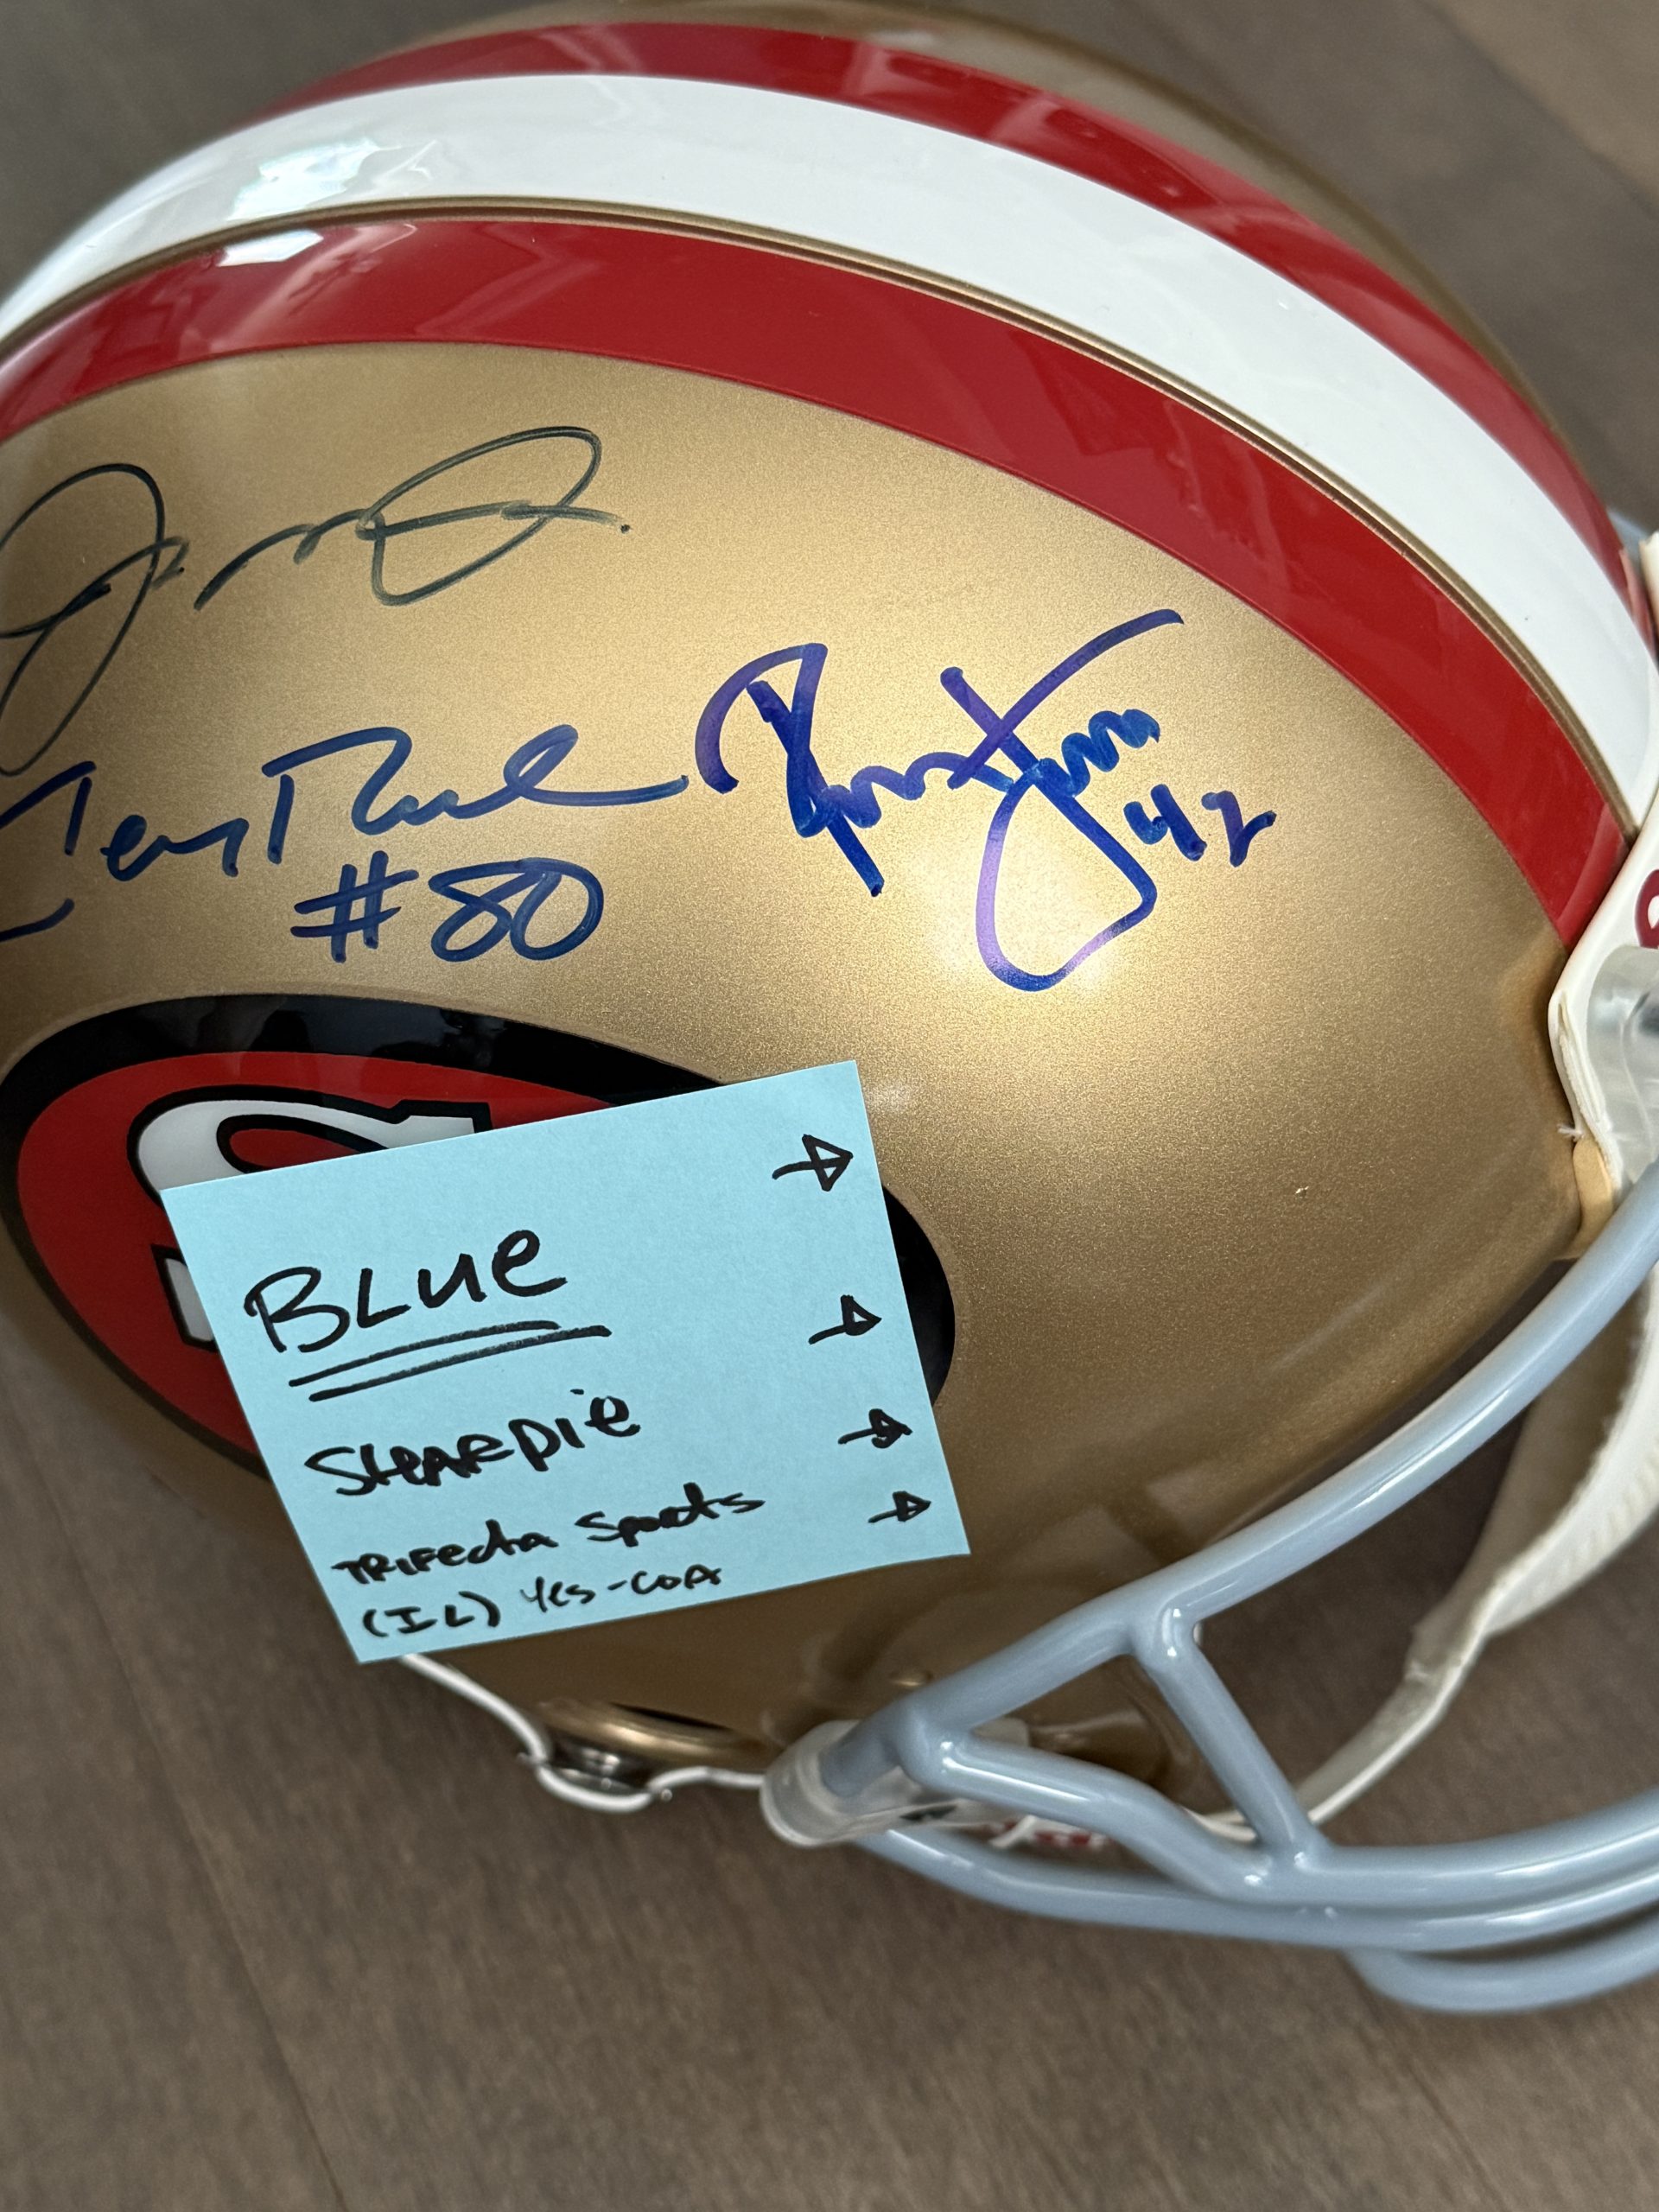
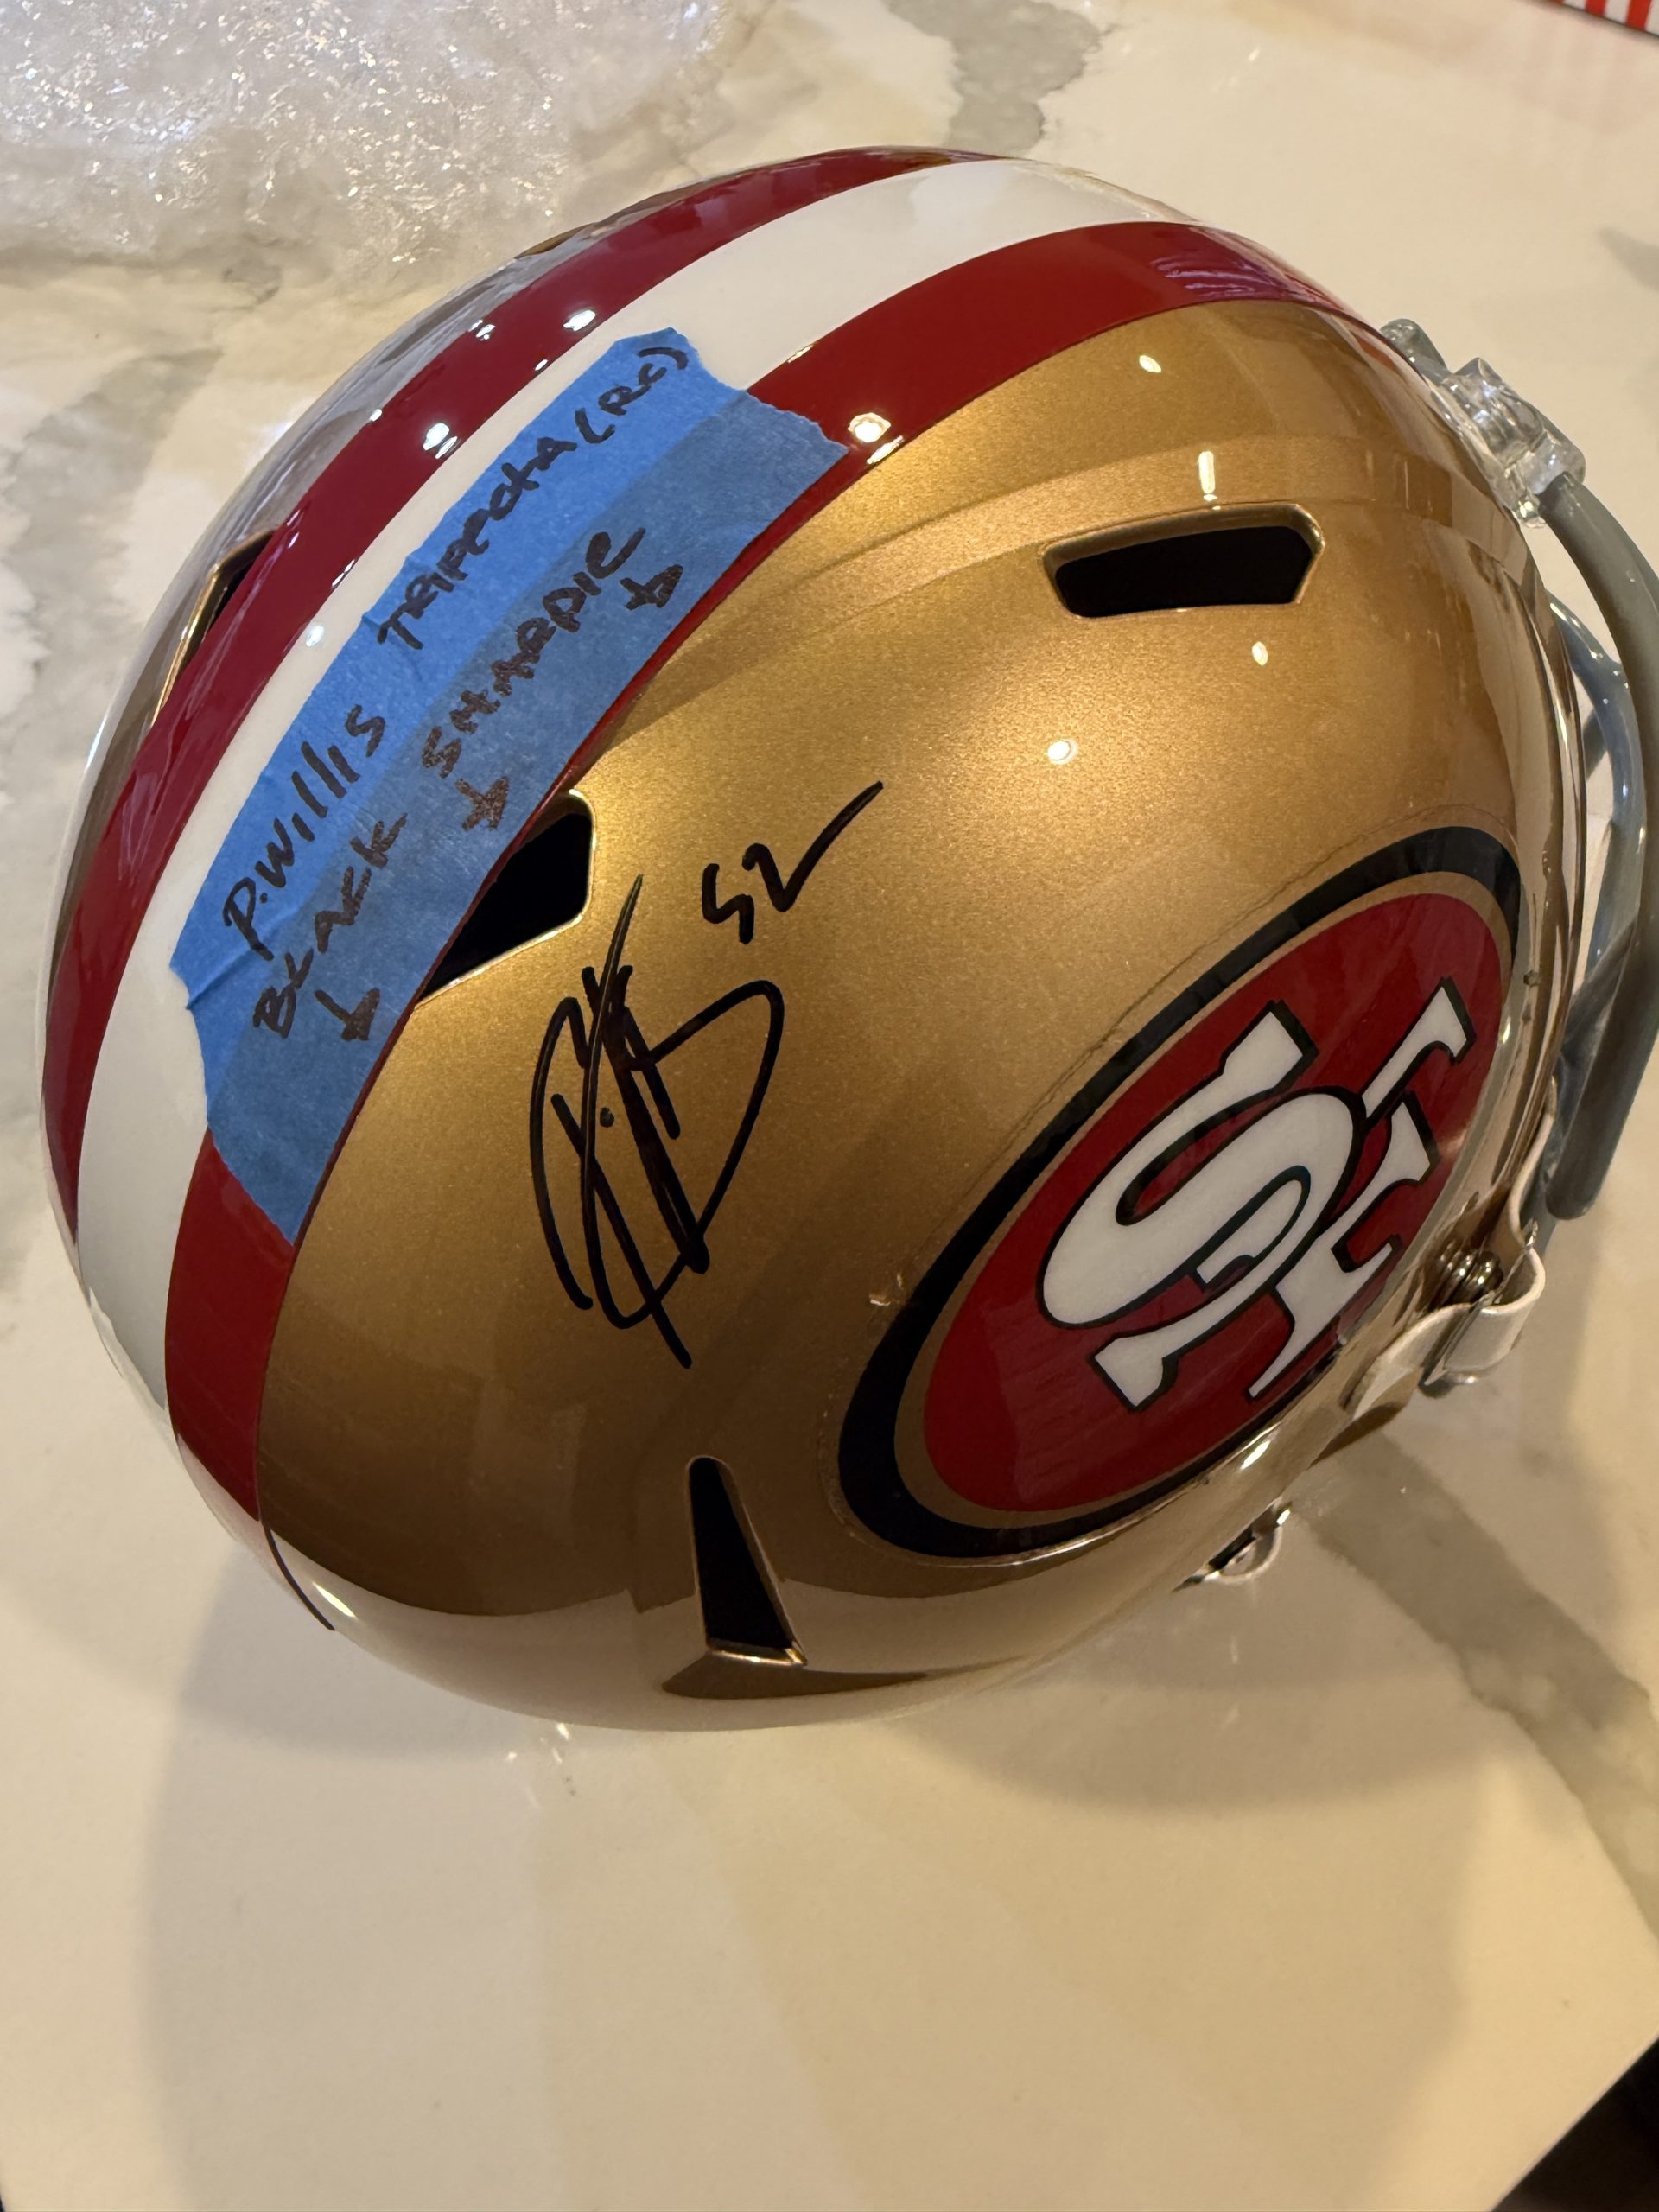
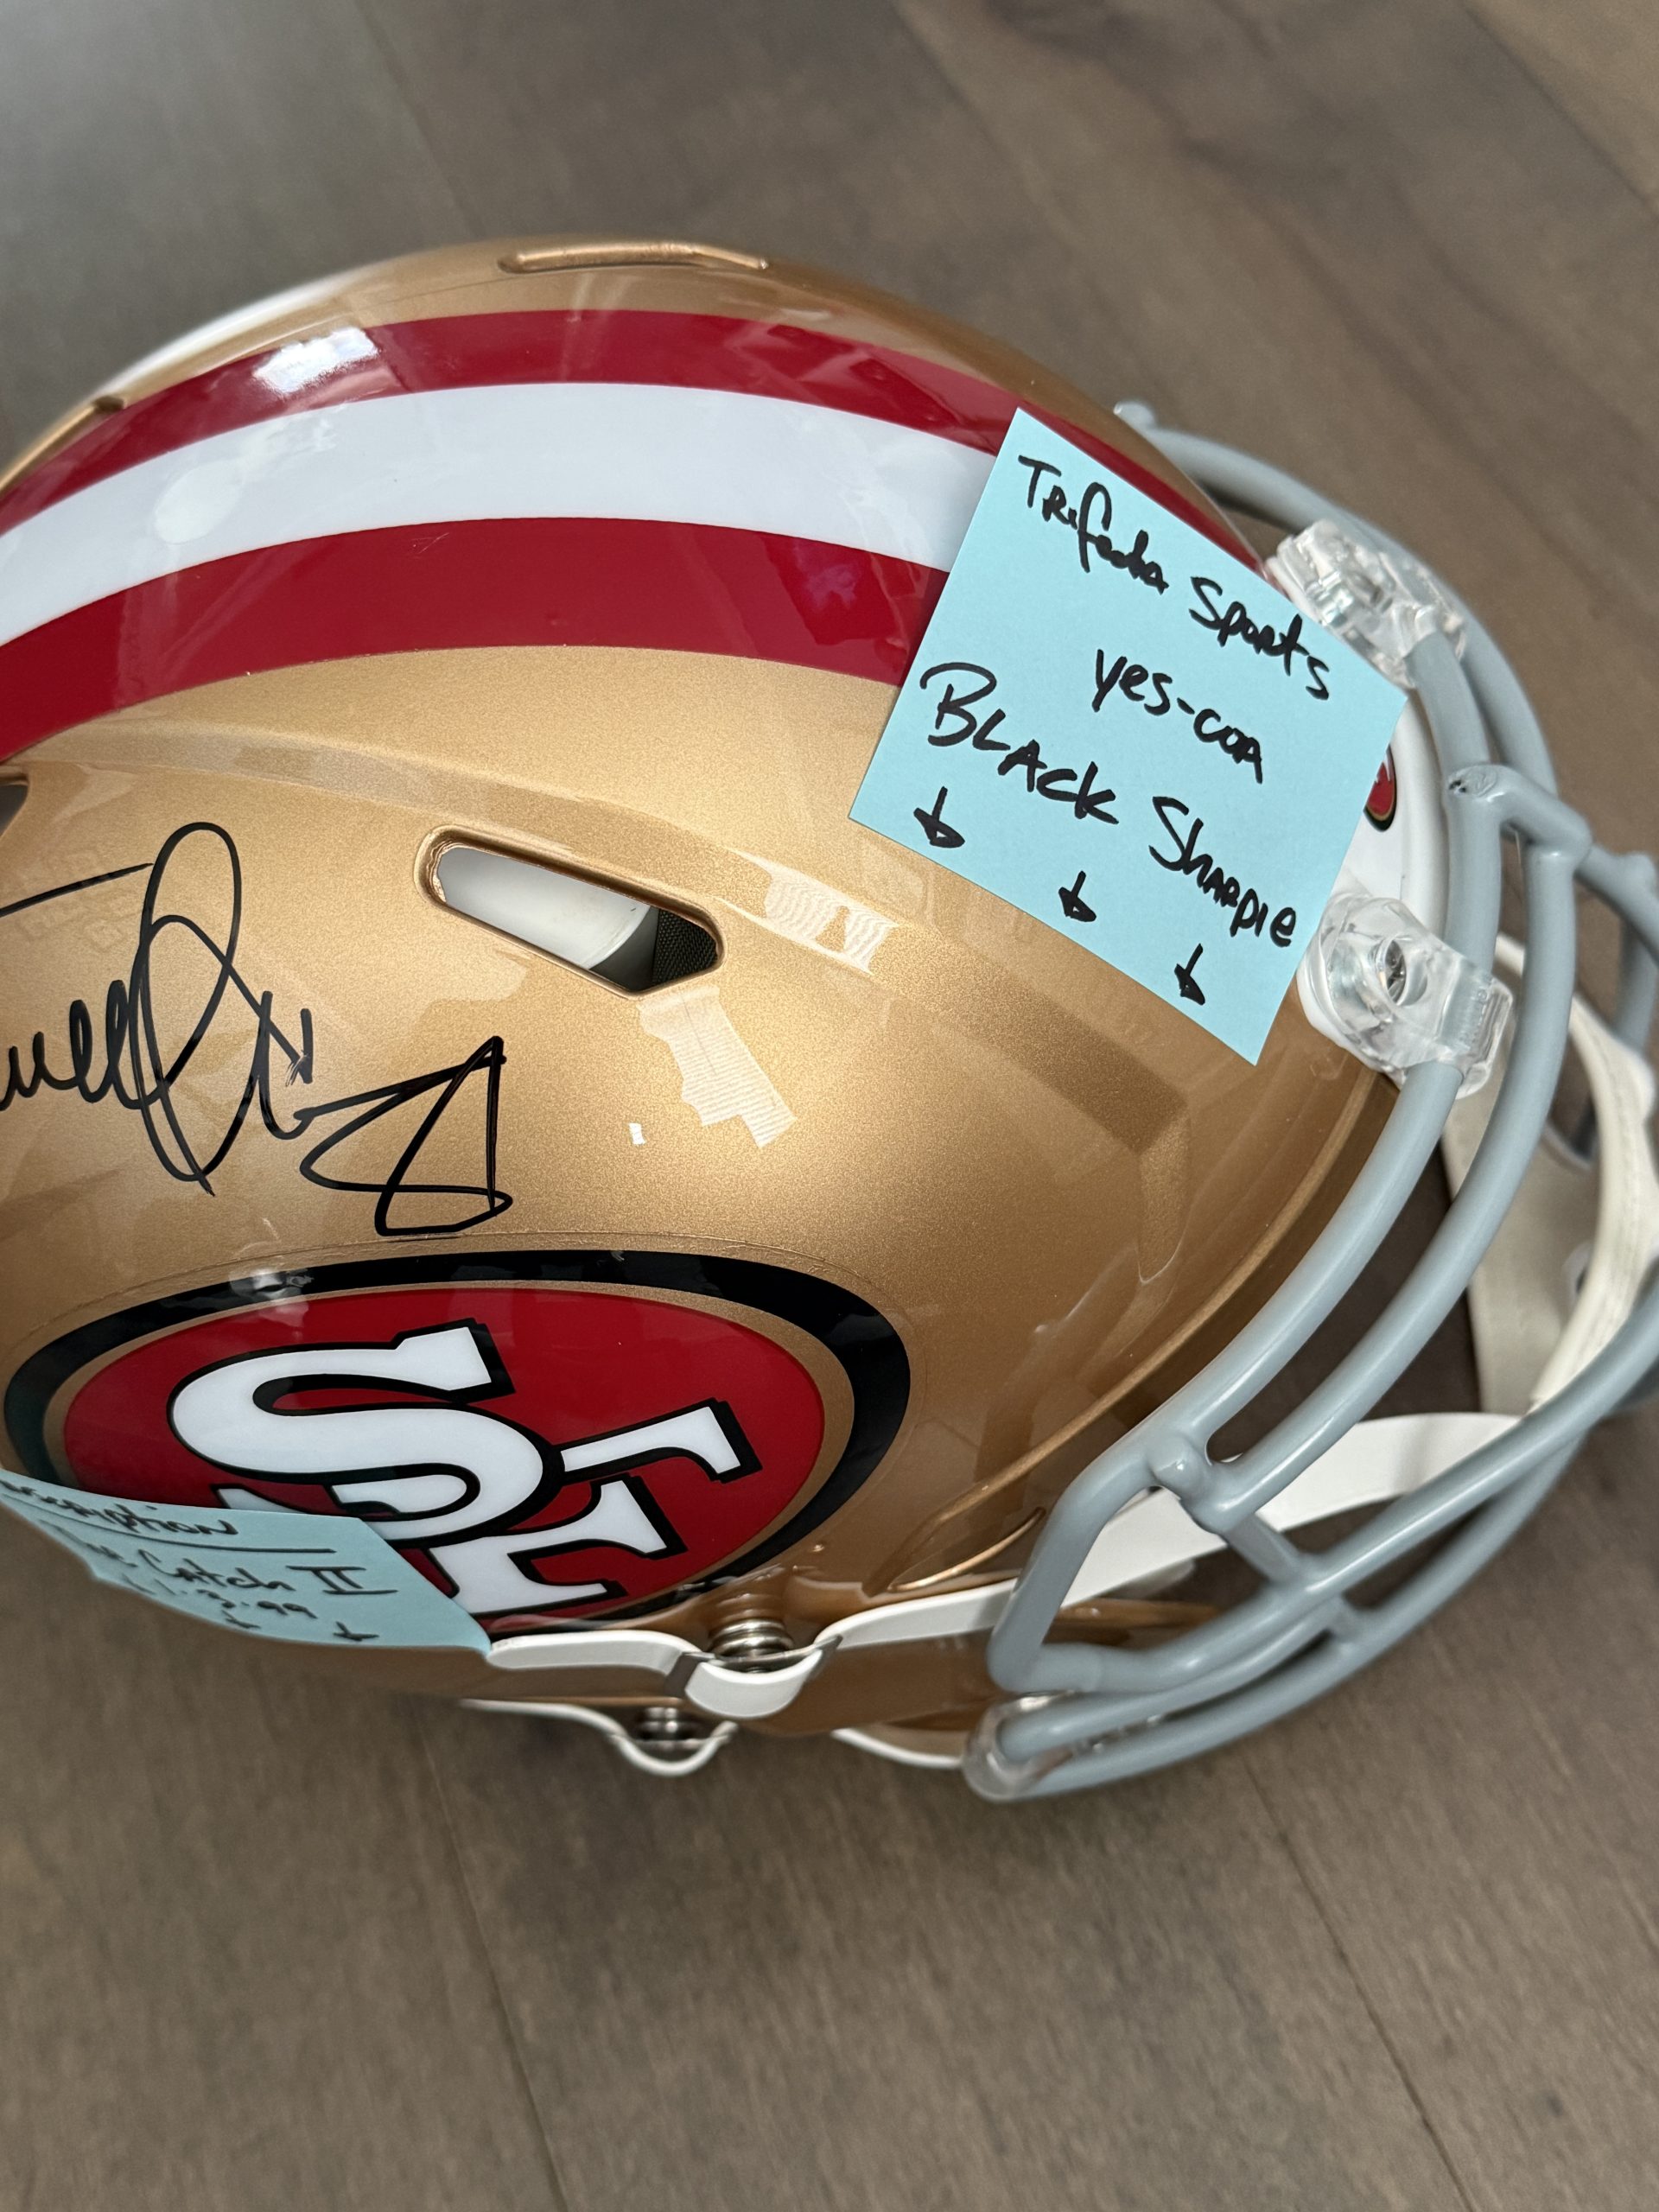
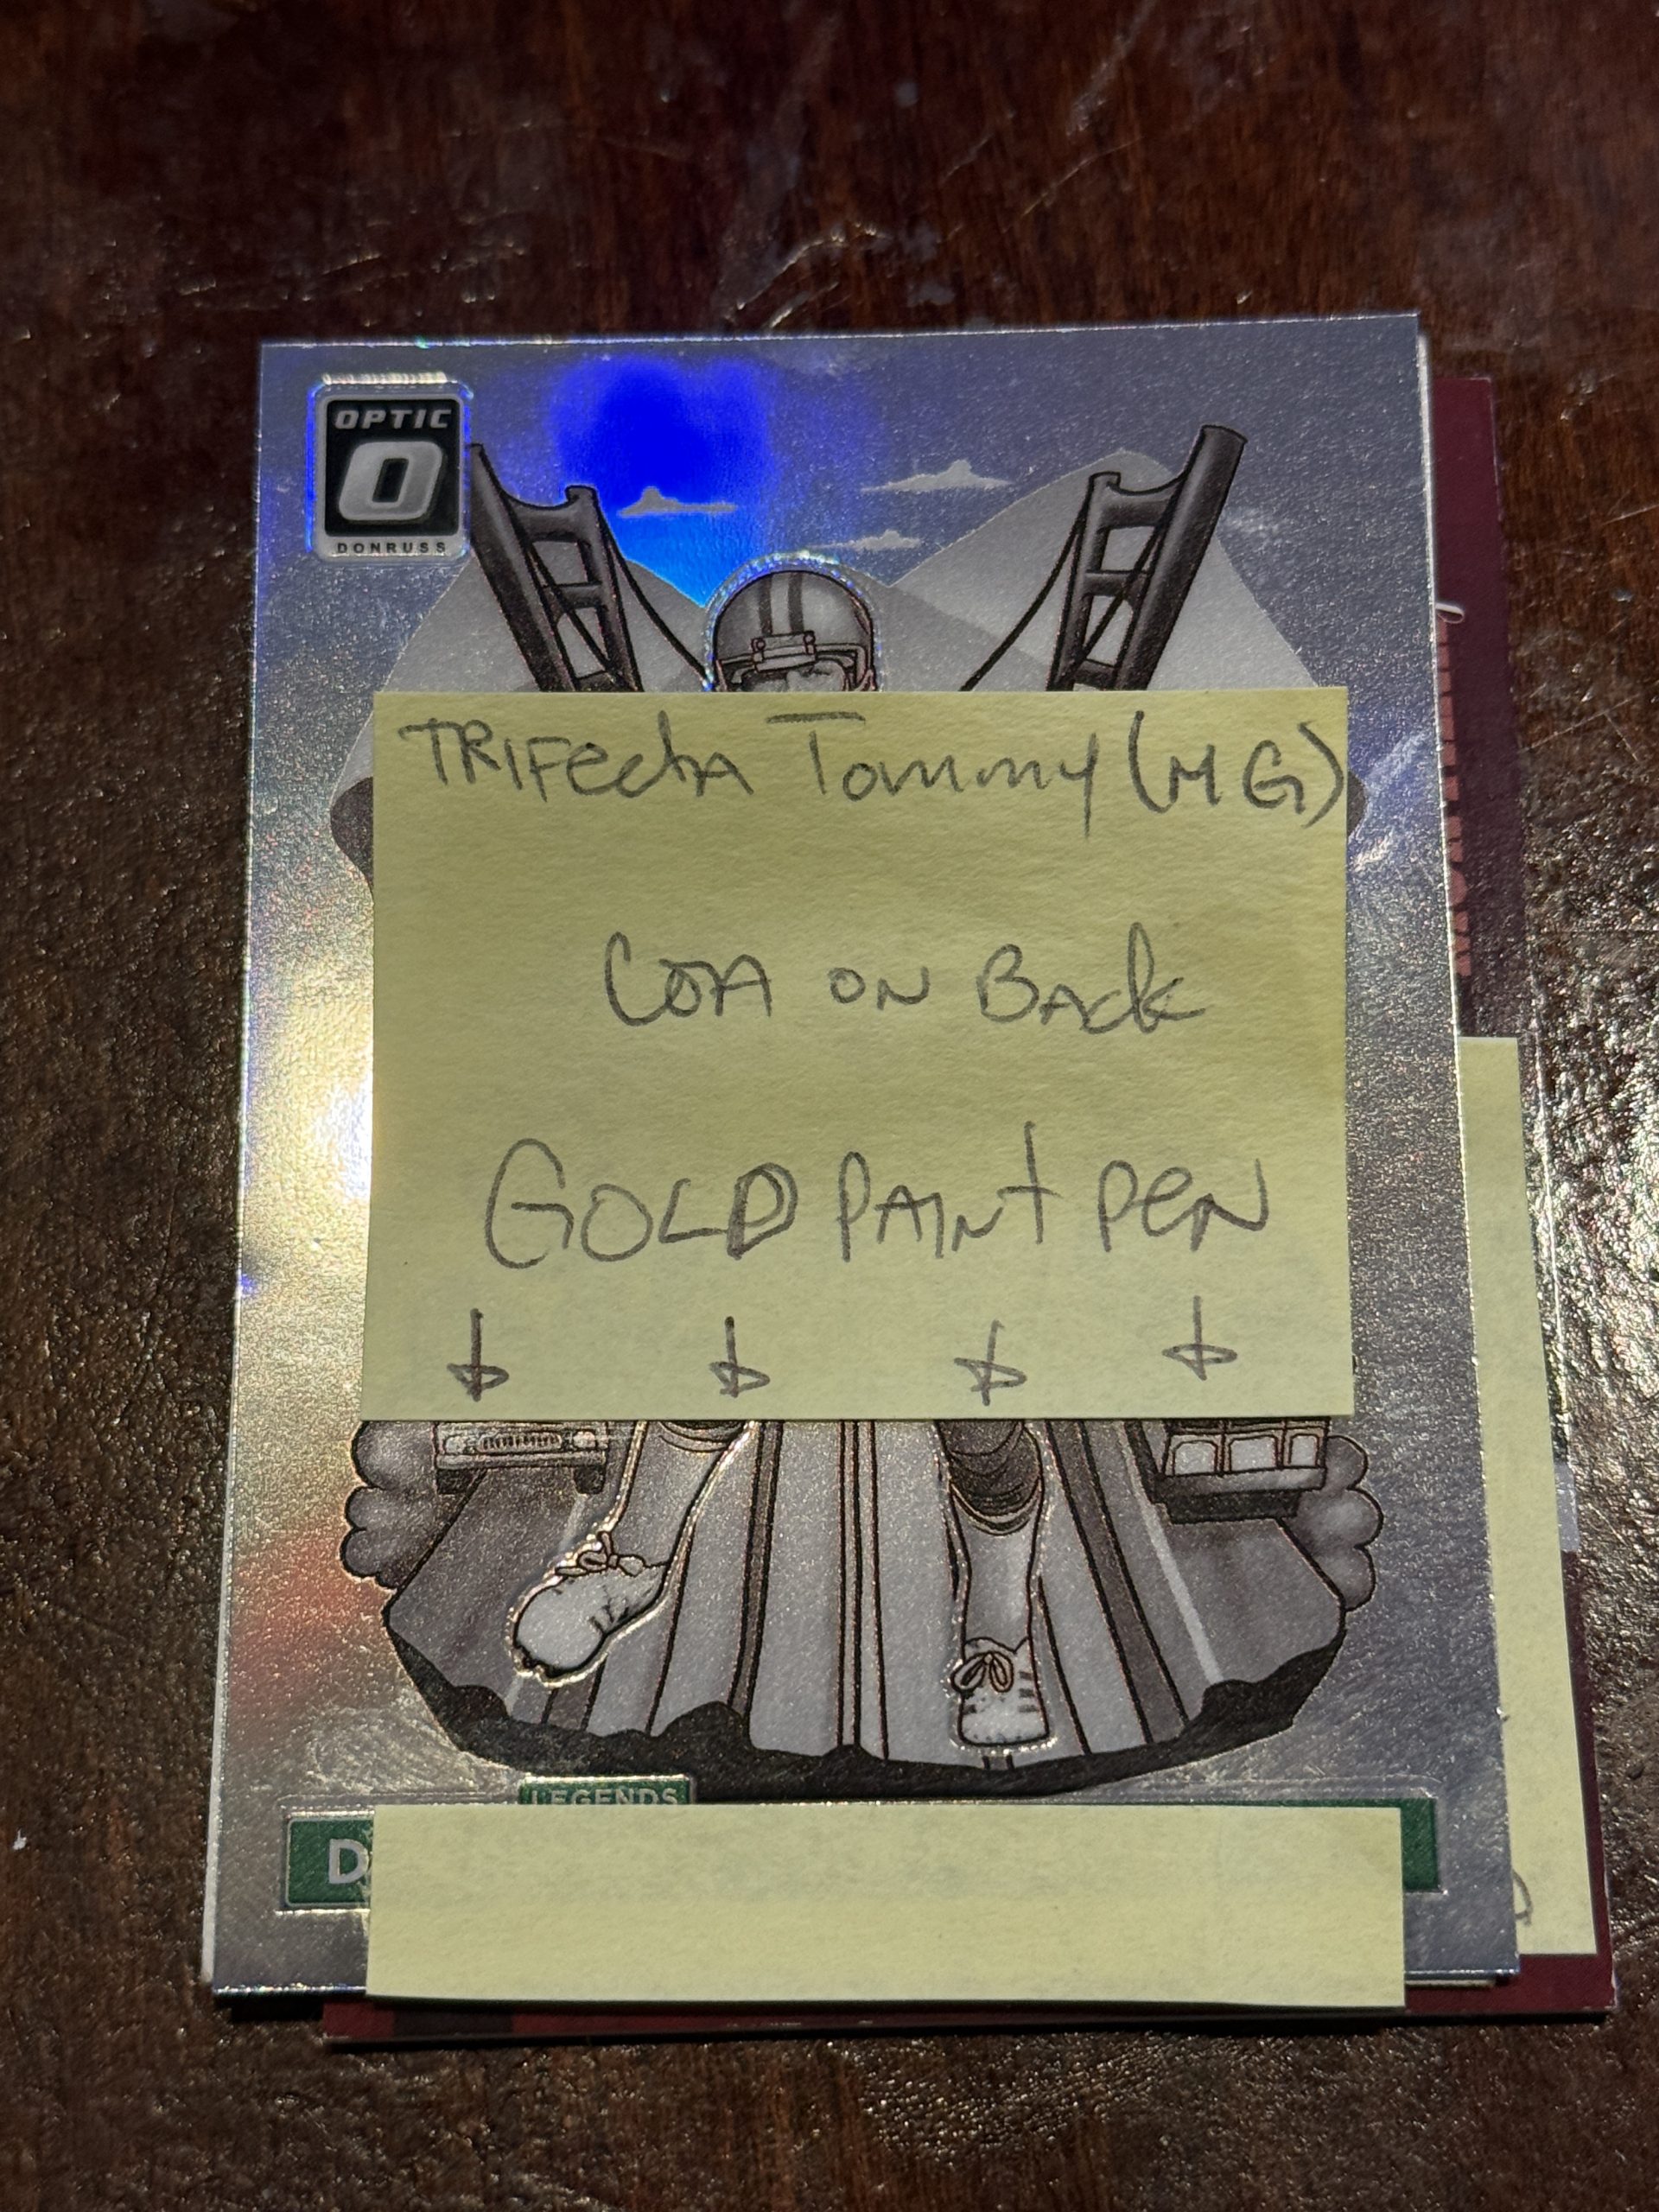
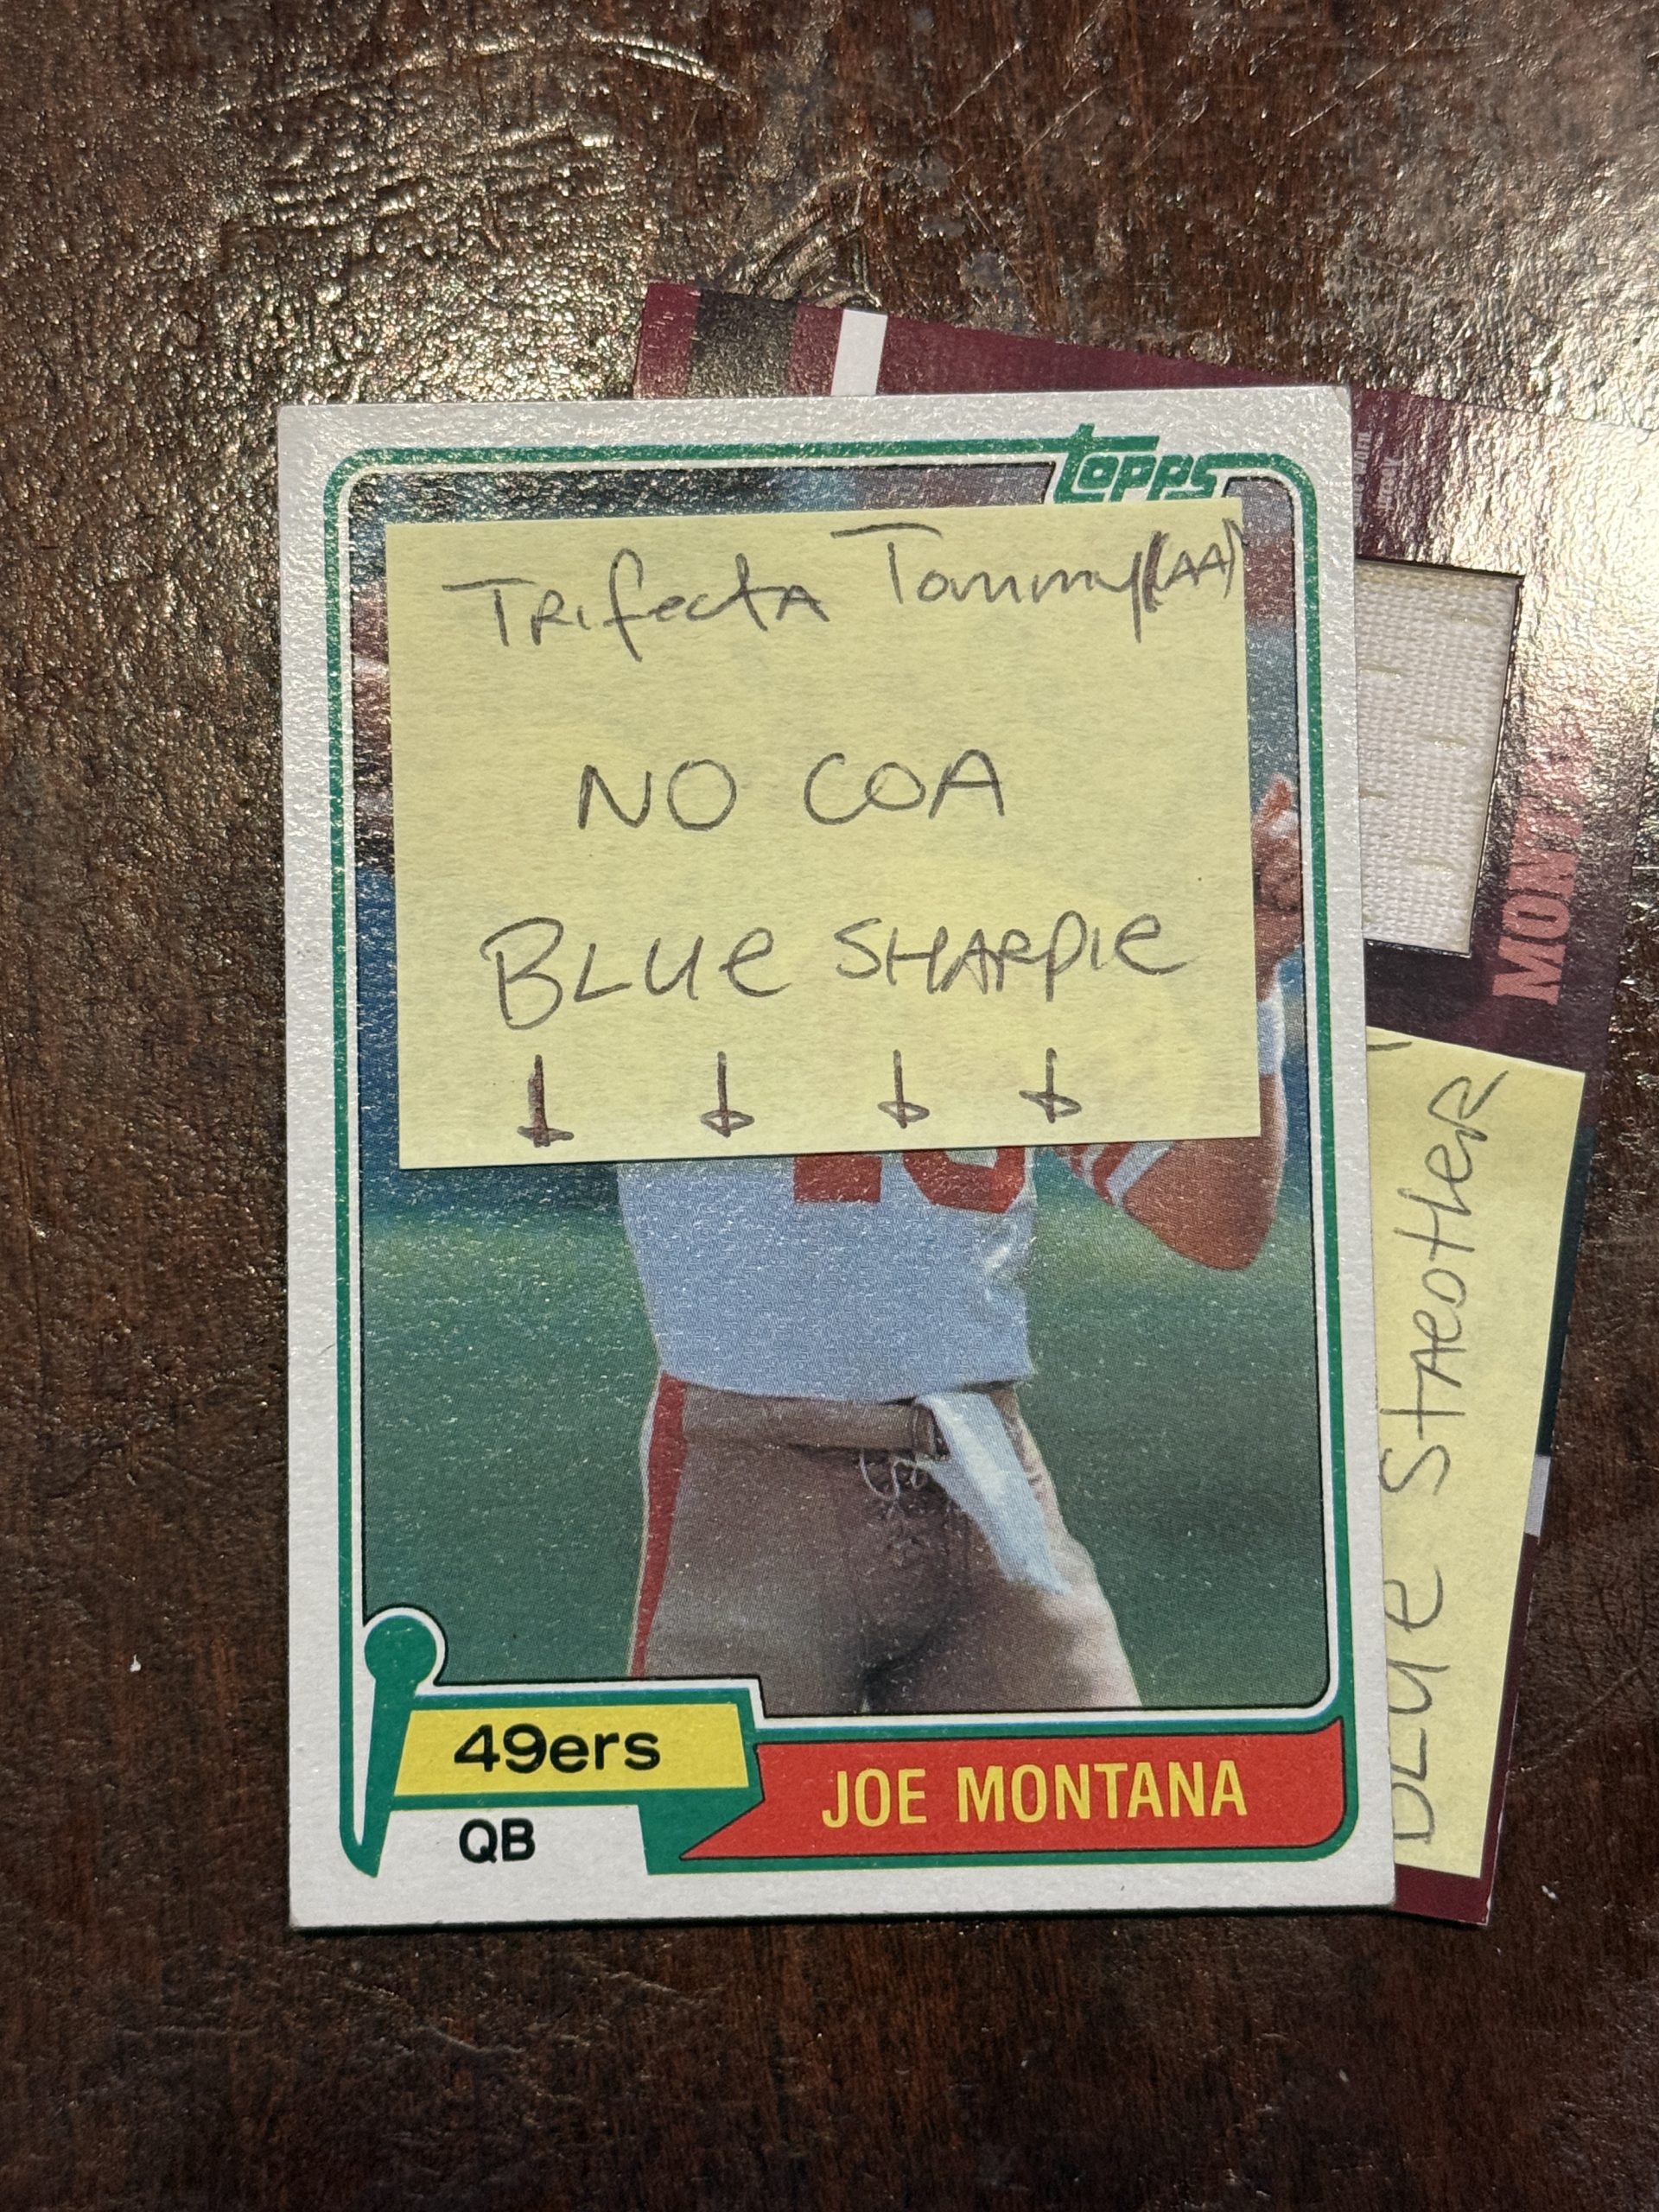
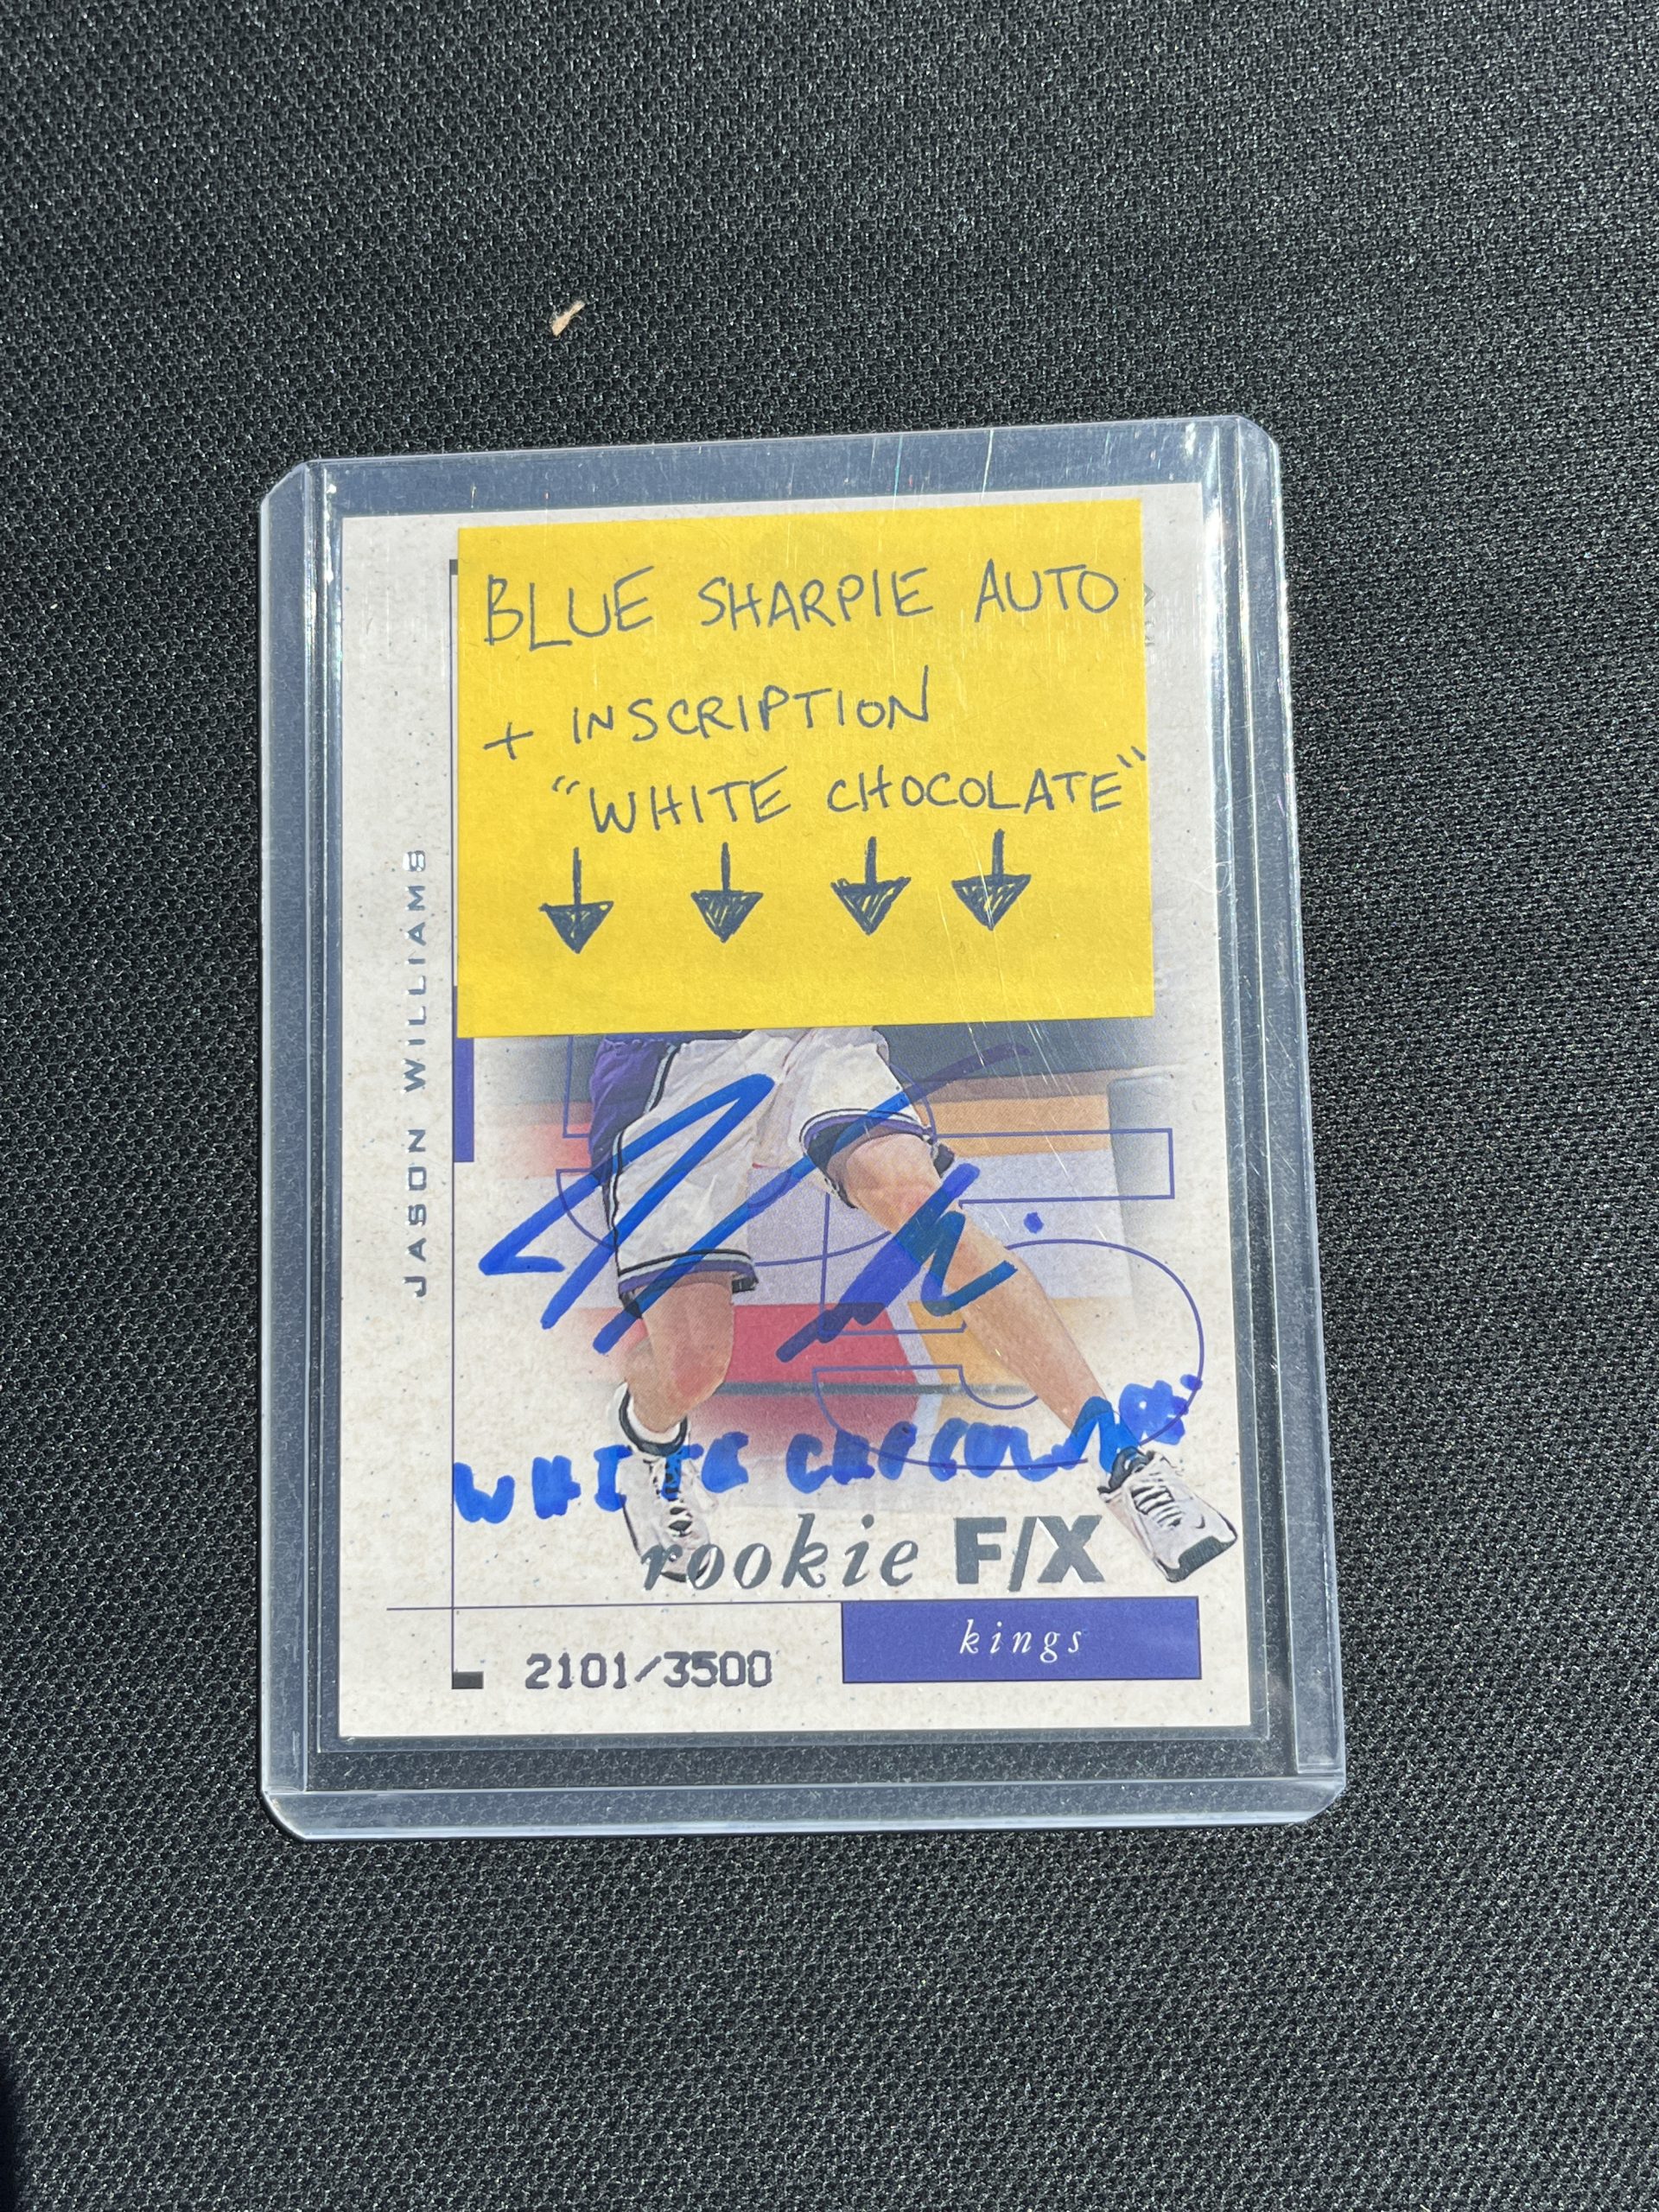
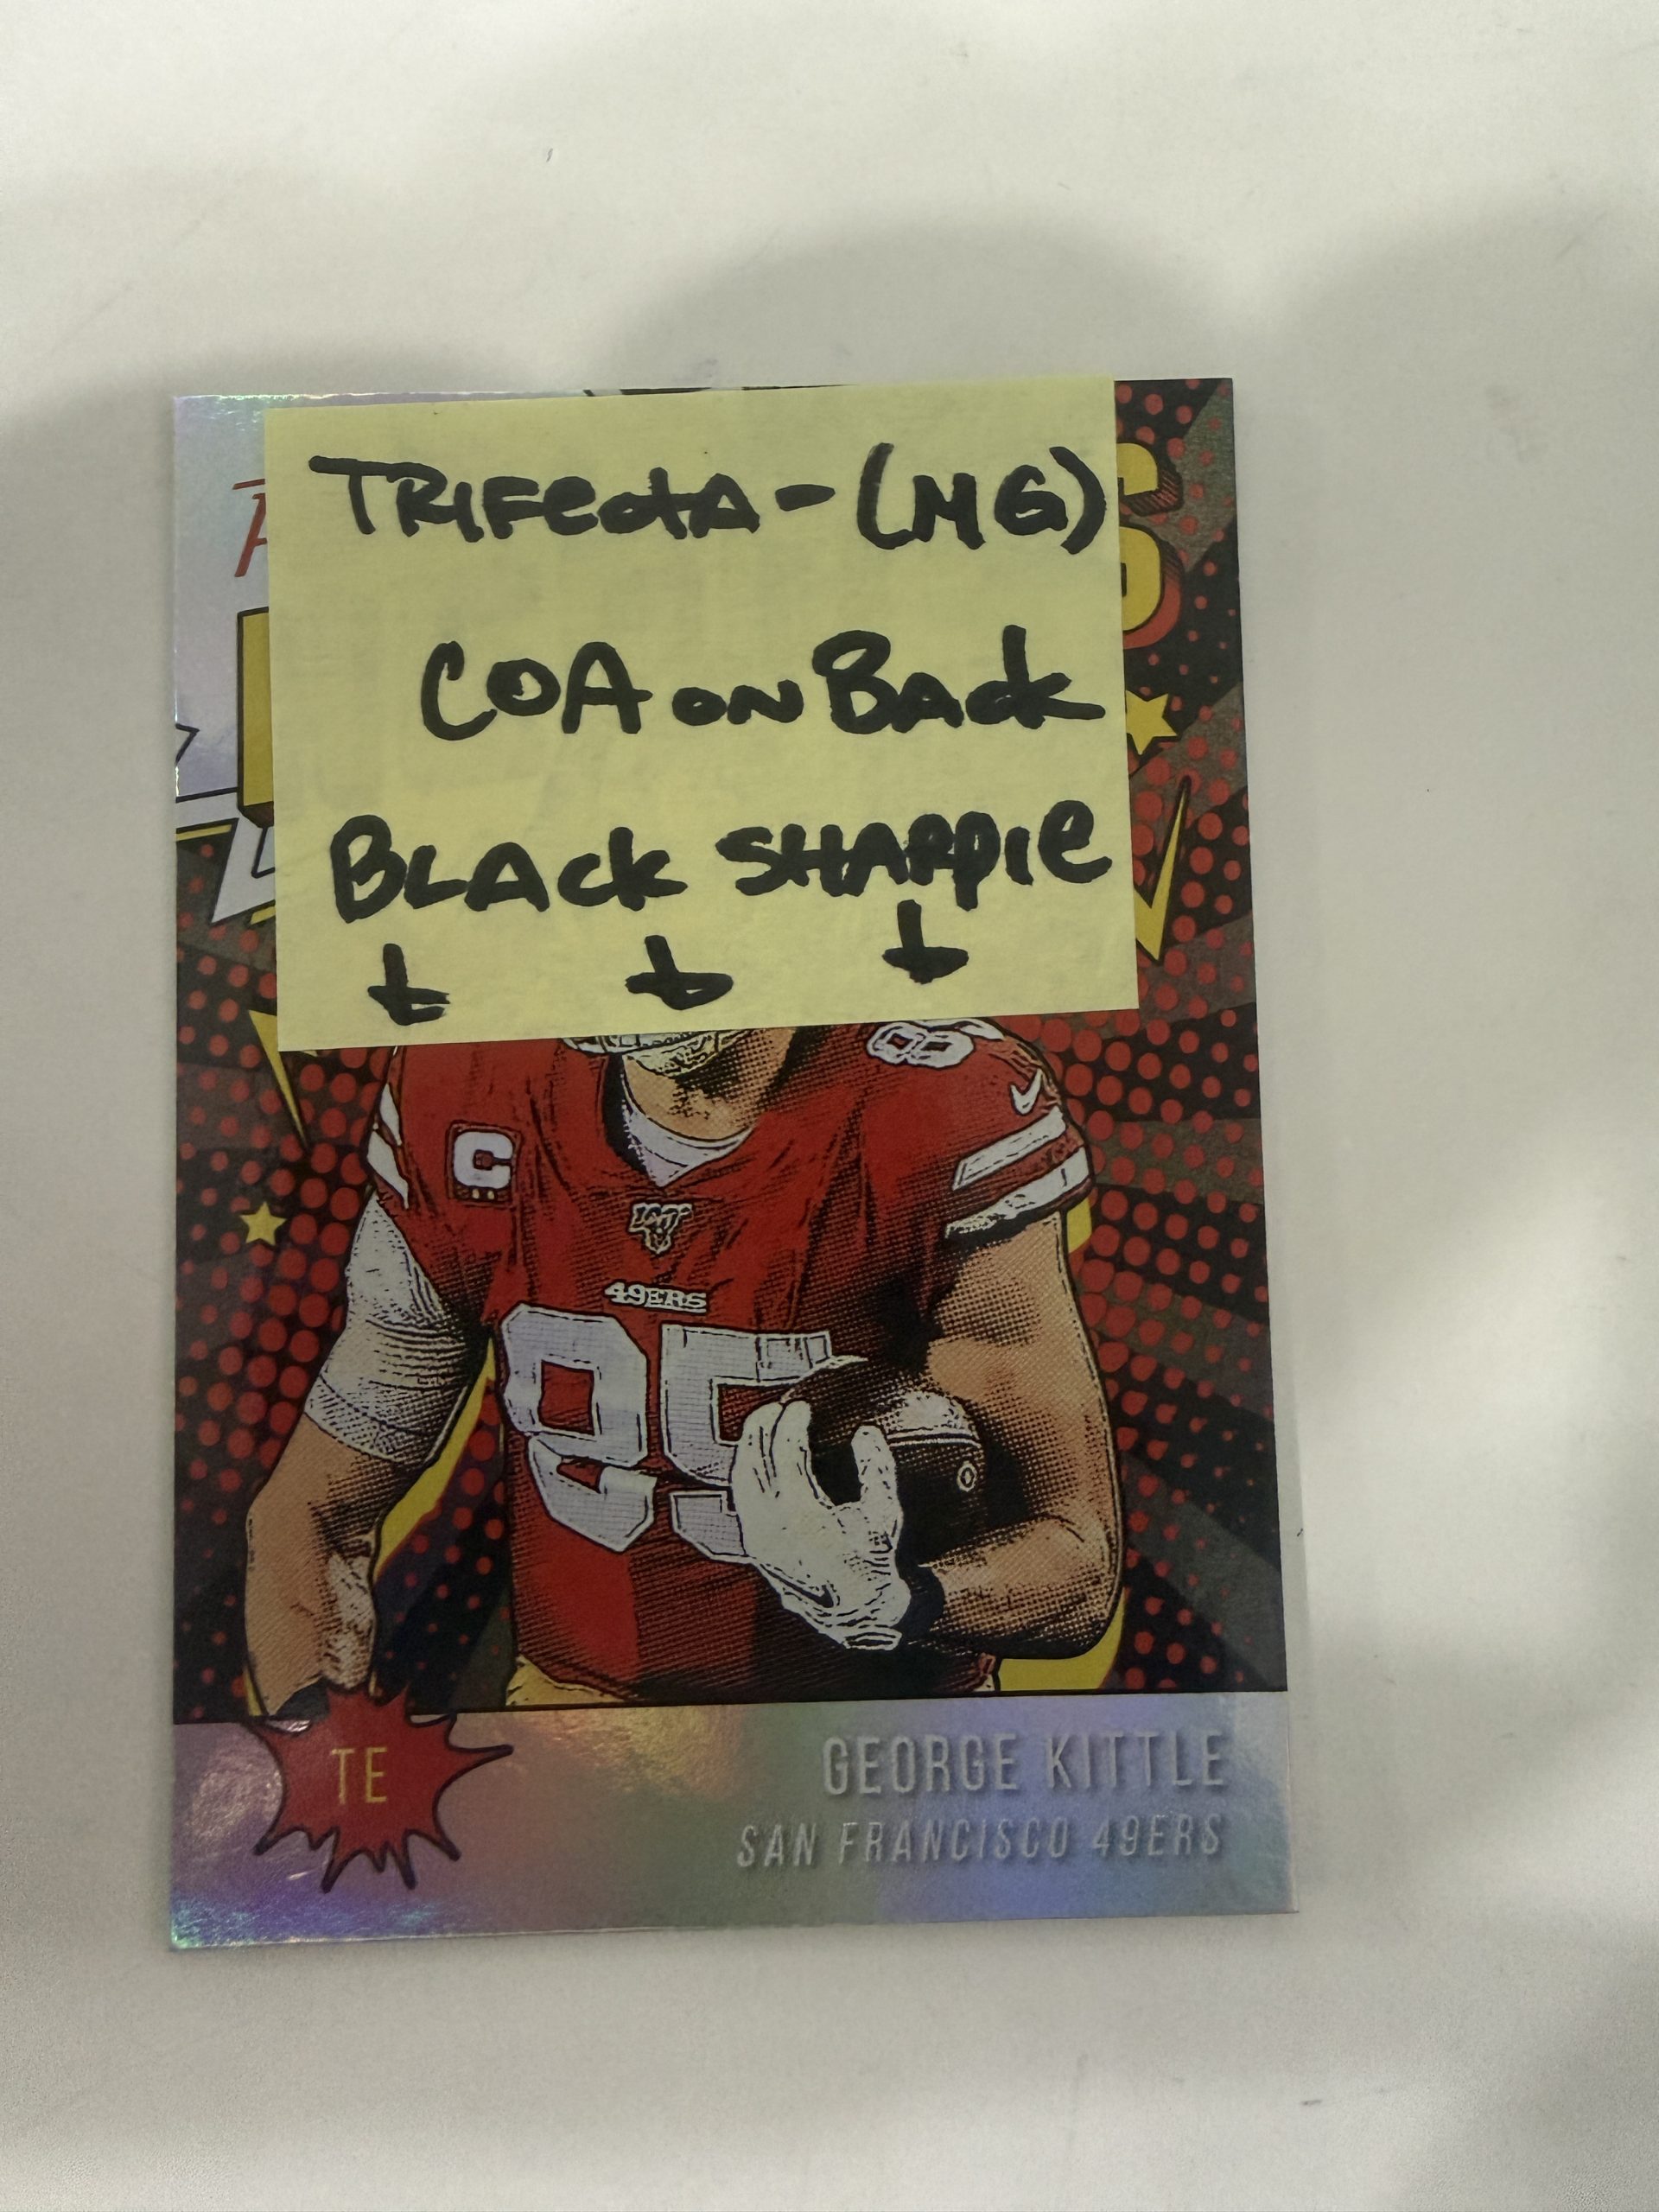
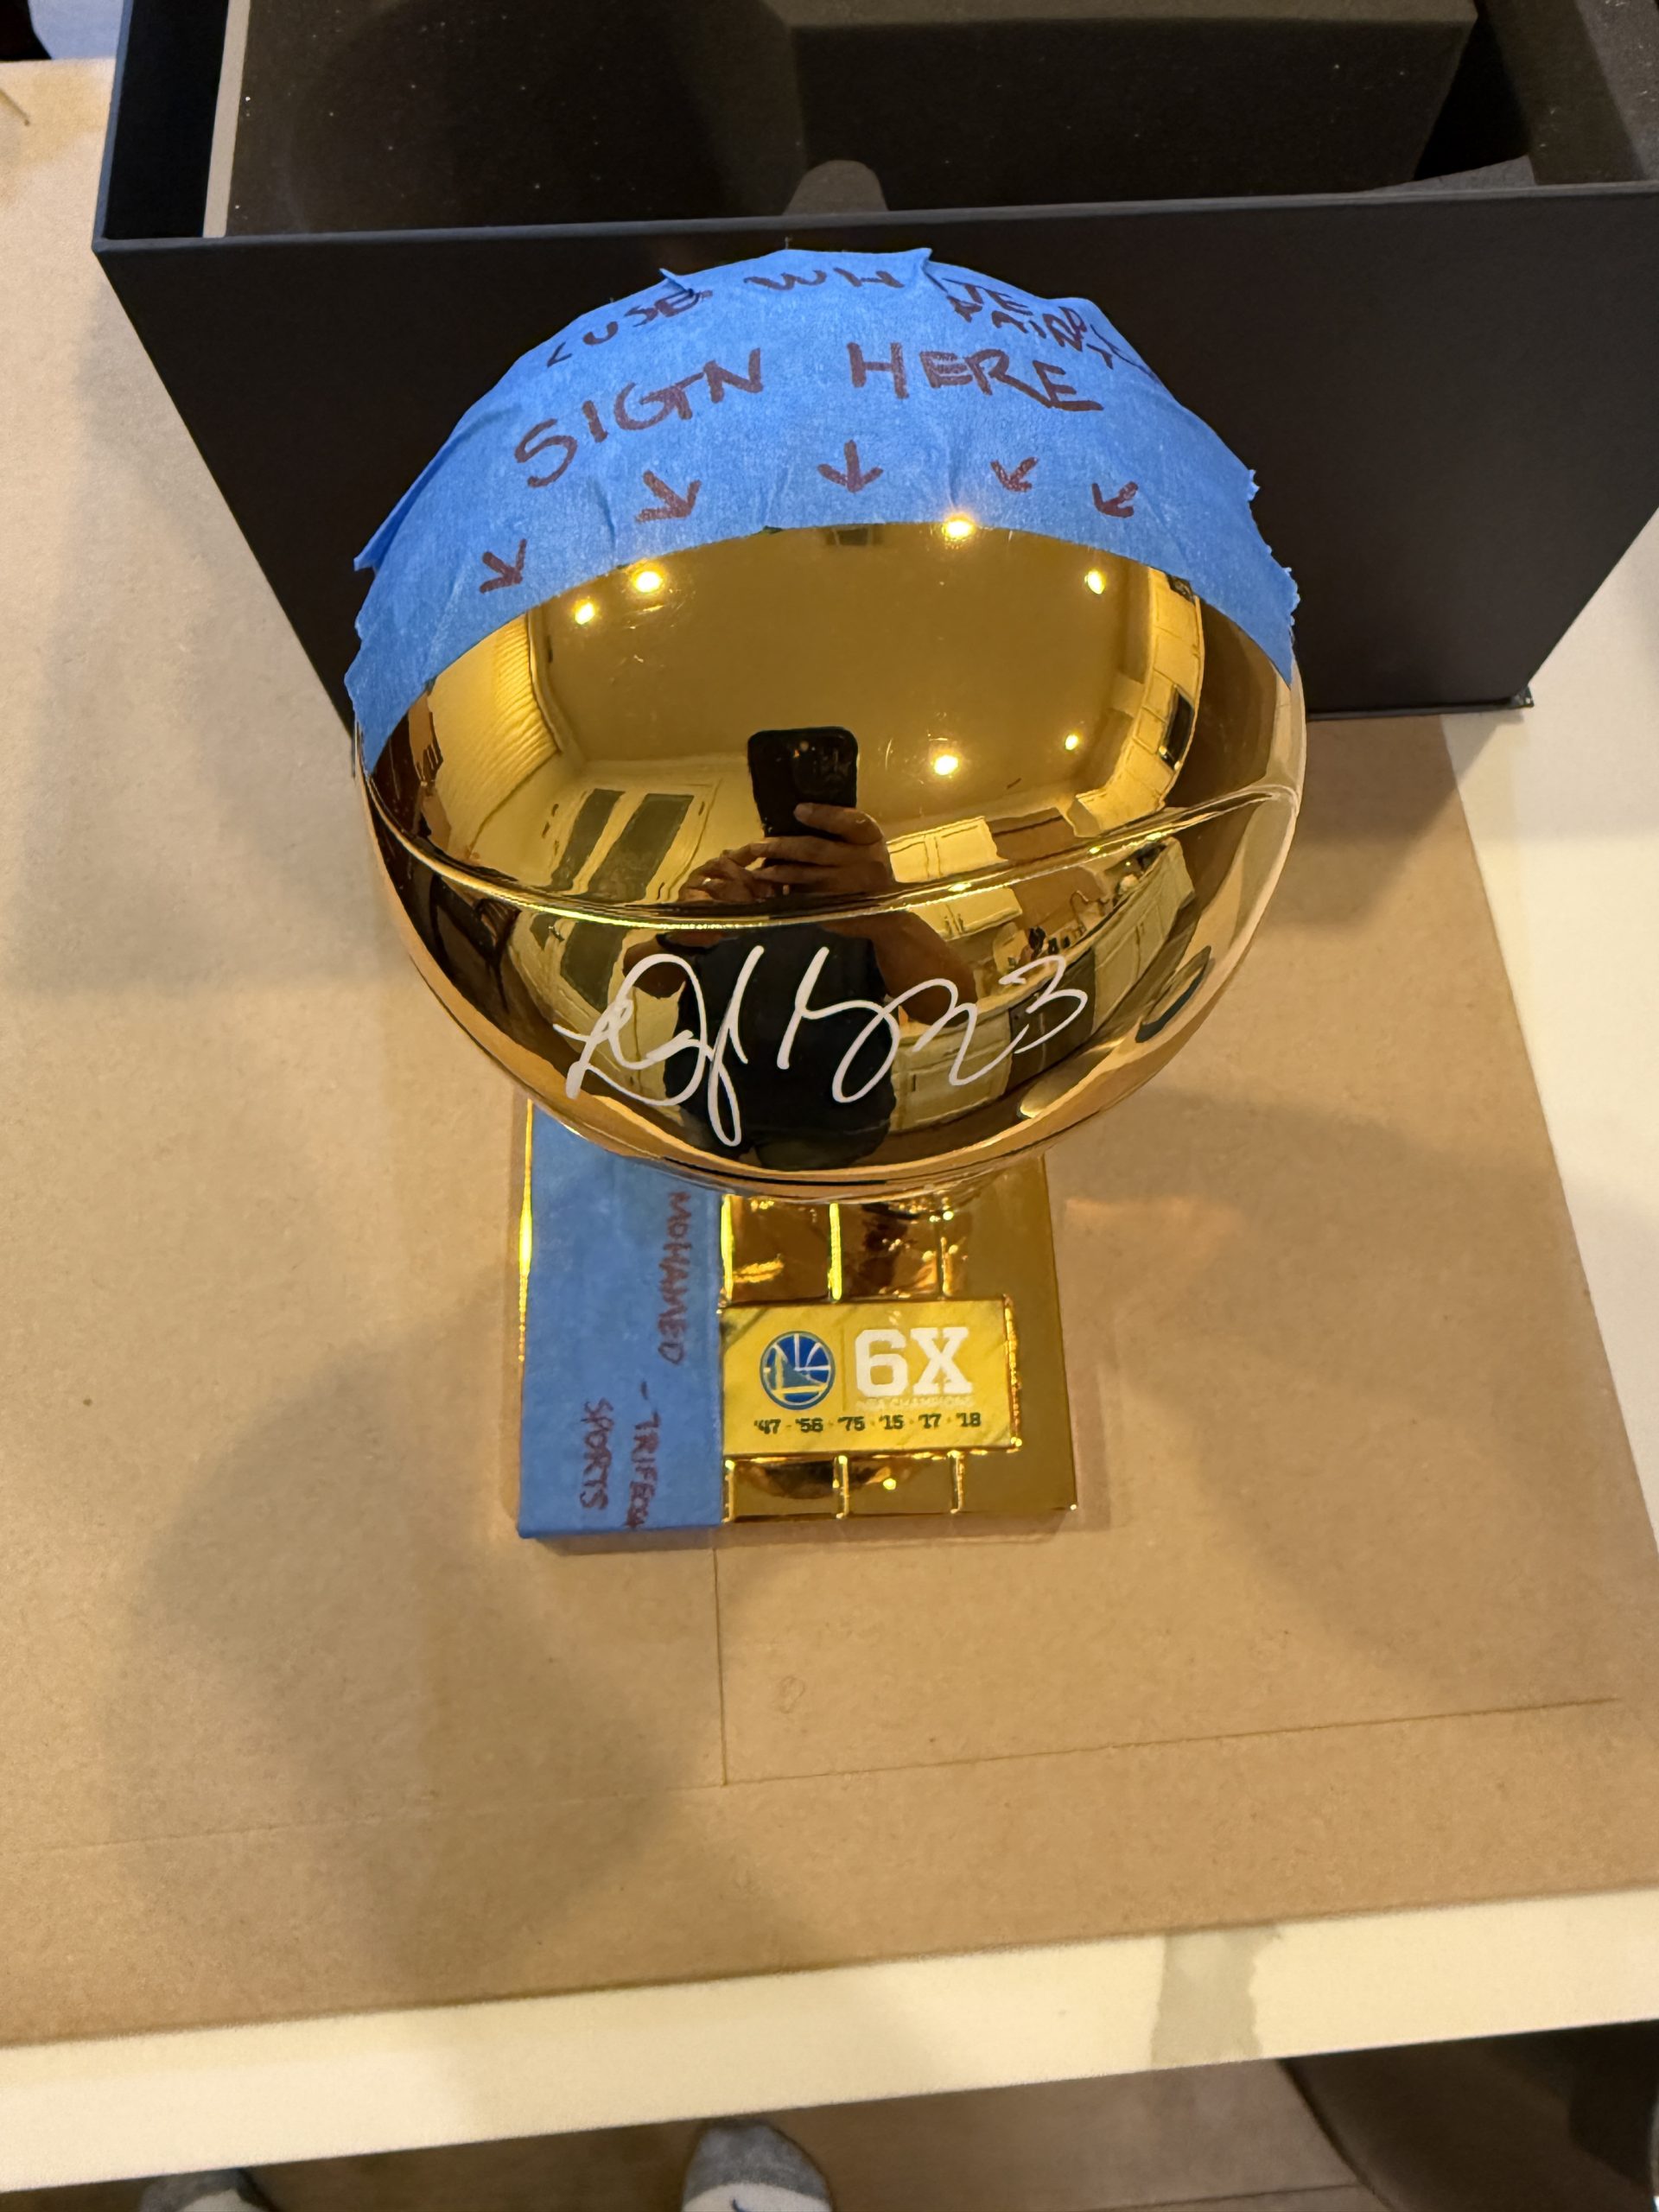
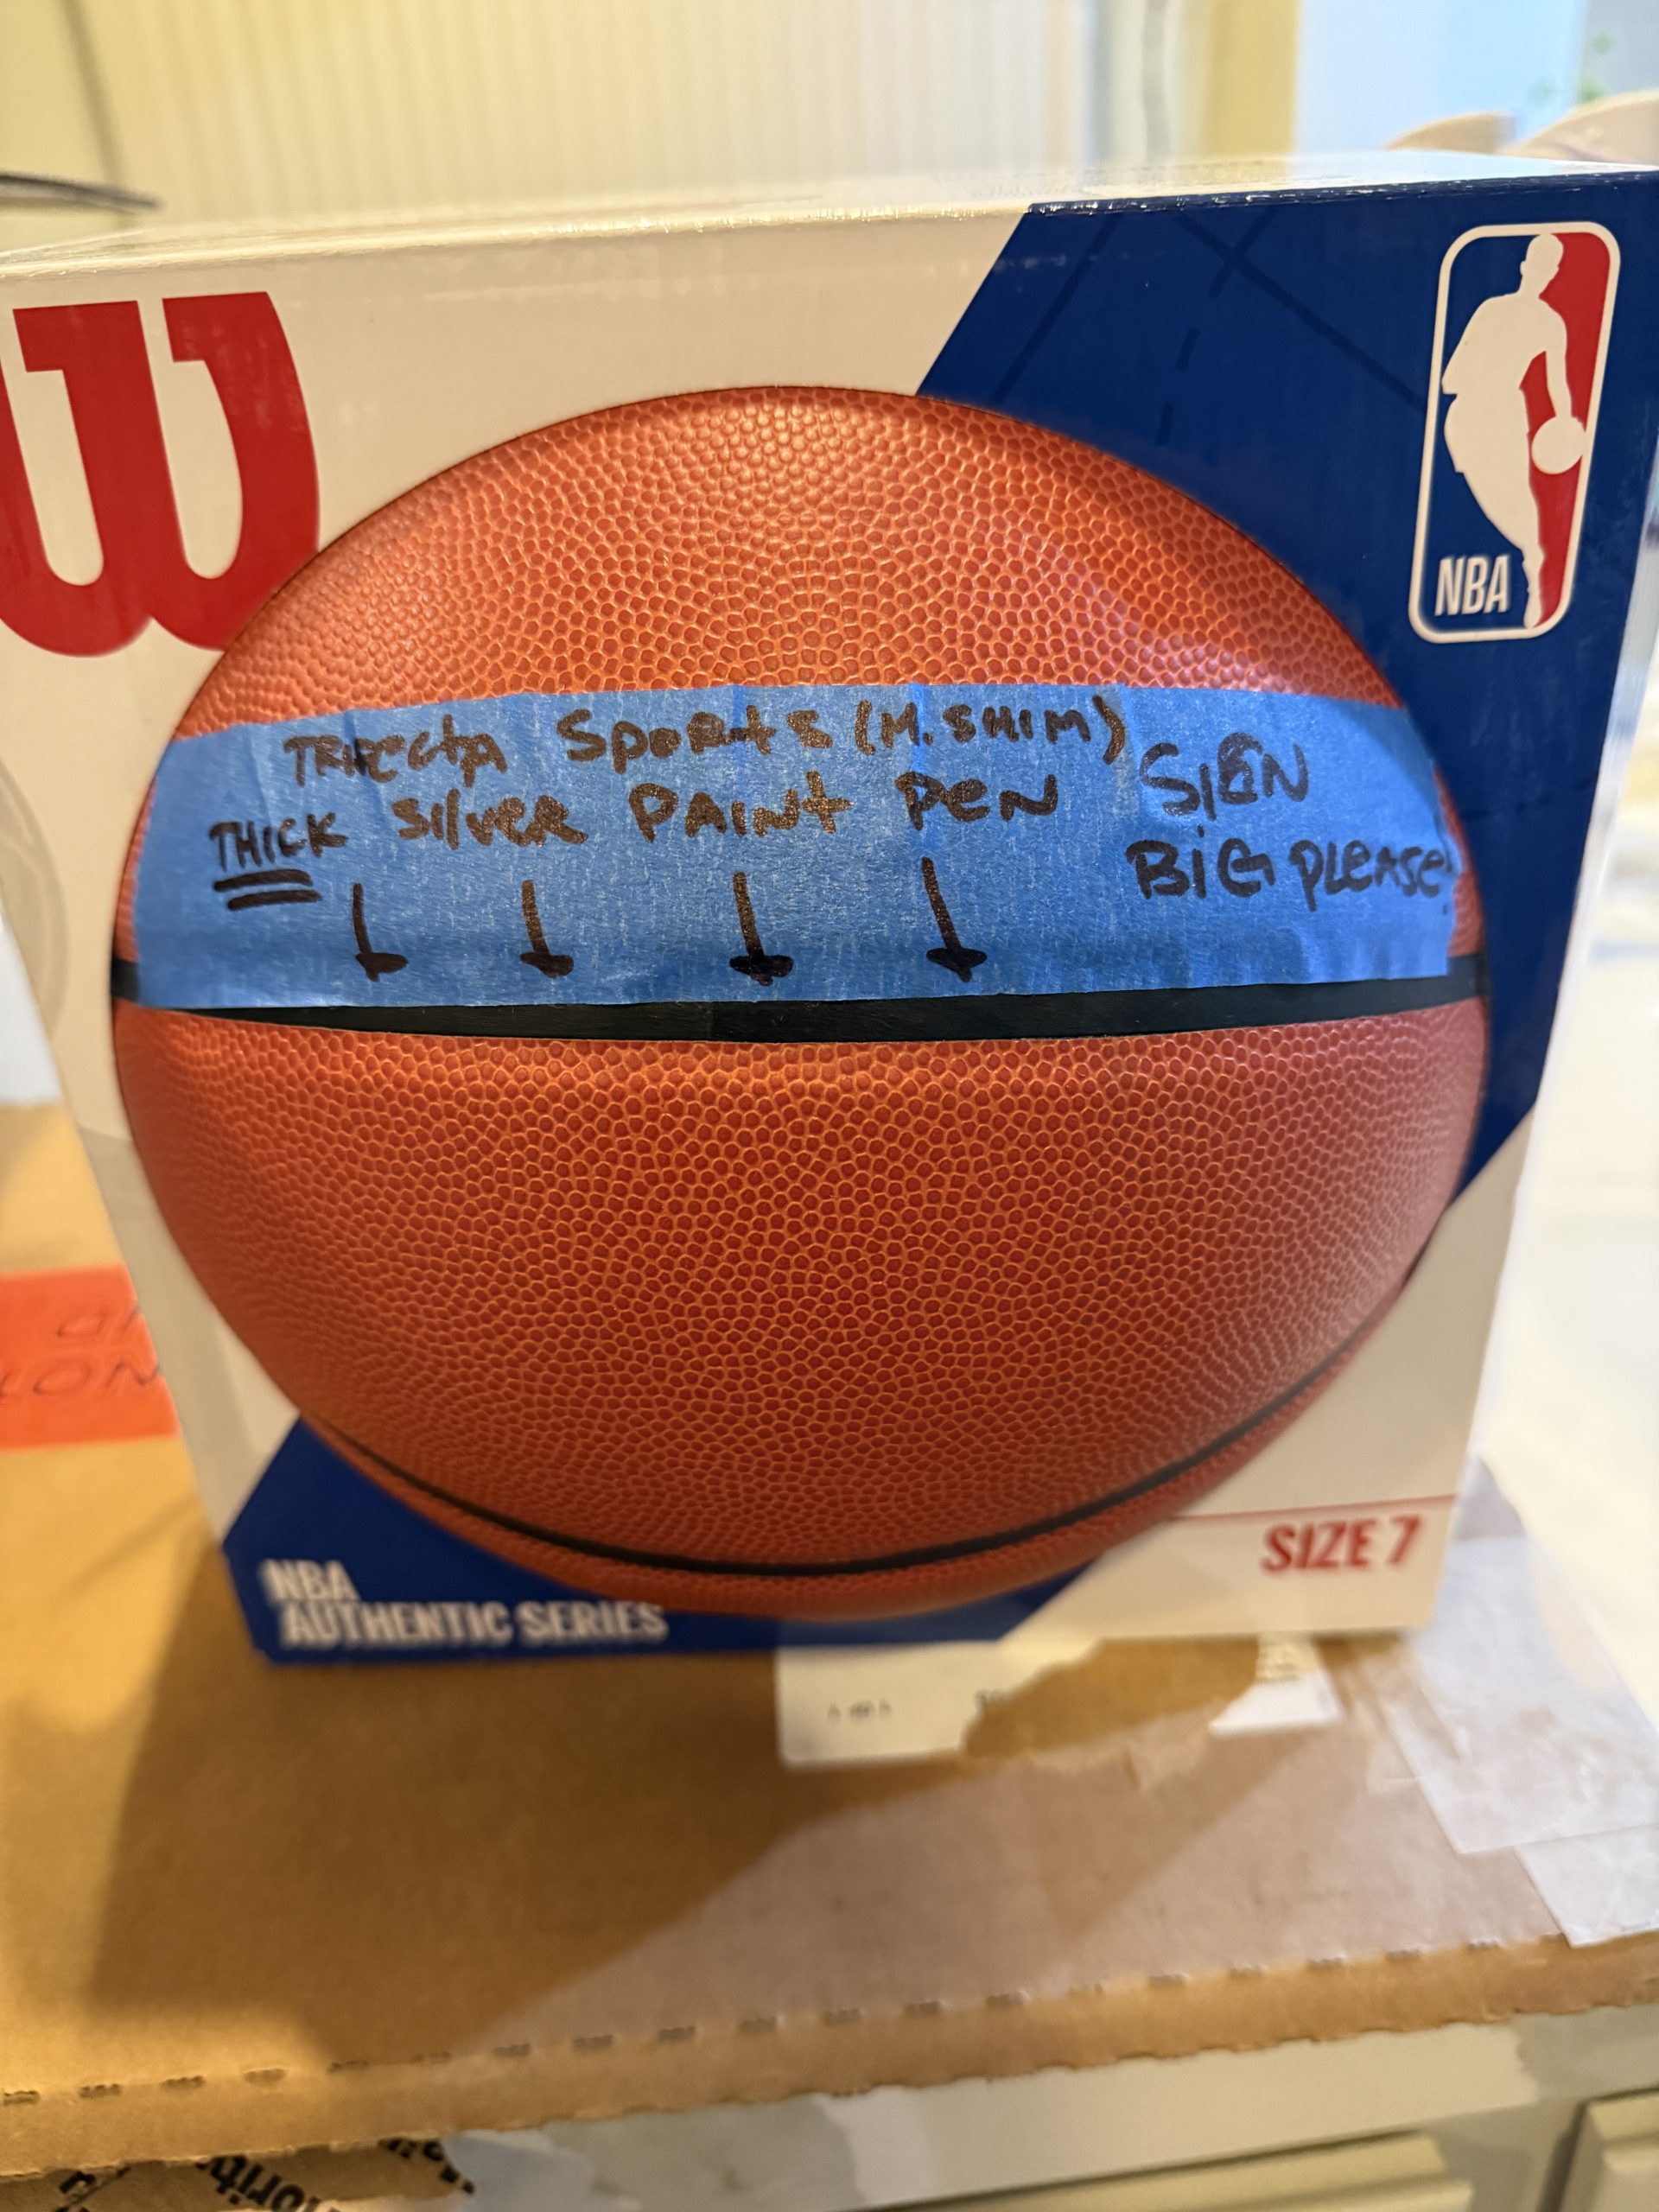
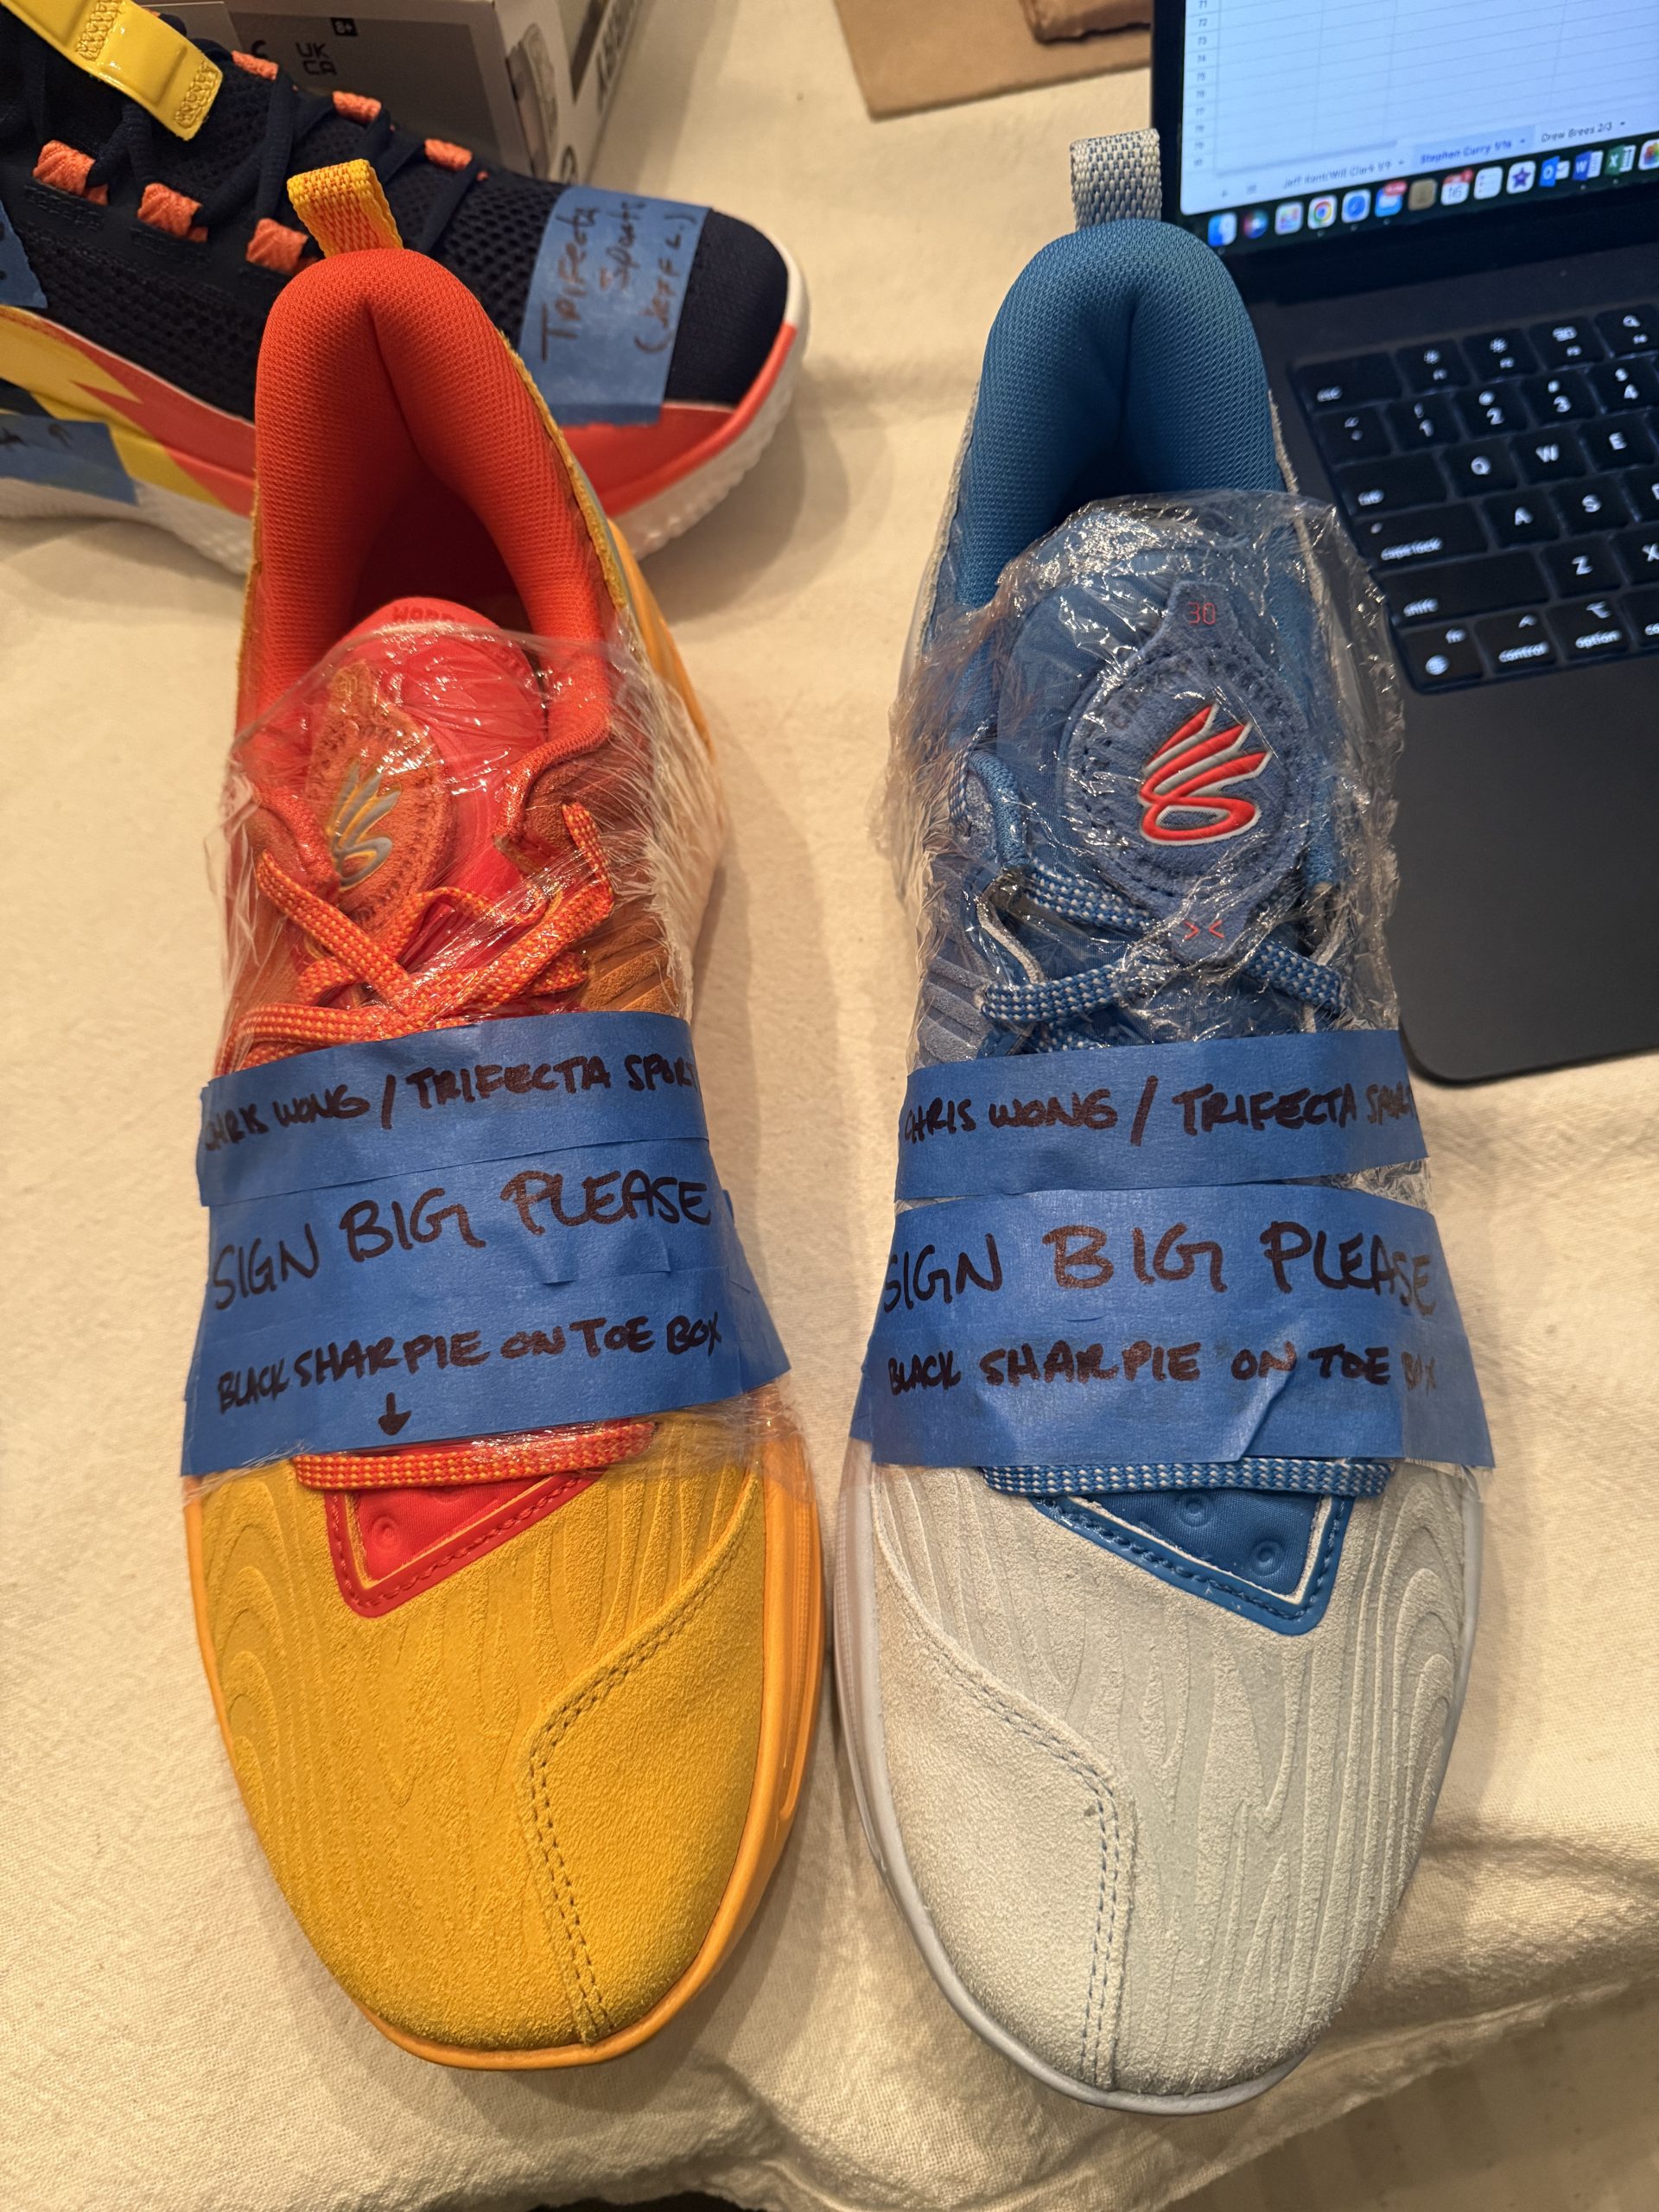
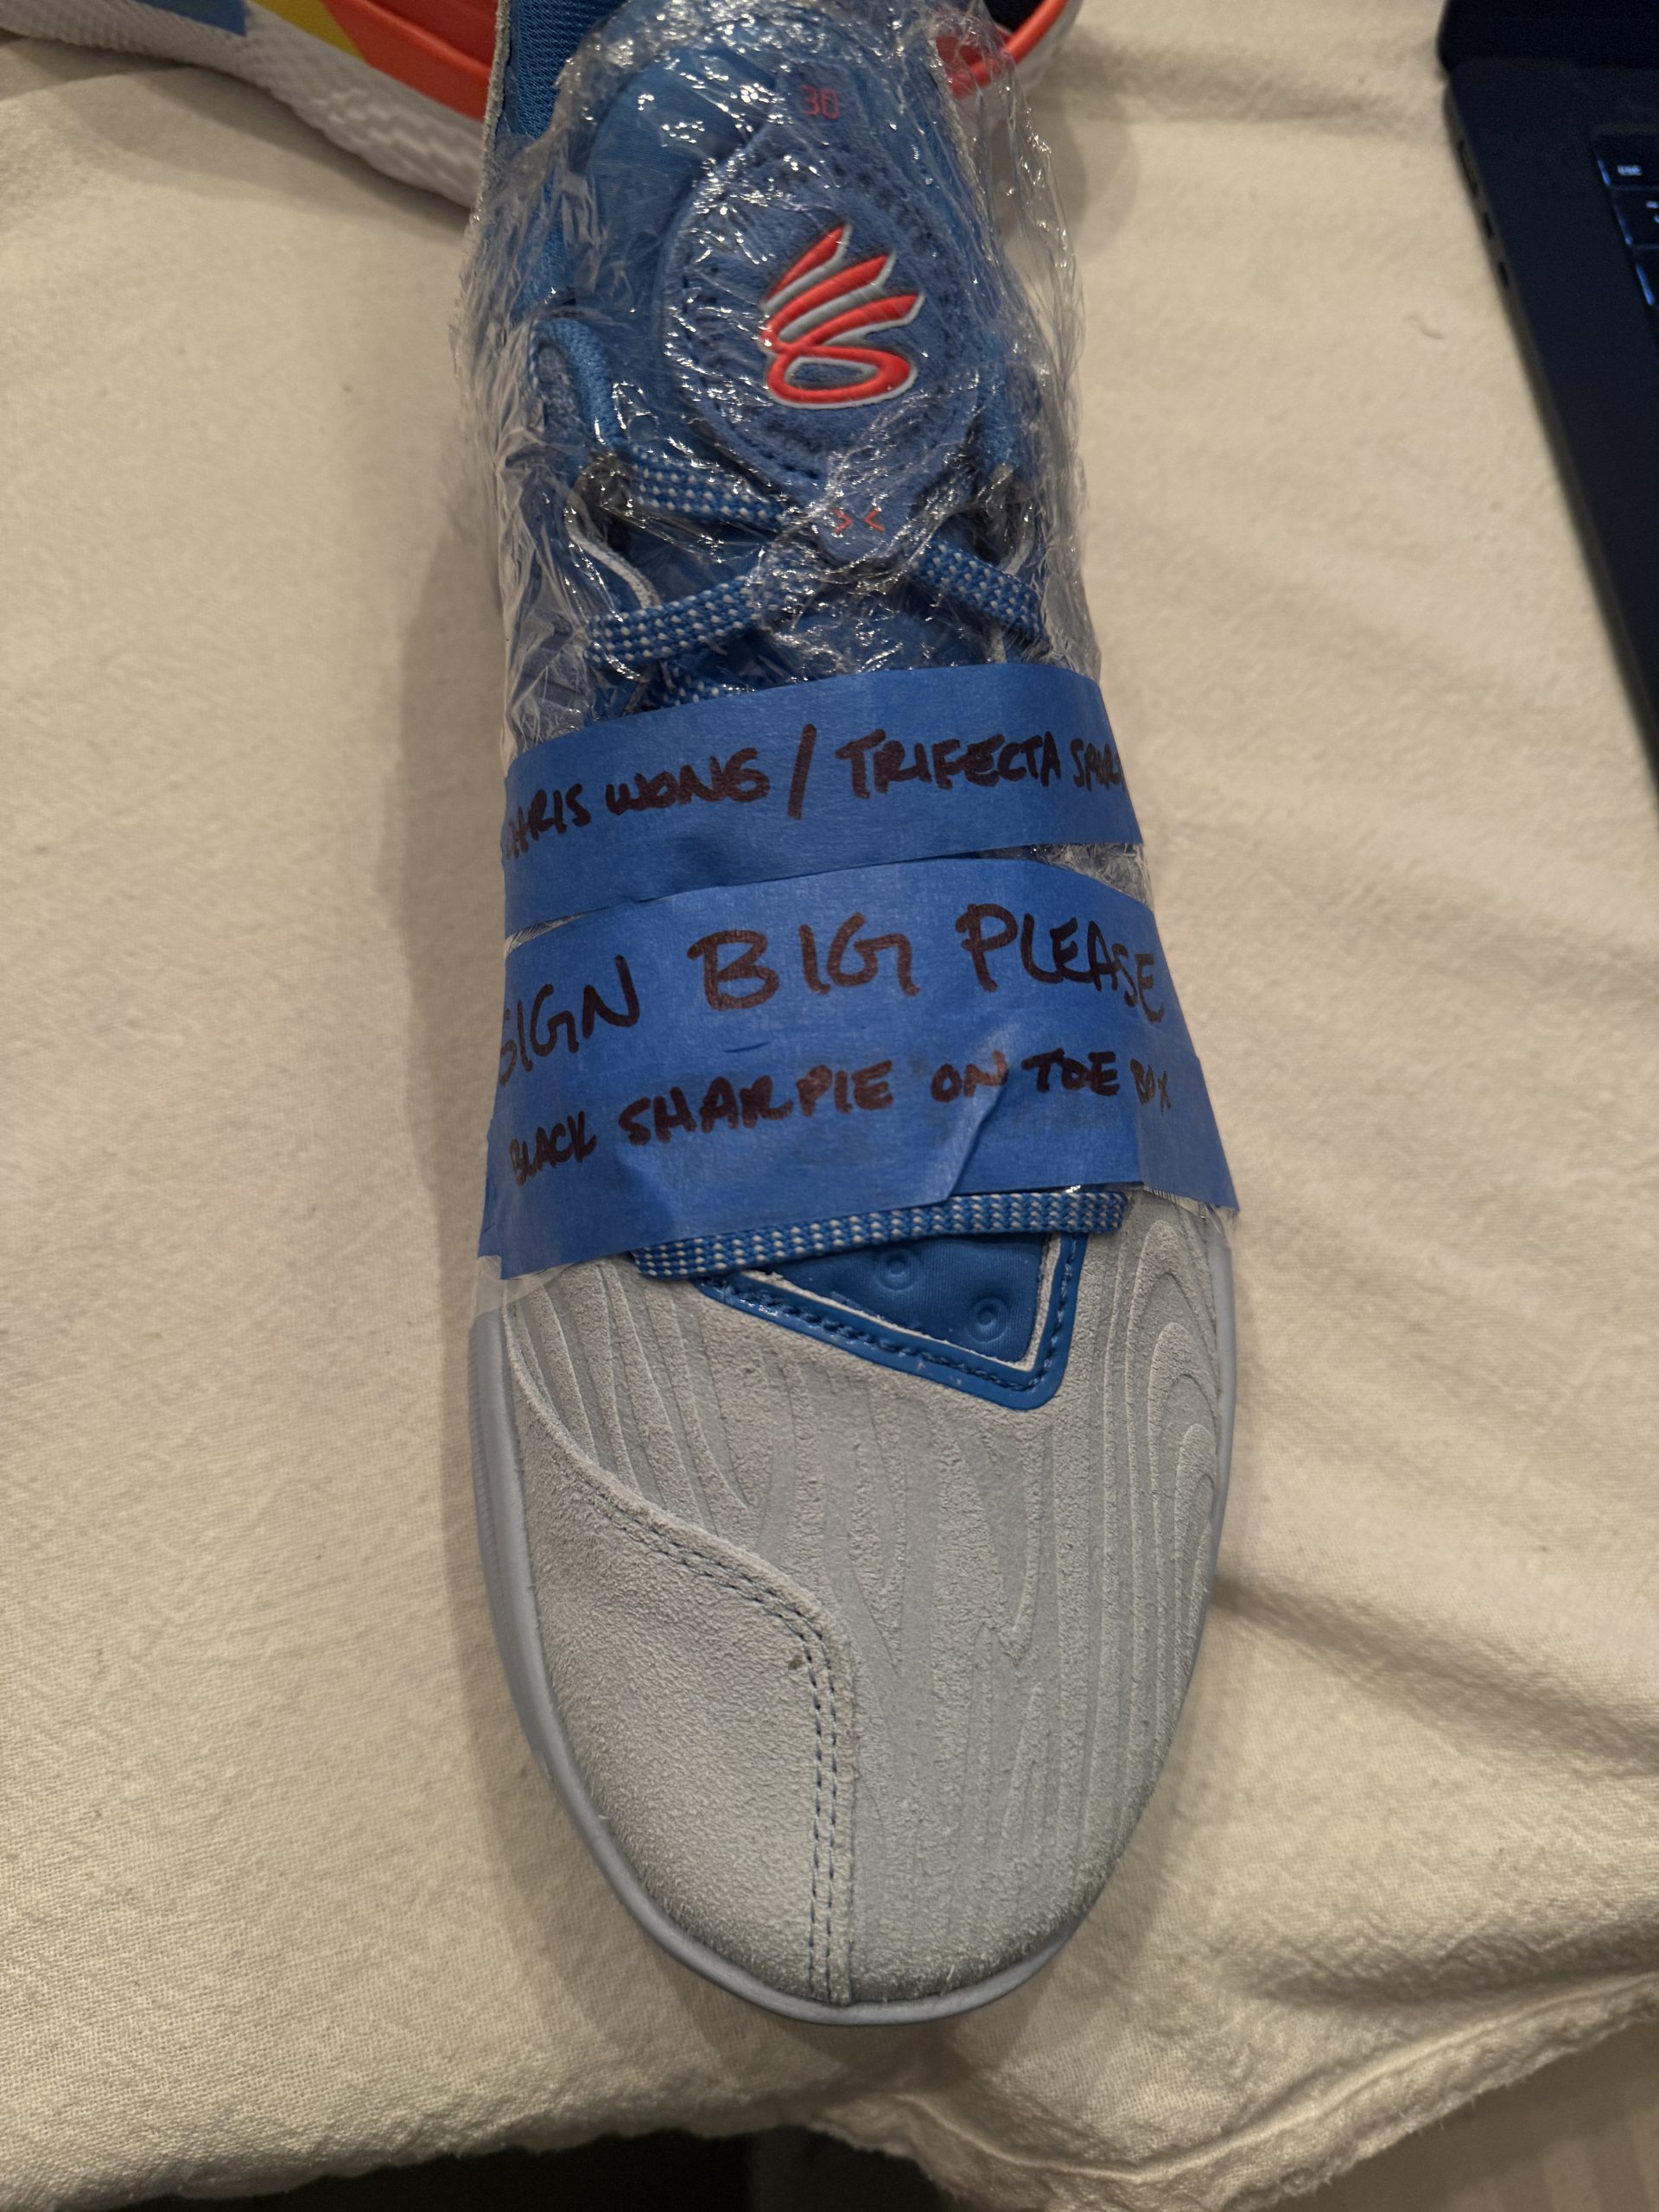
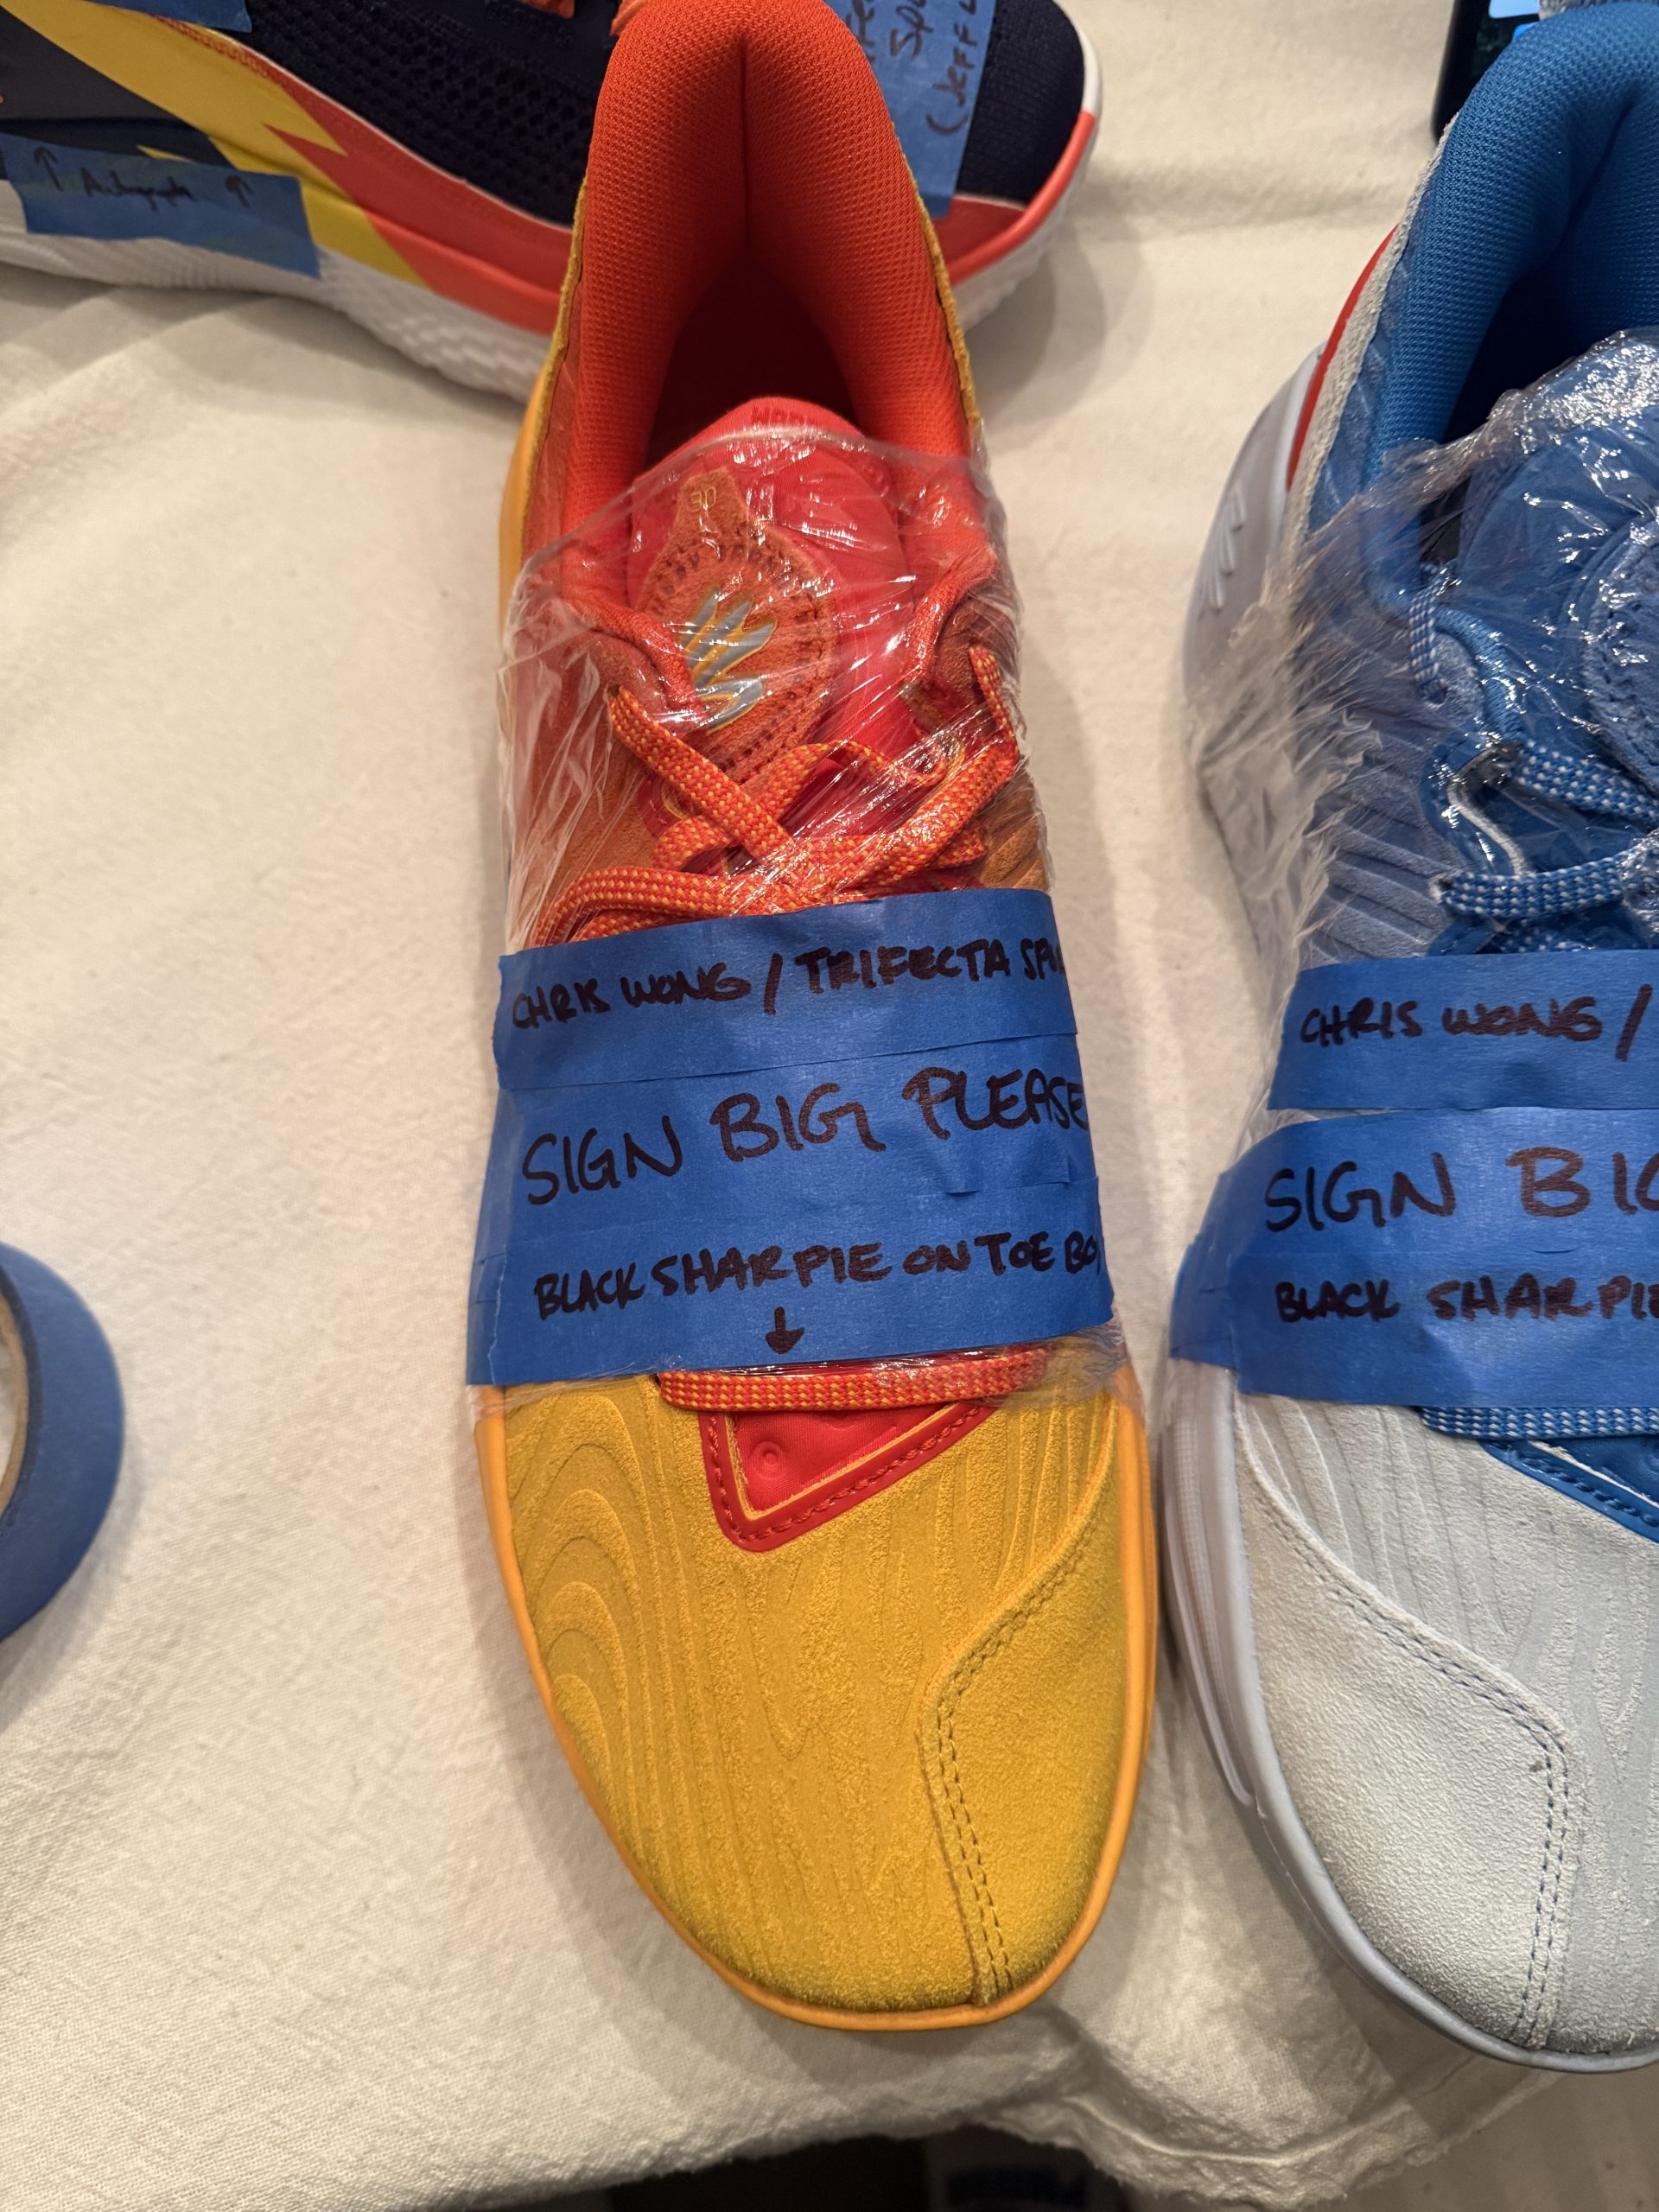
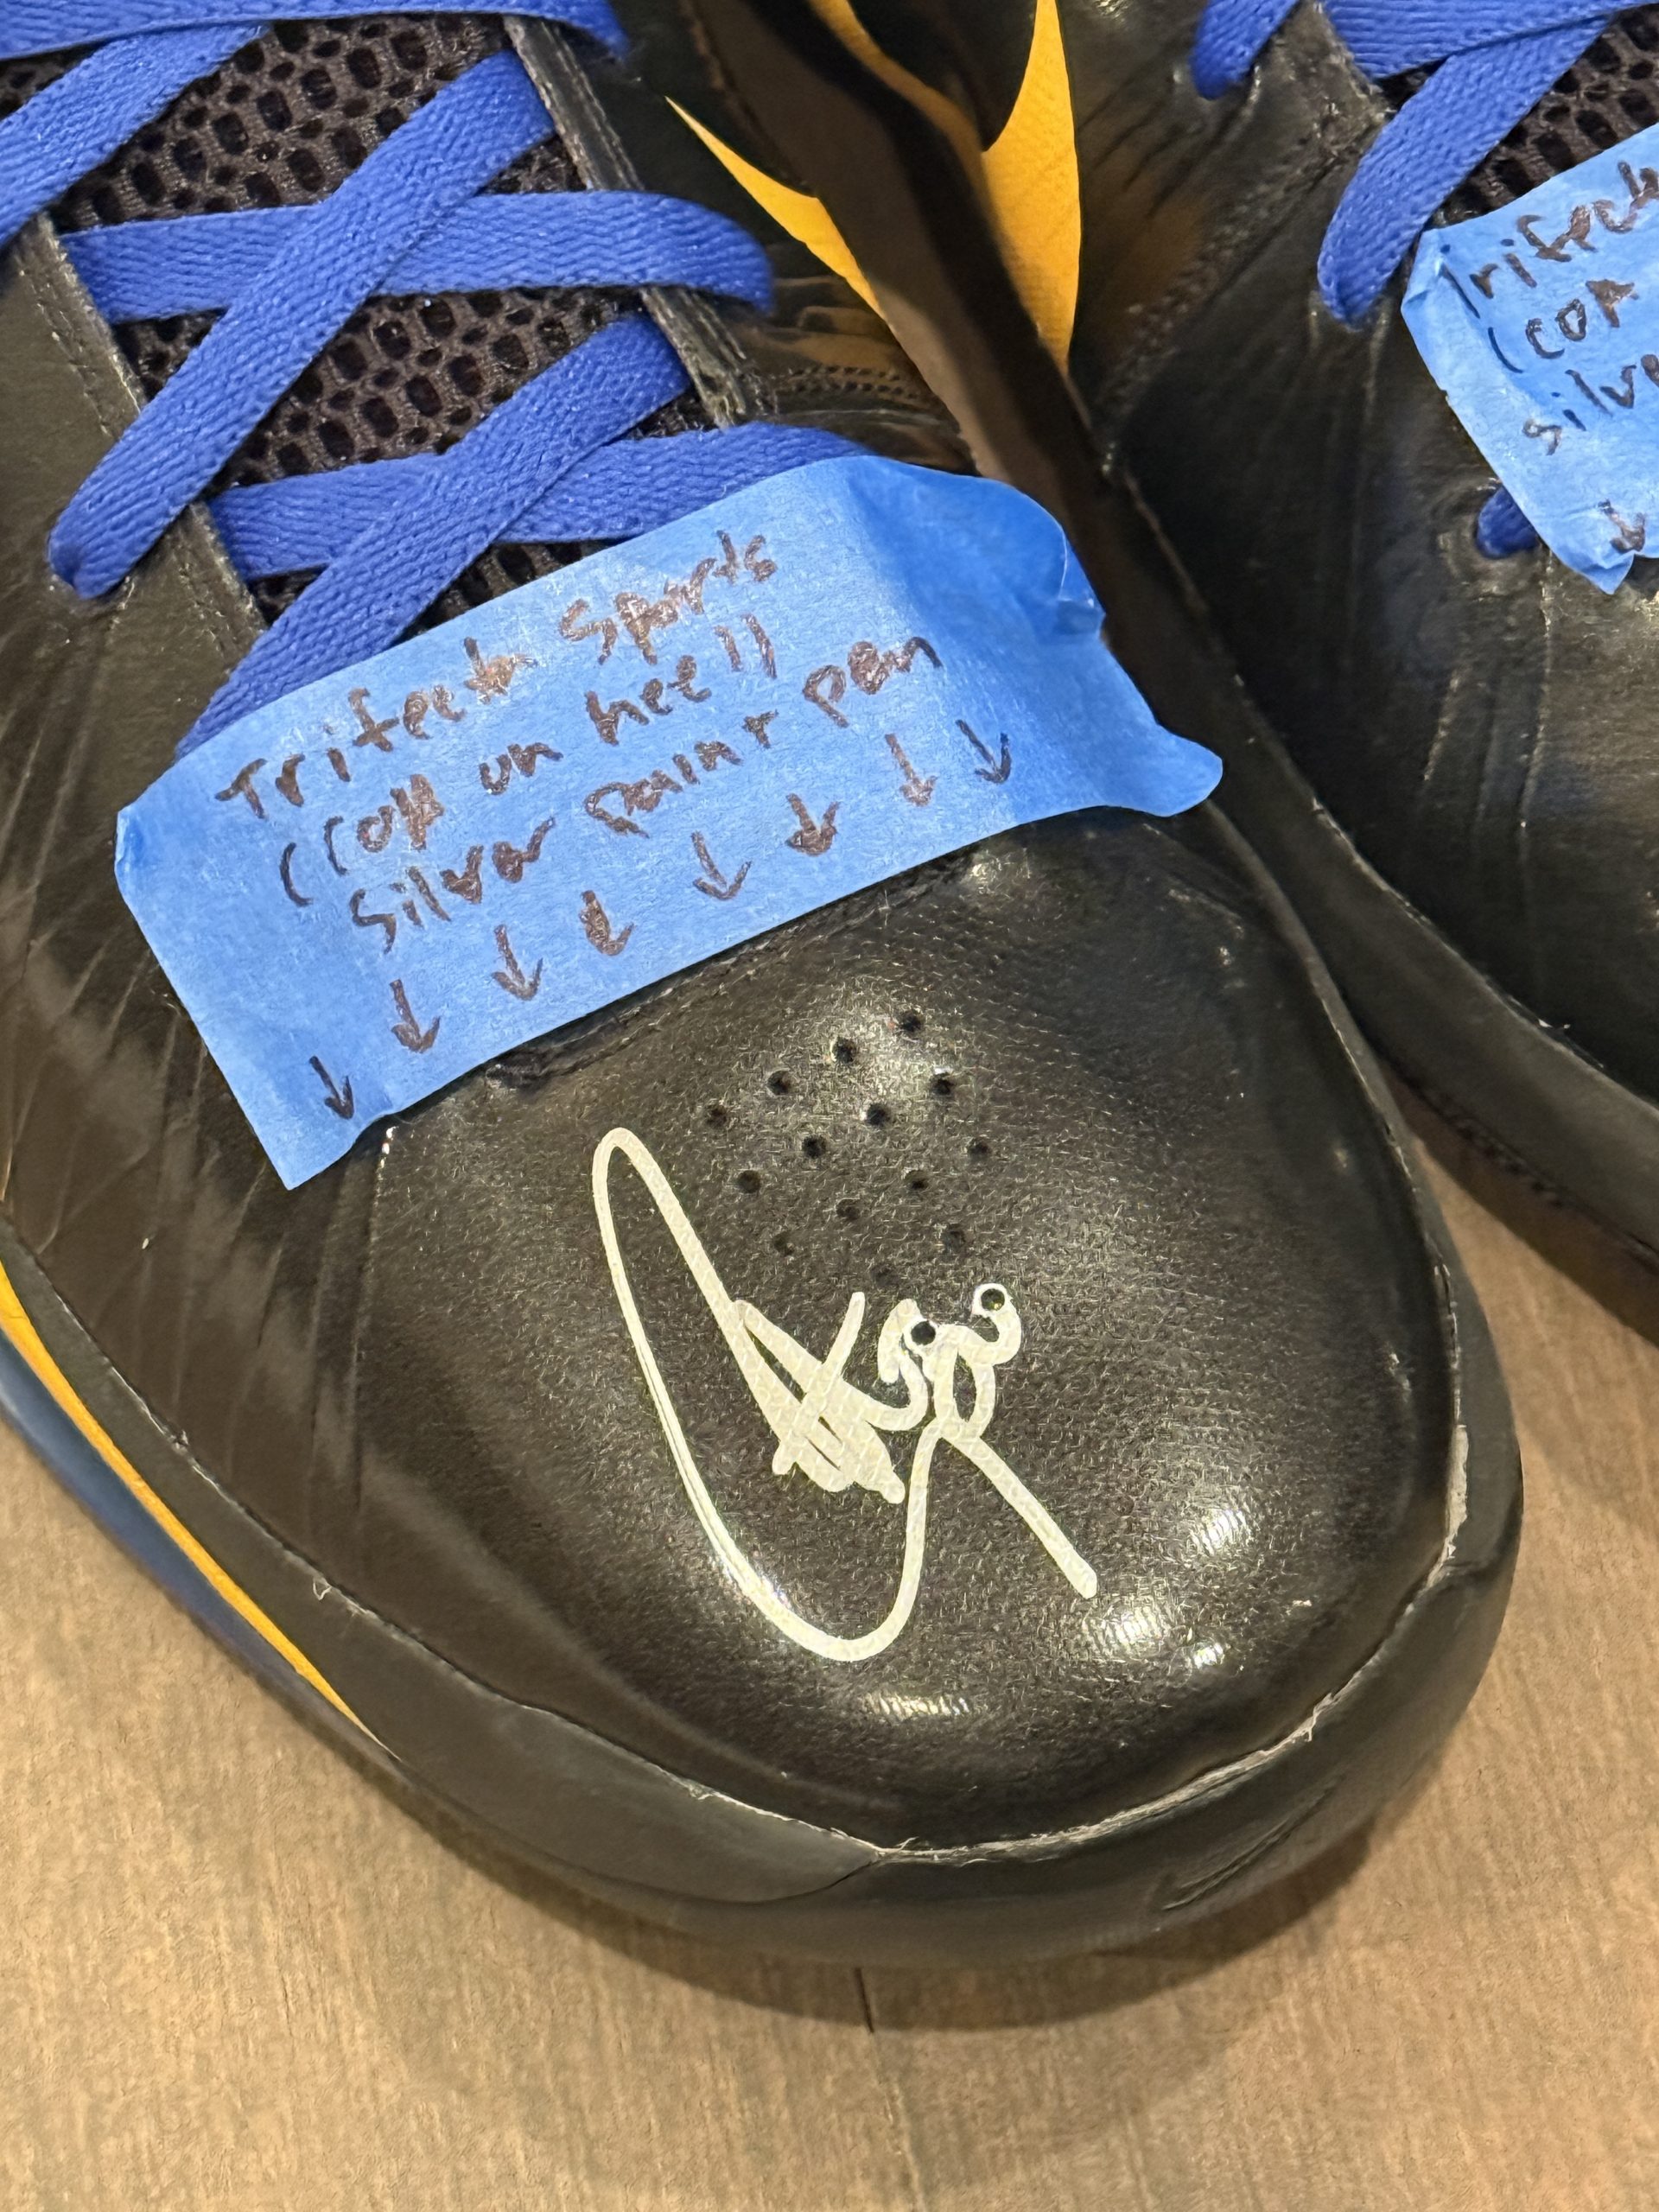
Tag every item with the player name, pen color, and arrows showing exactly where to sign.
Jerseys


Mini Helmets

Full Size Helmets


Trading Cards
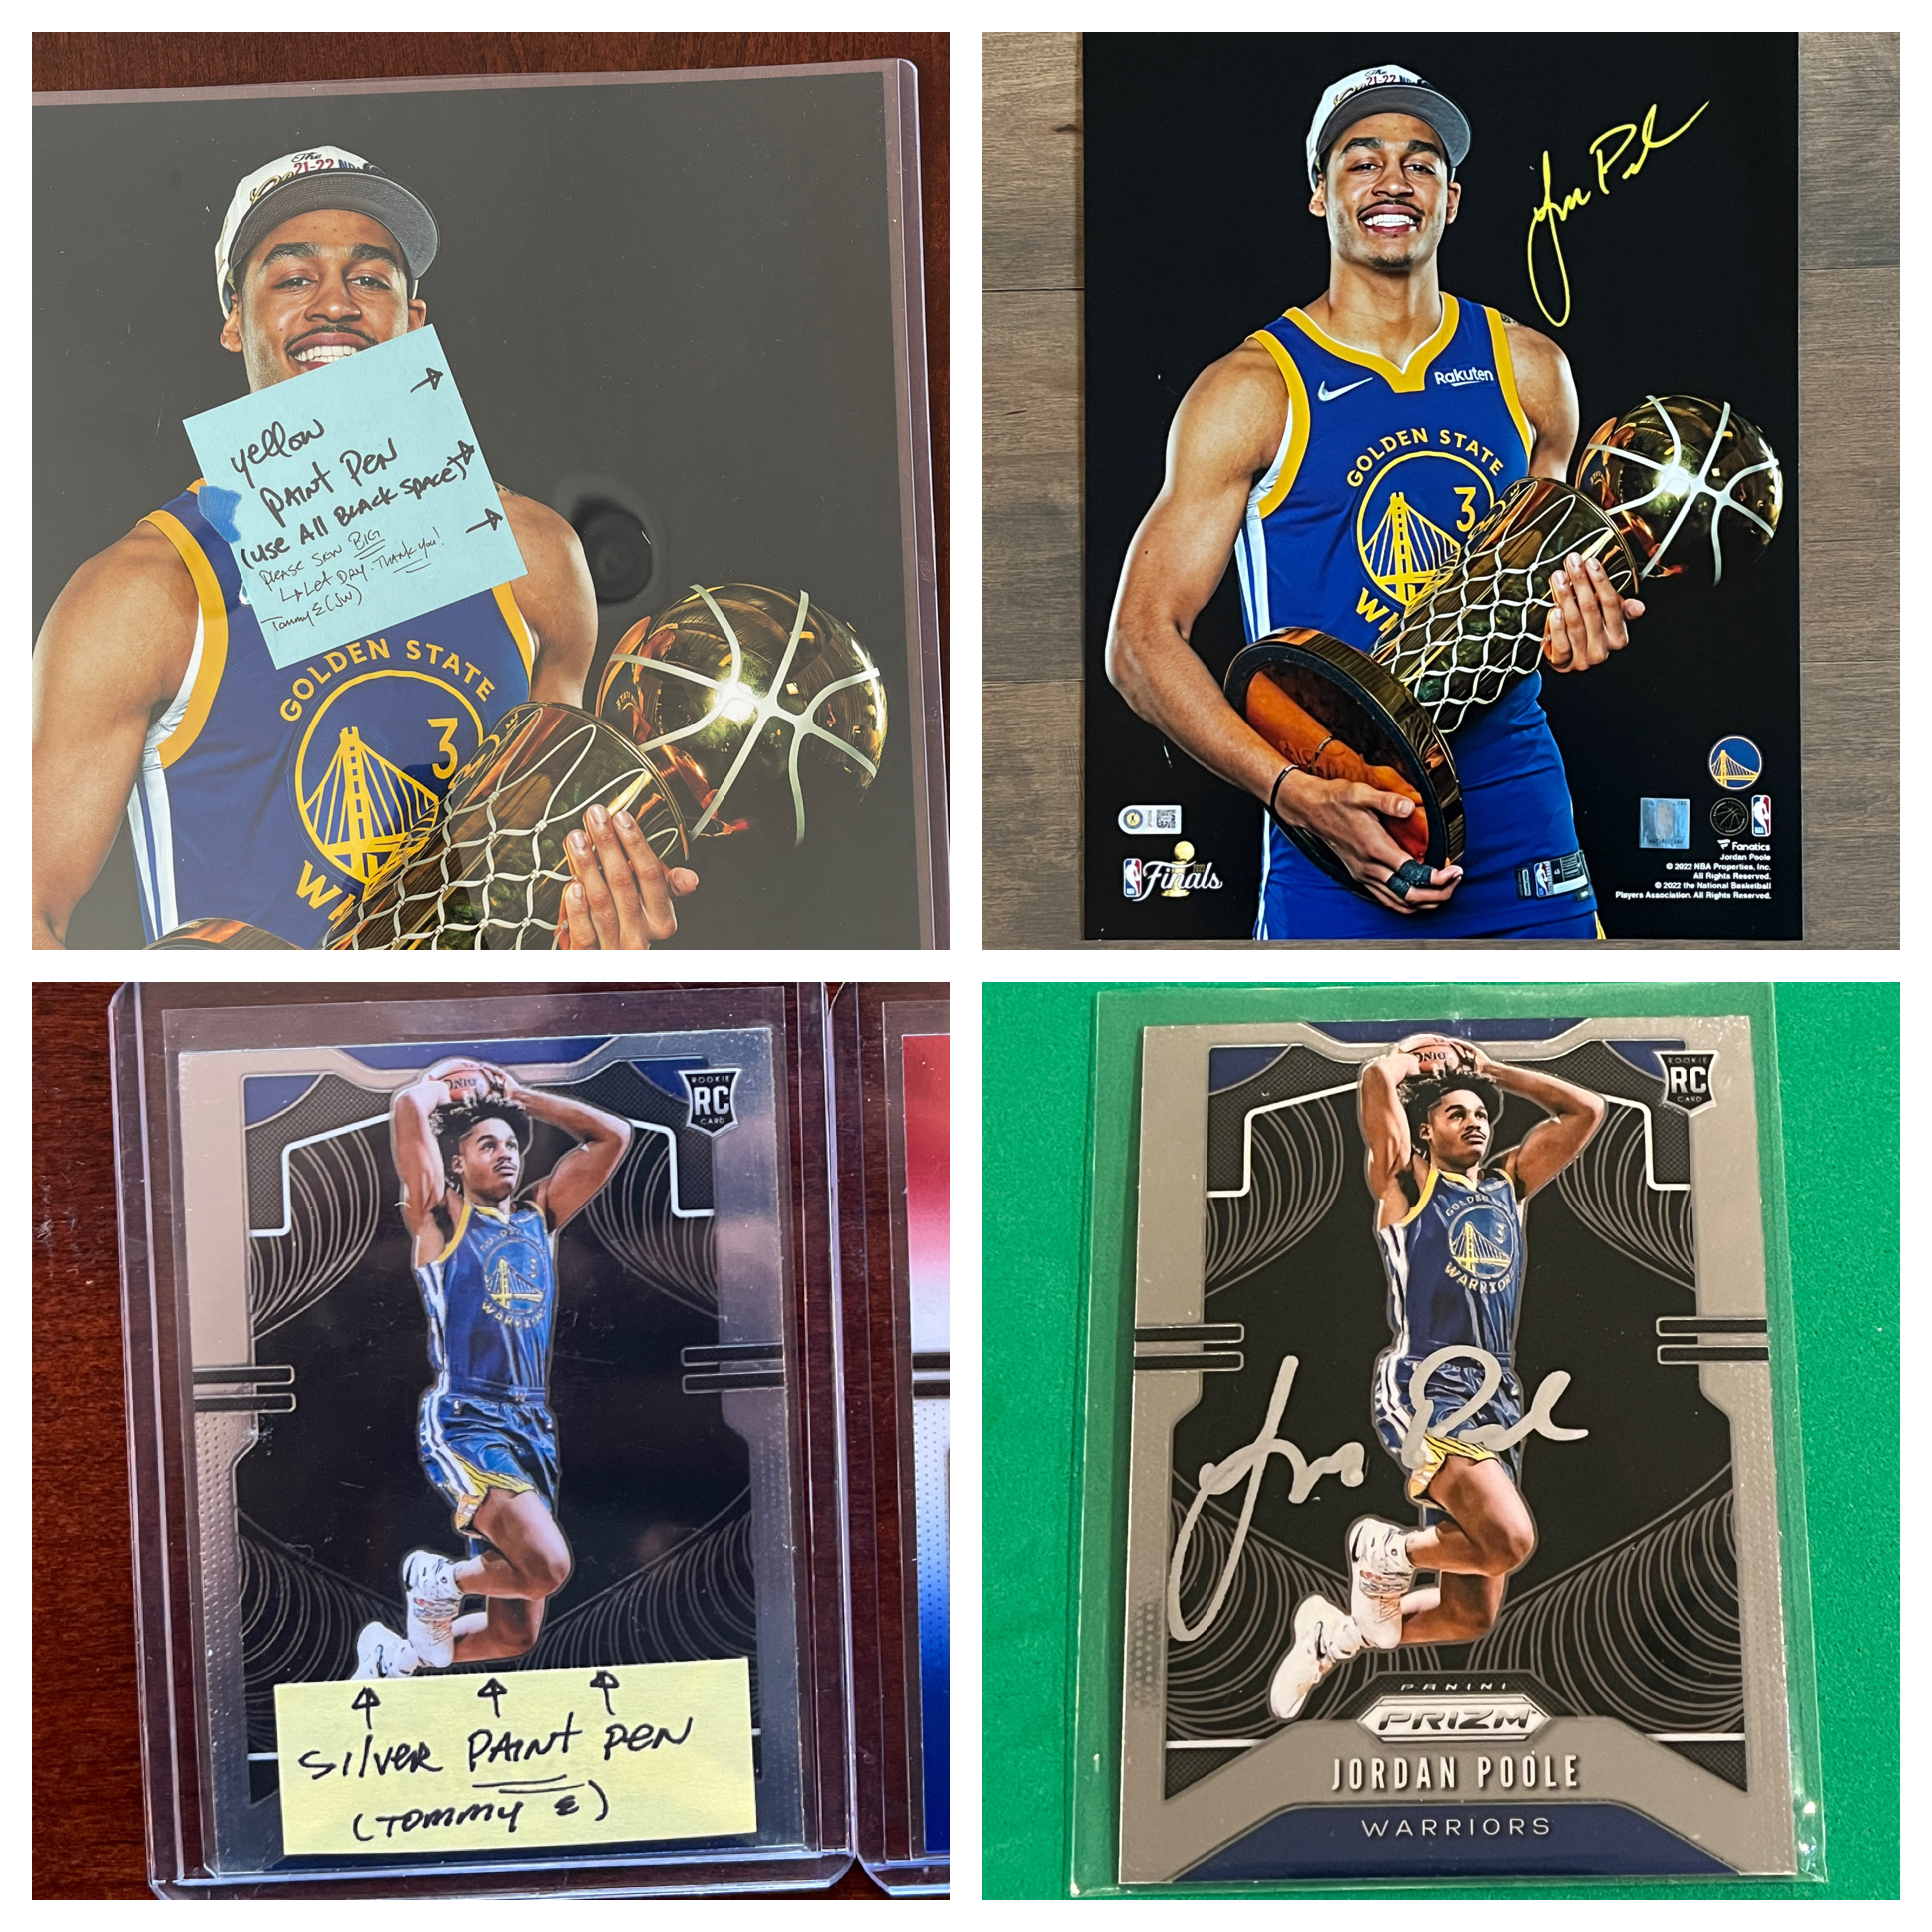

Photos & Prints
Basketballs
Shoes

Misc Items